質問:Is Japanese edition of ChatGPT original or translation of English ChatGPT?
As of my last knowledge update in September 2021, OpenAI had not released an official Japanese edition of ChatGPT. However, it’s important to note that advancements and updates may have occurred since then.
If a Japanese edition of ChatGPT exists or has been released since my last update, it could be an adaptation or translation of the original English ChatGPT. The translation process involves translating the underlying model, fine-tuning it using Japanese text, and potentially making cultural or linguistic adjustments to ensure the responses are appropriate and natural in a Japanese context.
For the most current and accurate information about a Japanese edition of ChatGPT, I recommend visiting the OpenAI website or referring to official updates and announcements from OpenAI or other relevant sources.
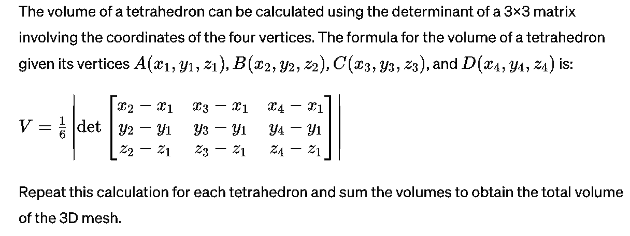
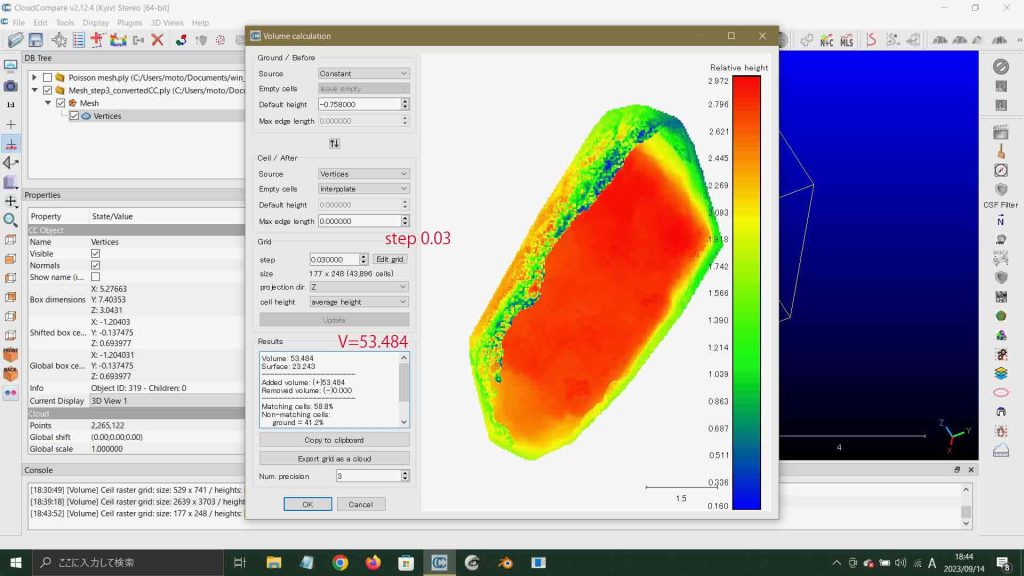
文学論集Vol. 73, No. 3の『フィールド科学のためのアップルLiDAR測量 Part 2』の「Ⅴ.4 四面体に分割して体積を求める」(Sep. 19, 2023投稿)のコピーをここに示す。ChatGPTを初めて使った報告の一部である。 ———————————————— ChatGPTを本日初めて使い,” Do you calculate the volume of a 3D mesh obj file?”って質問すると,多少長いが示唆に富む回答があった。
Load the OBJ file → Triangulate the Faces → Calculate Tetrahedral Volume → Sum Up the Tetrahedral Volumes.
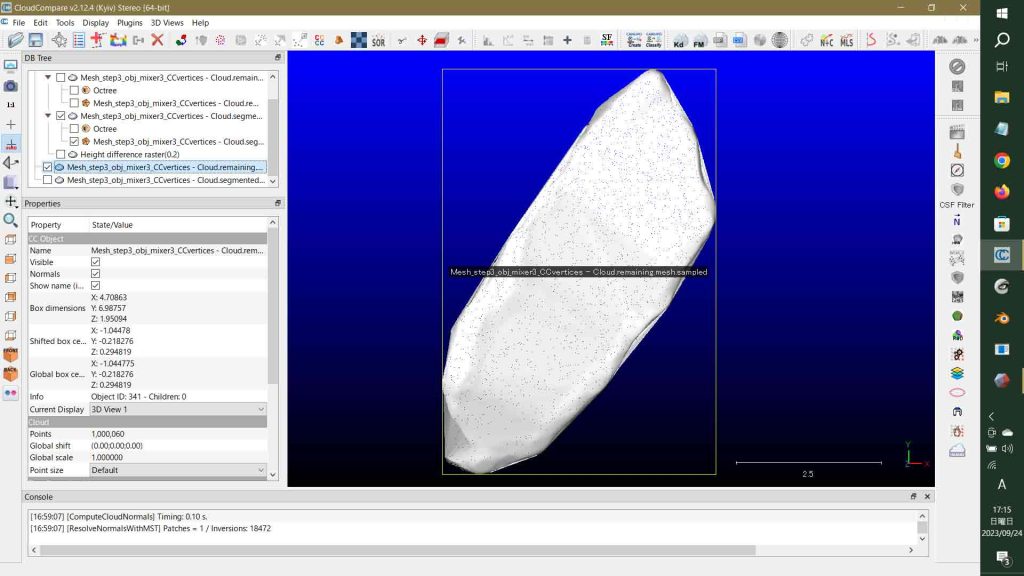
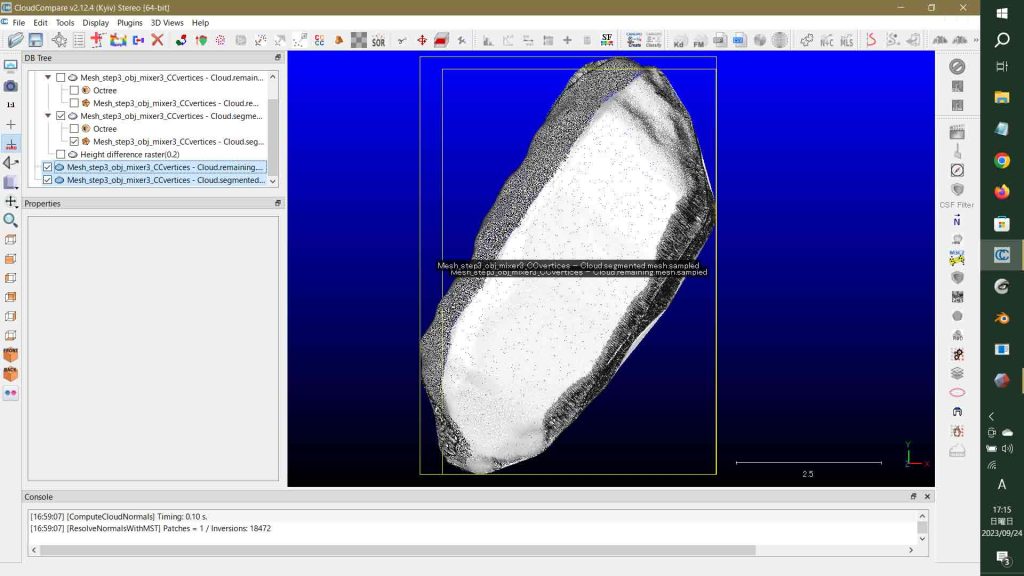
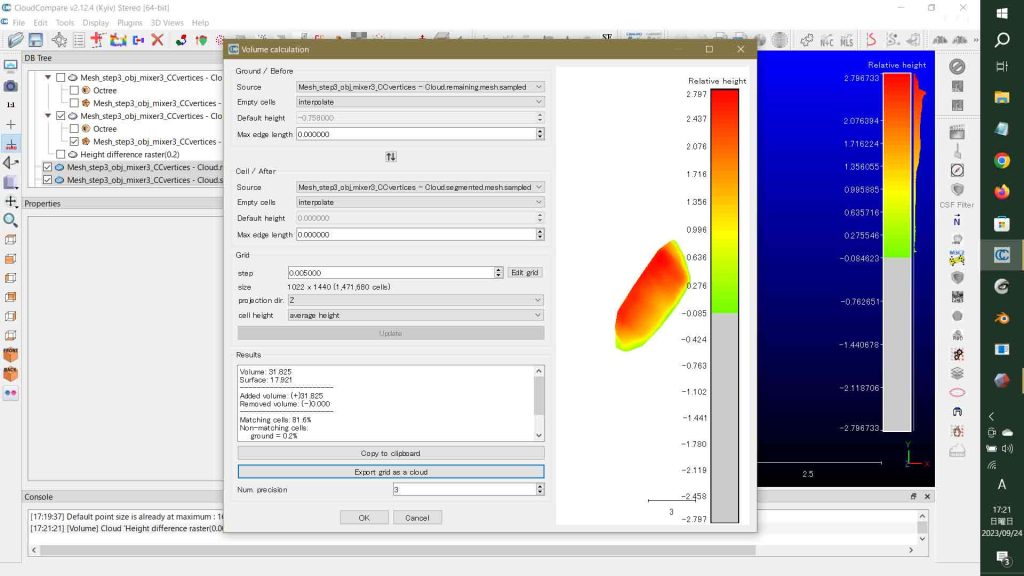
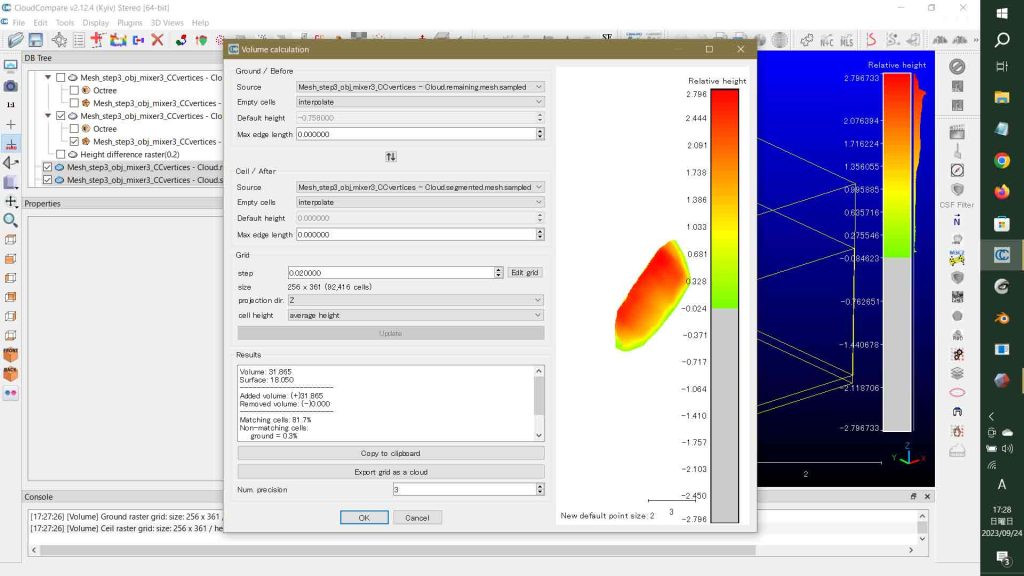
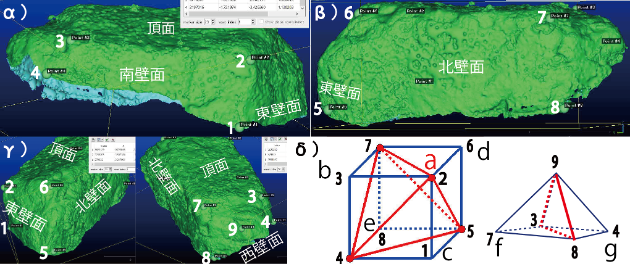
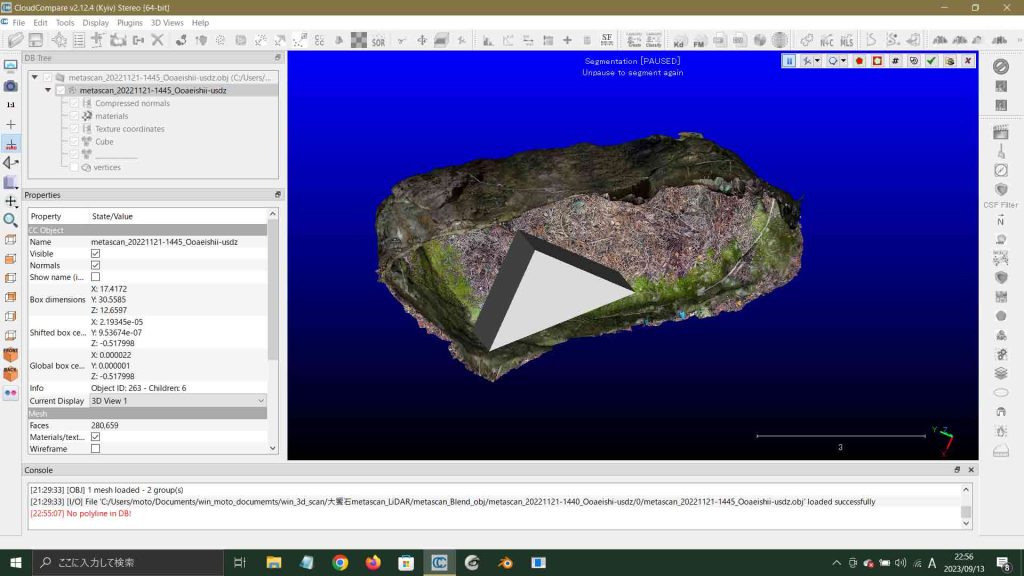
このモデルを手作業で実行した。このモデルではどんな形態でも適応が可能ではあるが大饗石はほぼ一つの六面体と一つの五面体で構成されている。 図33のα)は南壁面,β)は北壁面,γ)は東と西の壁面を示している。西壁面は,いわば新幹線先頭車両の鼻のように,大饗石本体の六面体に四角錐が突出しているようで,こういったイメージの元で,1〜9の9点の座標値を採取した。つまり,CloudCompareの上段メニューアイコン群の左から4番目のアイコン Point list picking(9点)を実行した。図33にその地点を示している。六面体内の四面体構成を図33δ)左手に示す。5個の四面体は,a〜eと命名しそれらの頂点に対応する頂点にa〜eを記している。西壁面の五面体は図33δ)右手に示すがf,g二つの四面体で構成される。1〜9の9点の座標値は,(x, y, z)の配列で,次の表5に示している。
2.1 質問: 3D scanned objects inevitablly have a big hole at the bottom. Please show me how to close up it?
ChatGPT回答:
When you 3D scan an object, it’s common to have holes or gaps in the mesh, especially at the bottom or other areas where the scanning process might not capture data accurately. Closing these holes and creating a watertight mesh is important for 3D printing or further digital modeling. Here’s a step-by-step guide to closing up holes in a 3D scanned mesh:
Use 3D Modeling Software:
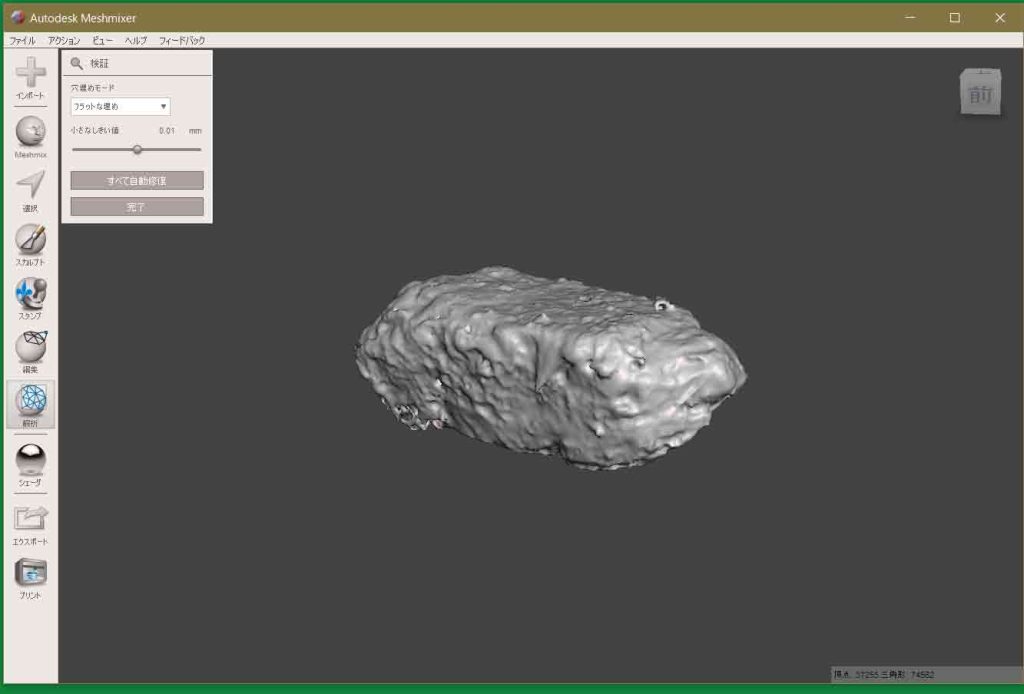
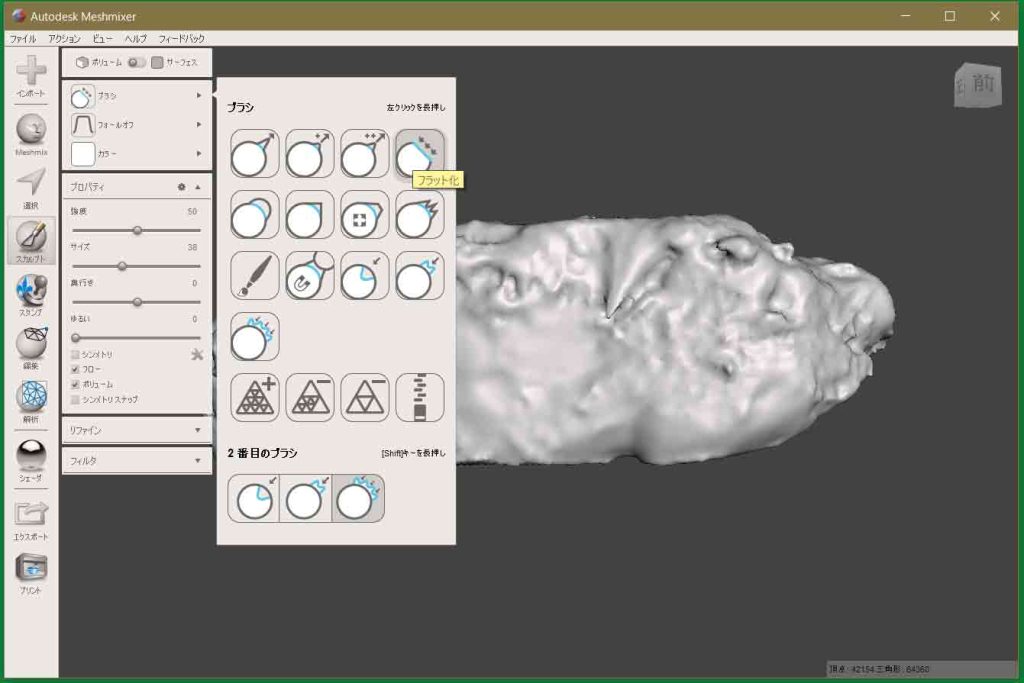
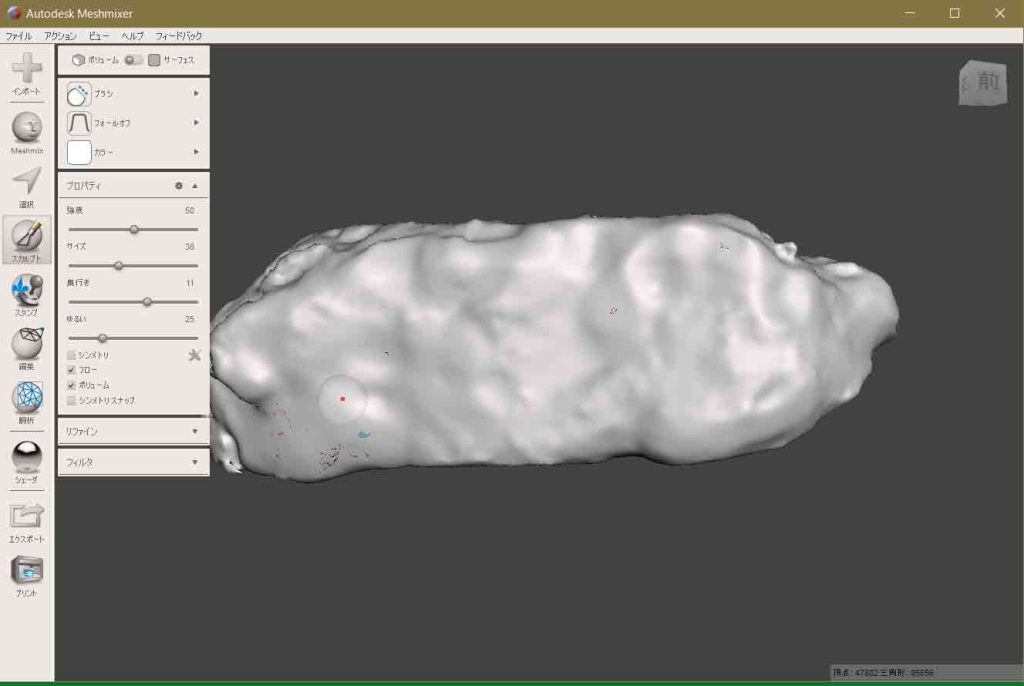
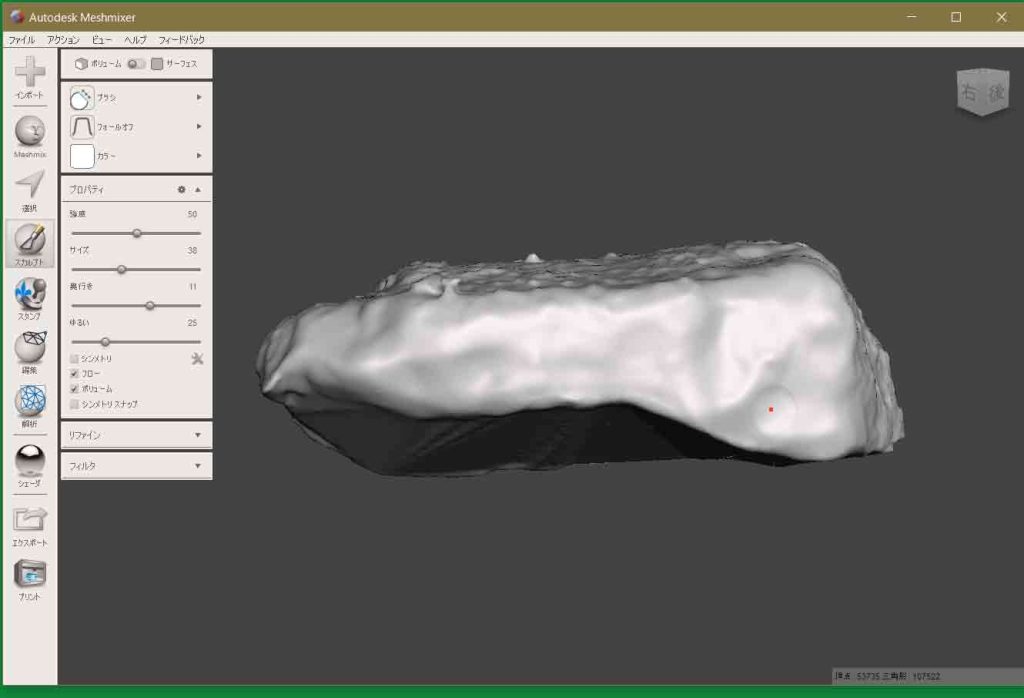
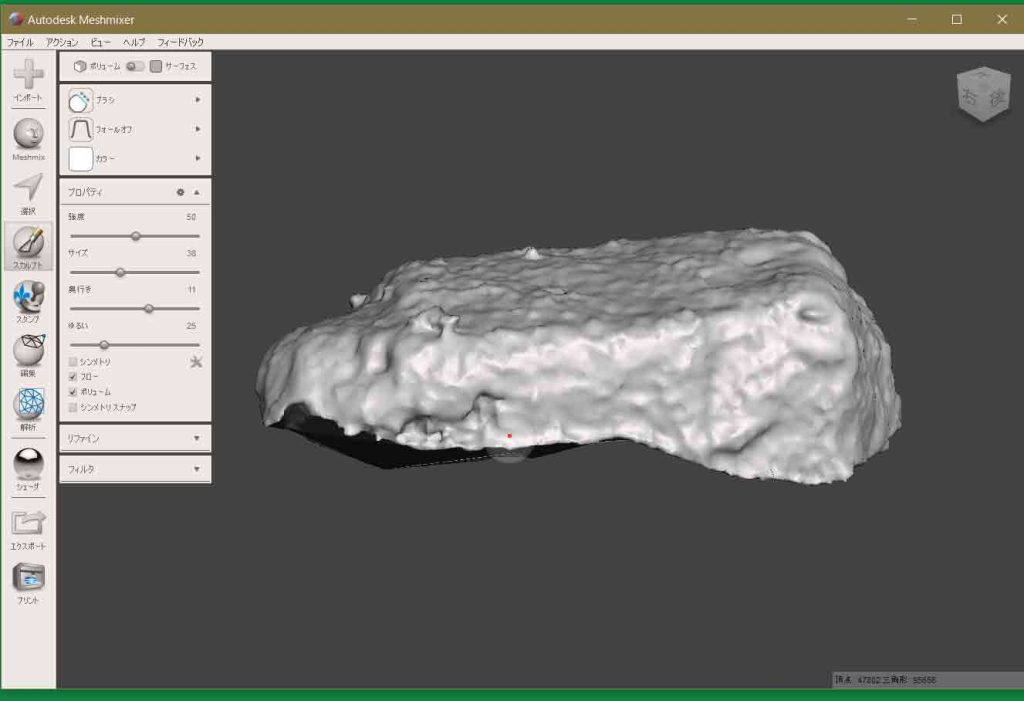
Open the 3D scanning file in a 3D modeling software that allows mesh editing, such as Blender, Autodesk Meshmixer, or MeshLab.(全部オープンソース,Meshmixerは数日前にインストールした。3Dプリンター用の簡易版で使い易そうな印象だ)
Identify the Hole:
Identify the hole or gaps in the mesh that need to be closed. You can usually visualize these areas by rotating and inspecting the model in the software.
Select the Hole:
Use the selection tools in the software to select the area around the hole. In most programs, you can click and drag to select vertices, edges, or faces.(MeshLabにこういう機能が欲しいと思っていたがこの手法などにアクセスできていない)
Fill the Hole:
Once you’ve selected the hole, use the software’s mesh editing tools to fill the hole. This may be called “Fill Hole” or “Bridge Edge Loops” in different software. The tool will automatically generate new geometry to close the gap.
Adjust and Smooth:
After filling the hole, you may need to adjust the new geometry to match the surrounding surface. Use tools like sculpting, smoothing, or vertex manipulation to refine the area and make it seamless.
Check for Watertightness:
Ensure the mesh is watertight by using the software’s tools to check for holes, leaks, or non-manifold geometry. This ensures there are no remaining gaps in the mesh.
Save the Edited Mesh:
Save the edited mesh as a new file to preserve the changes without altering the original scanned data.
Export for Further Use:
If you intend to use the mesh for 3D printing or other purposes, export the edited and closed mesh in a suitable file format such as STL or OBJ.
Validate with 3D Printing Software:
If you plan to 3D print the model, import the closed mesh into 3D printing software to confirm that it’s now watertight and ready for printing.
Remember, the exact steps and tools you use may vary based on the 3D modeling software you’re using, but the general process remains similar. Additionally, practice and experimentation will help you become proficient in closing holes and editing 3D scanned meshes effectively.
2.2 User 質問: As you know that 3D scanned objects have big holes in the meshes. Please show me how to mend them using Autodesk Meshmixer.
ChatGPT回答:
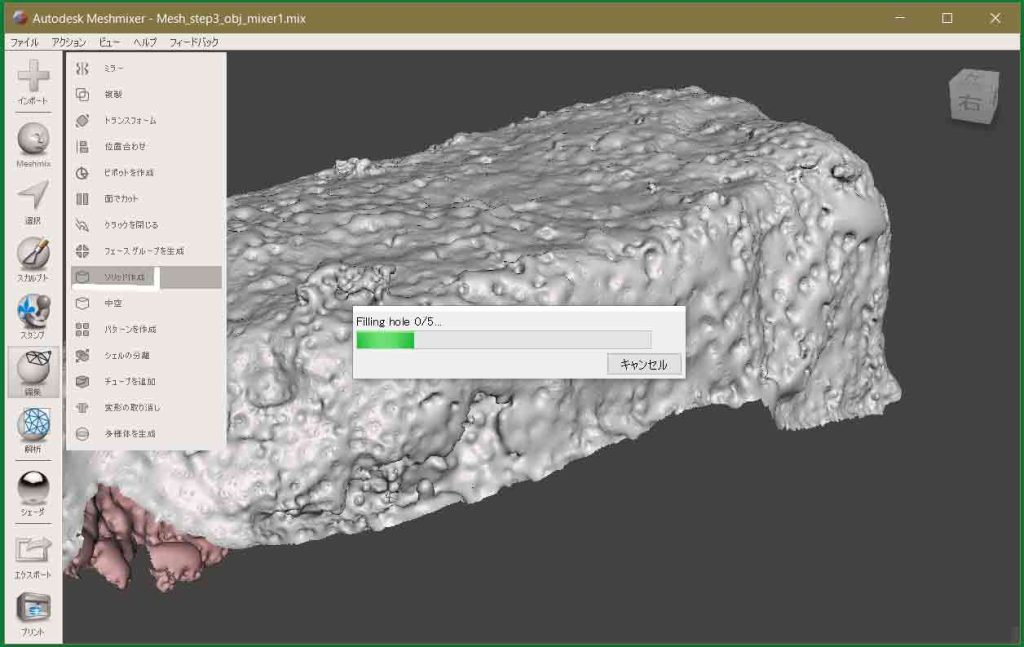
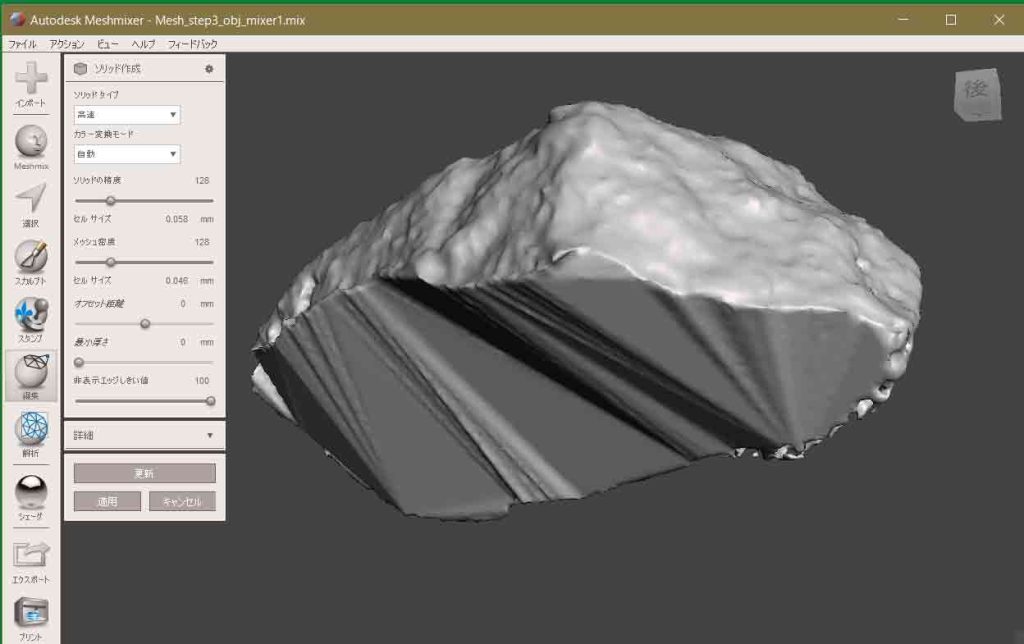
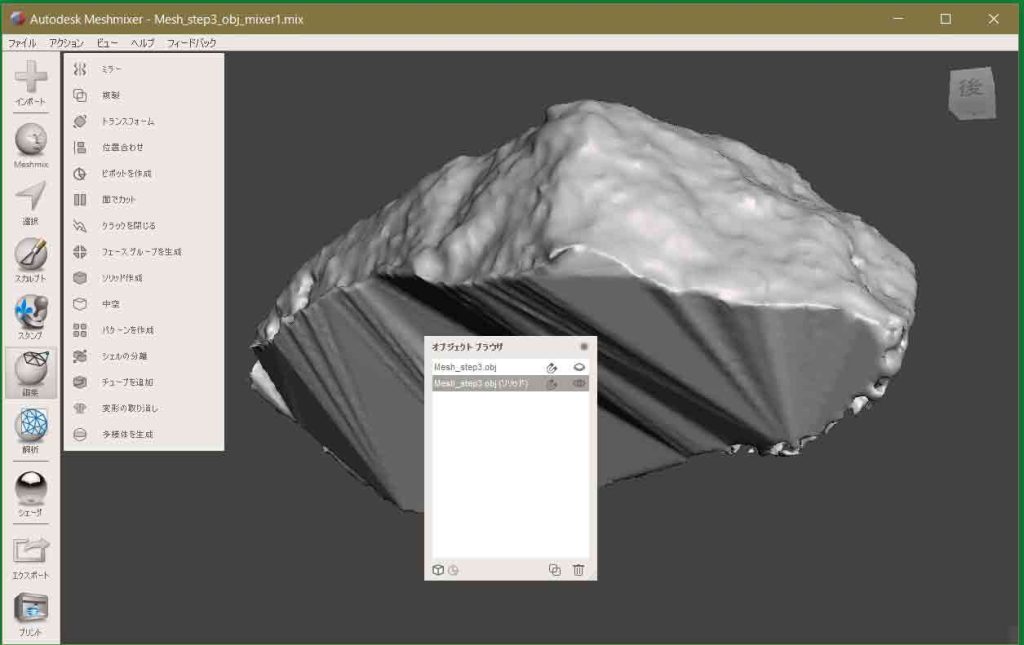
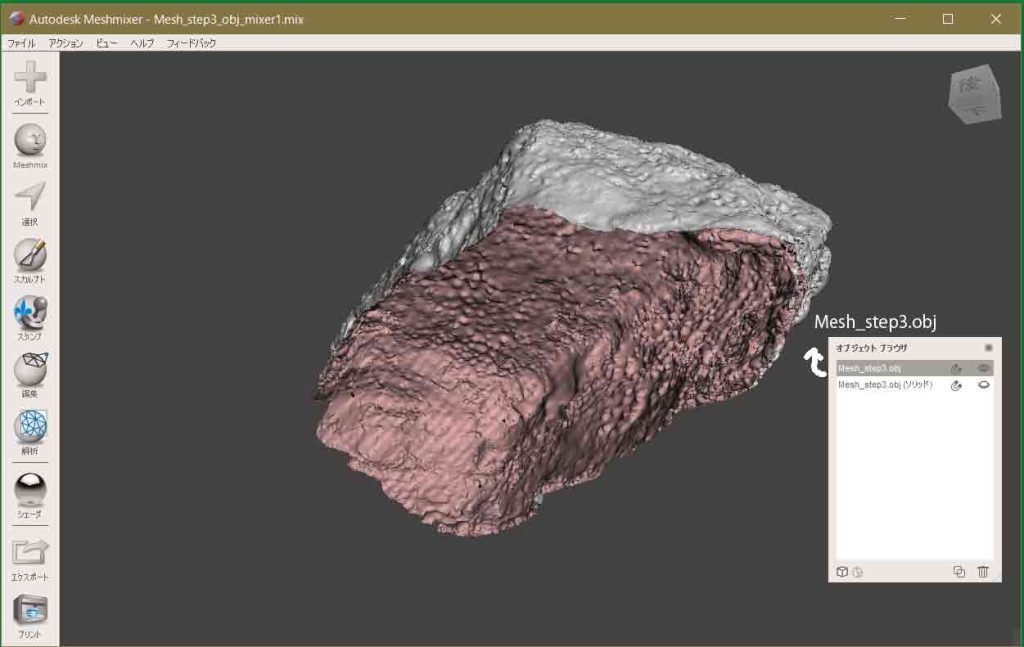
Certainly! Autodesk Meshmixer is a powerful tool for working with 3D meshes, including repairing holes. Follow these steps to mend holes in 3D scanned objects using Autodesk Meshmixer:
ってなことで続くのであるが,木枯らしが吹いていた。前述のように,ChatGPTを本日初めて使いー” Do you calculate the volume of a 3D mesh obj file?”ーって質問すると,多少長いが示唆に富む回答があった,と書いていたがすでにぼくの頭の中にその世界があったから,ぼくが反応できたのであって,ChatGPTを使うことで,新たな世界が展開する訳ではない。ChatGPTに具体的な質問をすると,一応返ってくるのであるが,どうでもいい内容で,実際のプロセスを示してくれない。これは,アプリのユーザーマニュアルが役に立たない現象と似ているかも知れない。ChatGPTはこういった分野では使えない。自らの論文の英語チェックには,役立つのではと,今だ期待をしはしている。
以上,Sep. 22, 2023記。
Blenderでusdzファイルをobjファイルに変換して体積を求める converting usdz into obj by Blender and calculating volume
7-Zip for Windows からダウンロードできる。Downloadsフォルダを開くと,7z2301-64x.exeがある。これをダブルクリックすると,Destination folder: C:\Program Files\7-Zip\と出るので,Install。7-Zipフォルダーには,exeファイルが幾つかあるが,7z.exeが基本的なものであろう。この段階で右クリックで使えるようになっている。
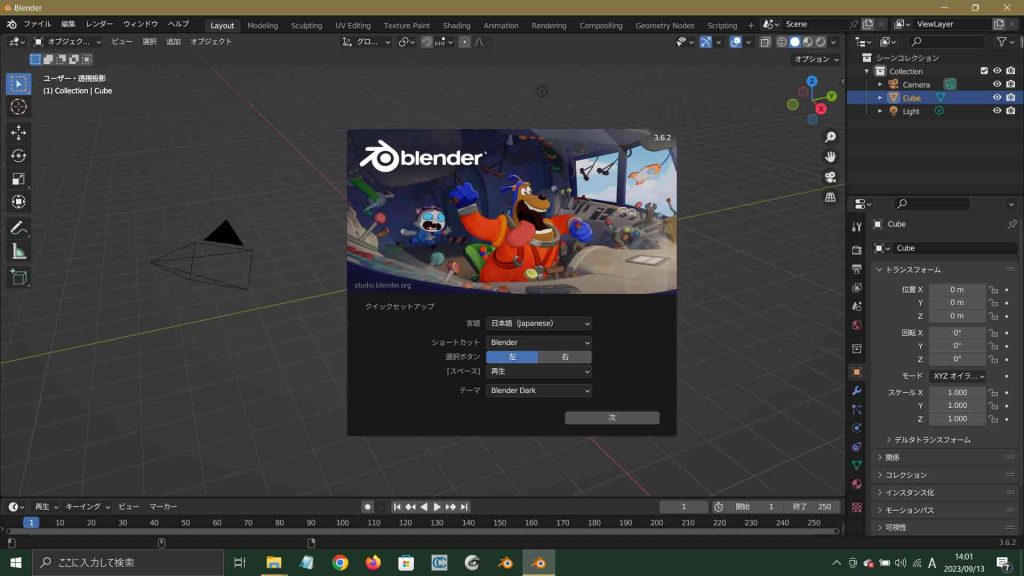
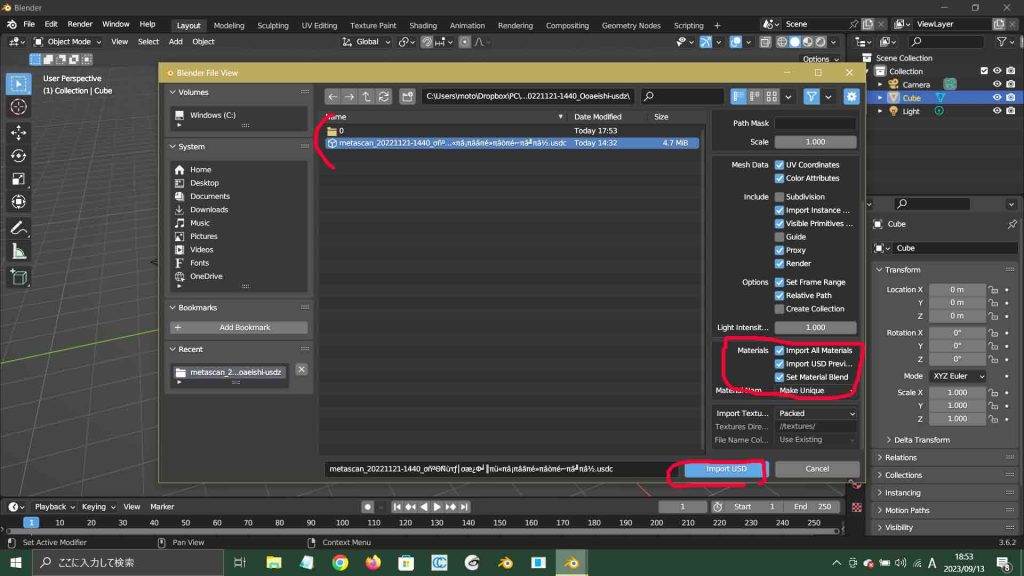
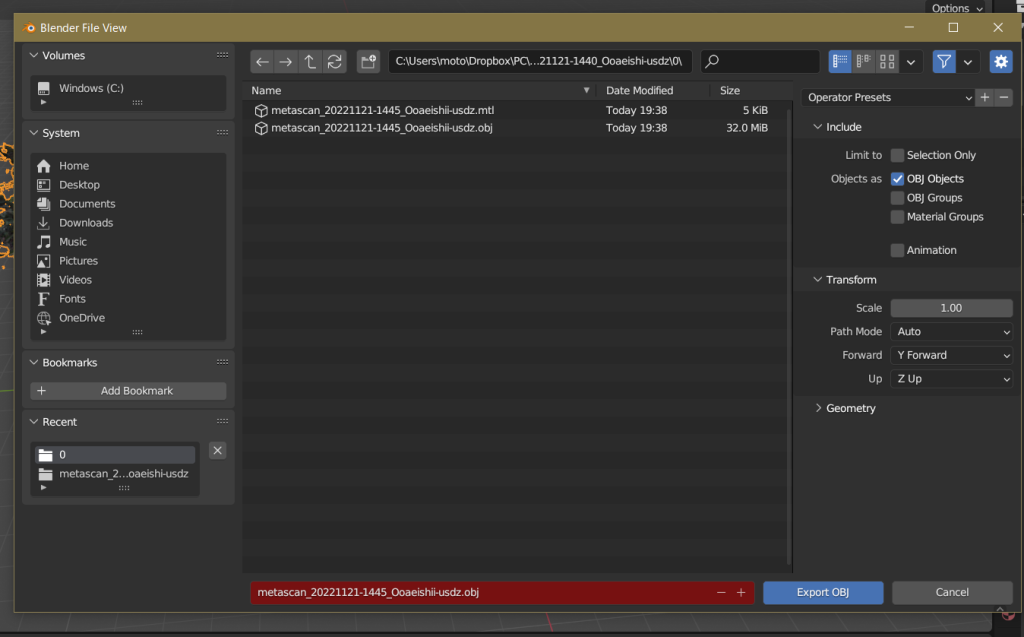
Blender の File -> Import -> Universal Scene Description (.usd, .usdc, .usda) から USDC ファイルだけでなく,テキスチャーを共にインポートすることになる。 Blender File View ウィンドウで目的の USDC ファイルを選択し、またテクスチャも一緒に読み込むため画面の右ペーンの,Import All materials(これにはディフォルトでは✓が入っていない), Import USD Preview(これにはディフォルトで✓が入っている), Set Material Blend (これにもディフォルトで✓が入っている)を有効にして、Import USD ボタンを押す。ボタンを押す前が,図4である。
図4 Blender File View ウィンドウでの入力
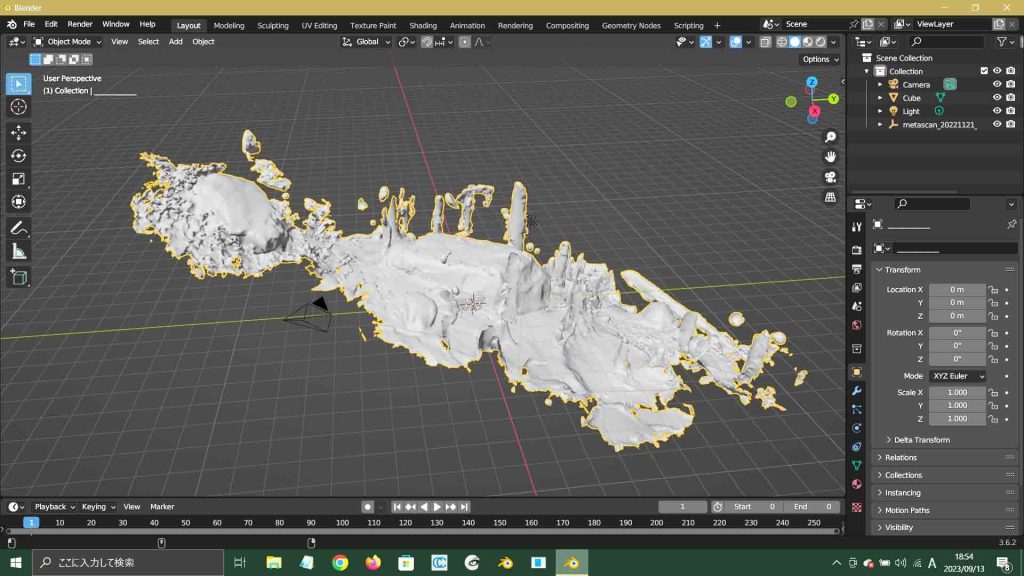
読み込んだ直後の画面が図5である。この時点では, 3D モデルにはテクスチャはいまだ表示されていない。
その結果が図4である。テキスチャーはまだだ。右上のView Port Shadingを選択する必要がある。右端のViewport Shading Method to display / shade object in the 3D View: Rendered Display render previewを選ぶと,次の図6のように表示される。
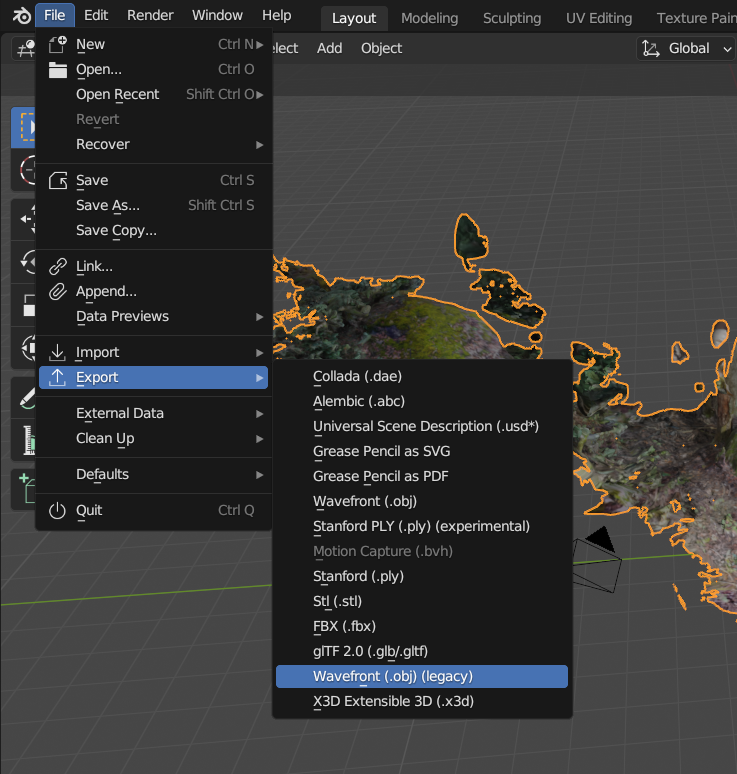
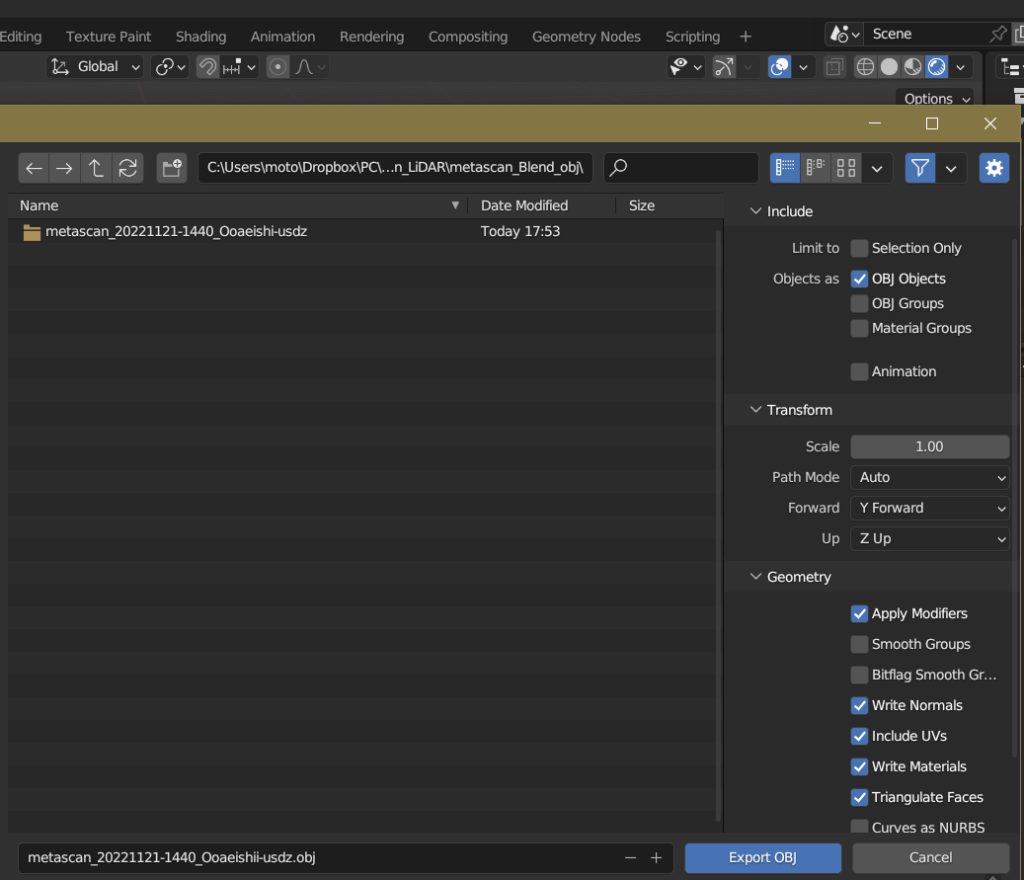
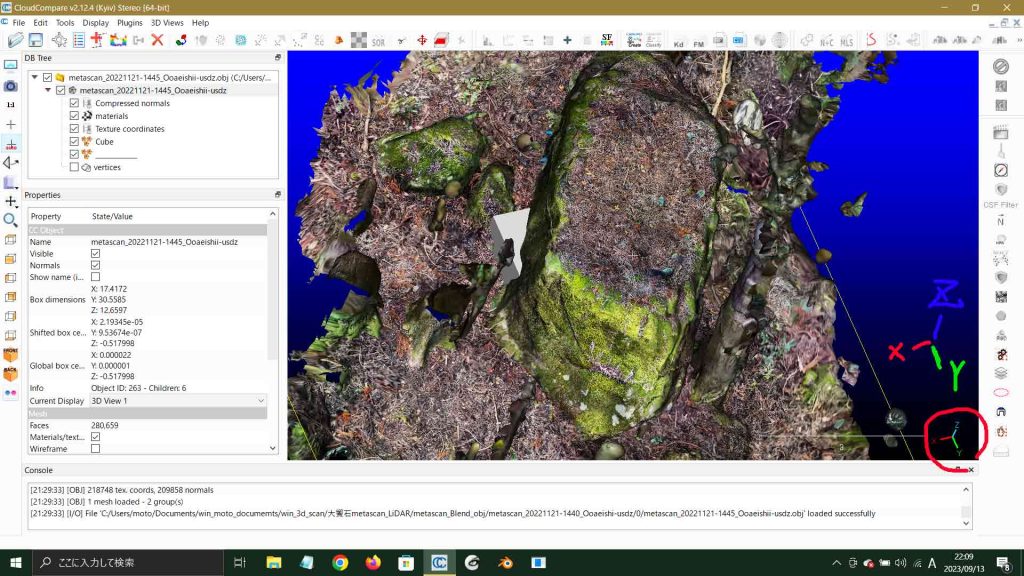
File -> Export -> Wavefront (.obj) を選択して OBJ 形式でエクスポートする。なお、デフォルトではエクスポート時の座標系が Z Forward, Y Up になっている。BlenderのZ軸は奥行き方向に対して,CloudCompareやMeshLabではZ軸は高度軸なので,変更する必要がある。図8の右ペーンのTransformで,UpをZ軸,ForwardをY Forwardに変更した。クラウドコンペアでのXYZ軸関係を見ると(図13),右手座標系になっているので,この設定は正解だ。なお,Exportする際に画面上のオブジェクトを選択していた(メッシュがオレンジ色で縁取られている)が,この所作は重要かも知れない?。
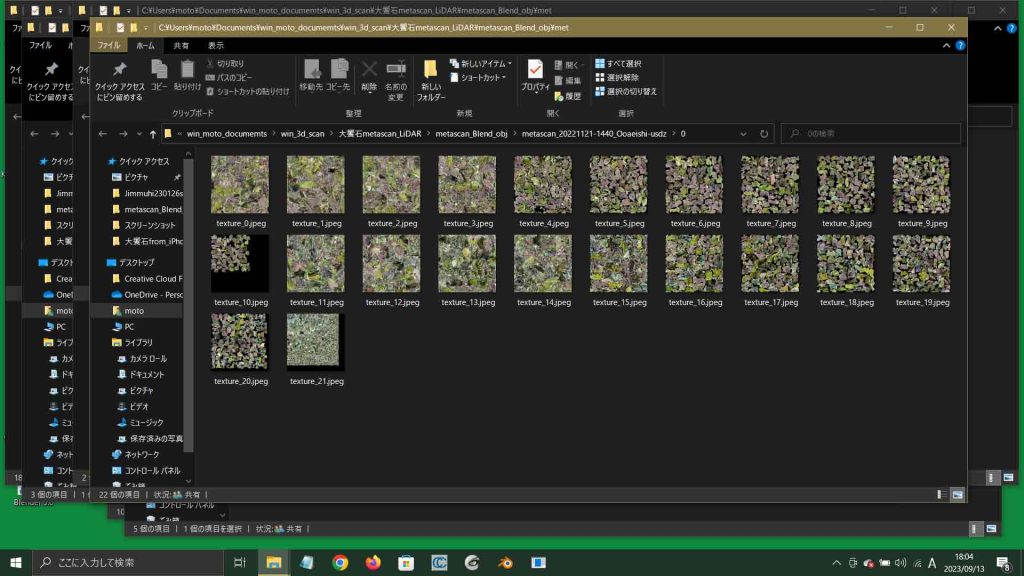
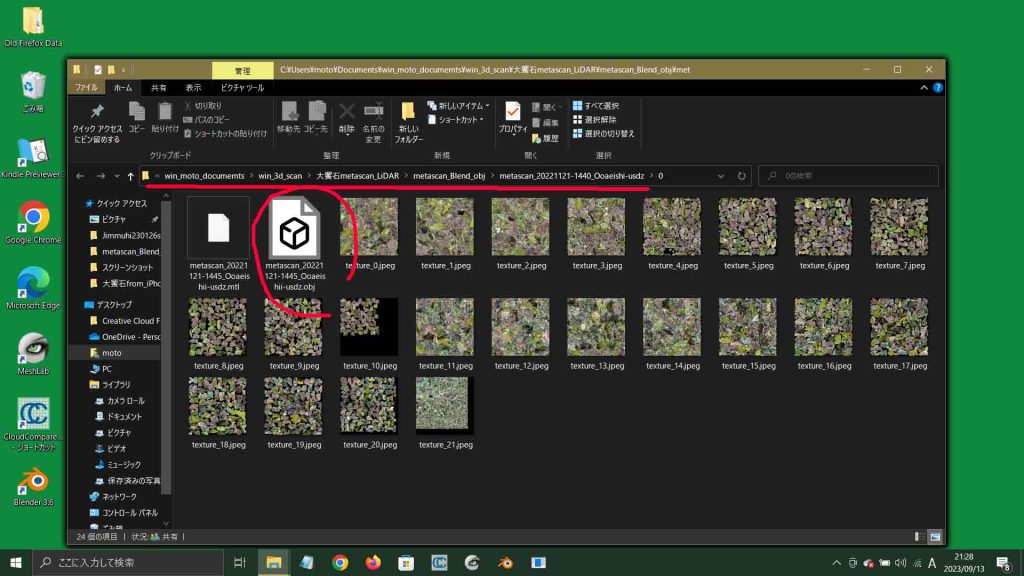
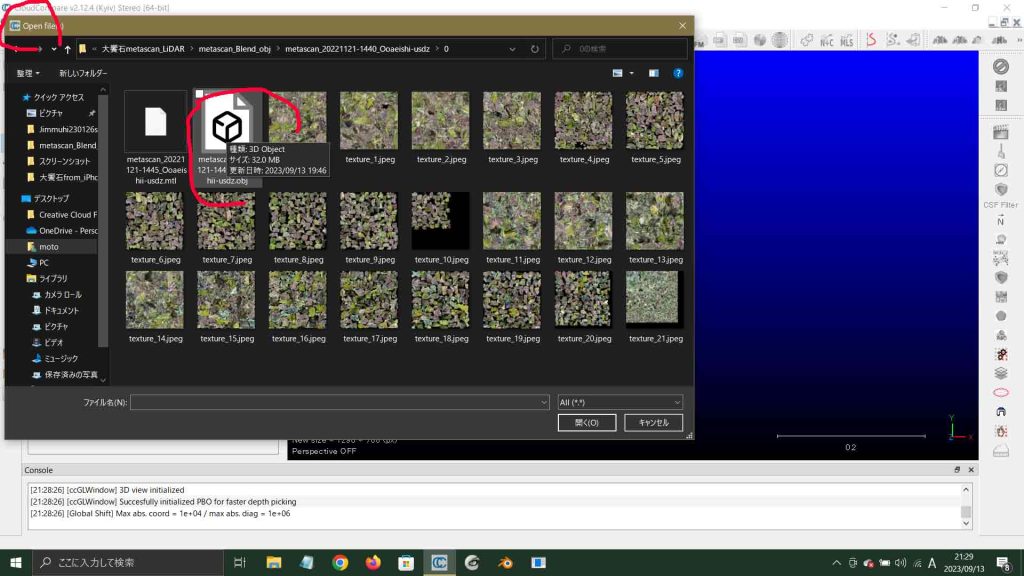
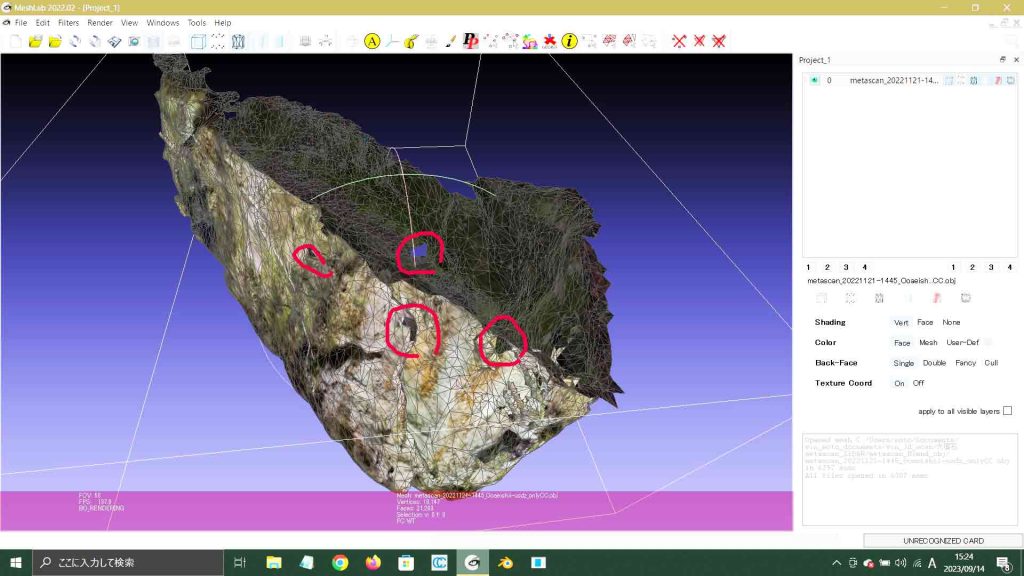
usdzから変換したobjファイルのtextureの肌理は細やかな気がしている。実際,segmentationの際のmeshの断面はfbxよりもかなりスムーズな印象であった。図16のように,比較的大きな穴が残っている。 図17では,Remeshing, Simplification and Reconstuction > Close Holes size 100,✓Prevent,設定。図18はその結果。手前の穴は塞がった。奥の一つは塞がらない。
図16 比較的大きな穴が
図17 Close holes size=100, ✓Prevent
図18 手前の穴は塞がった
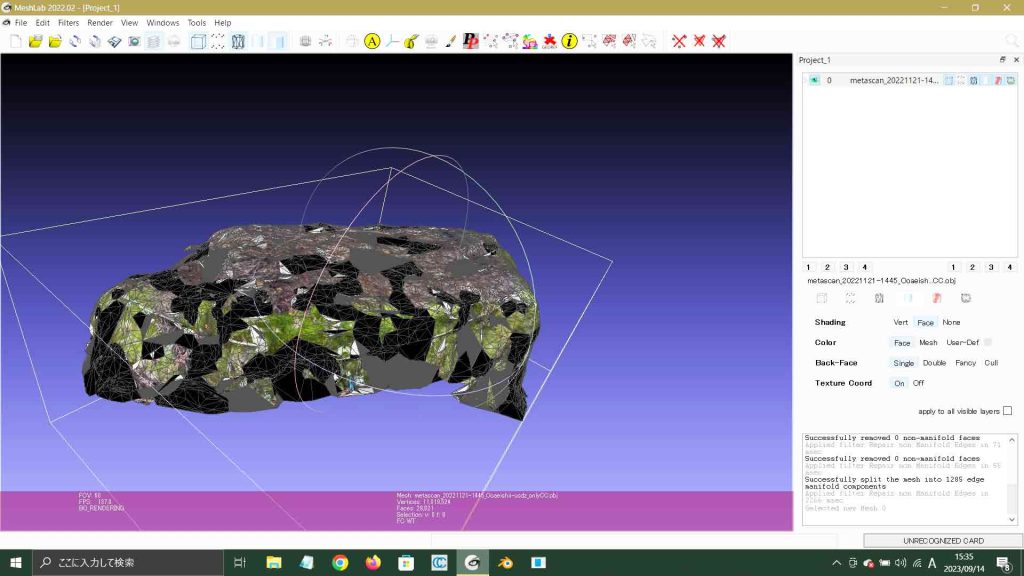
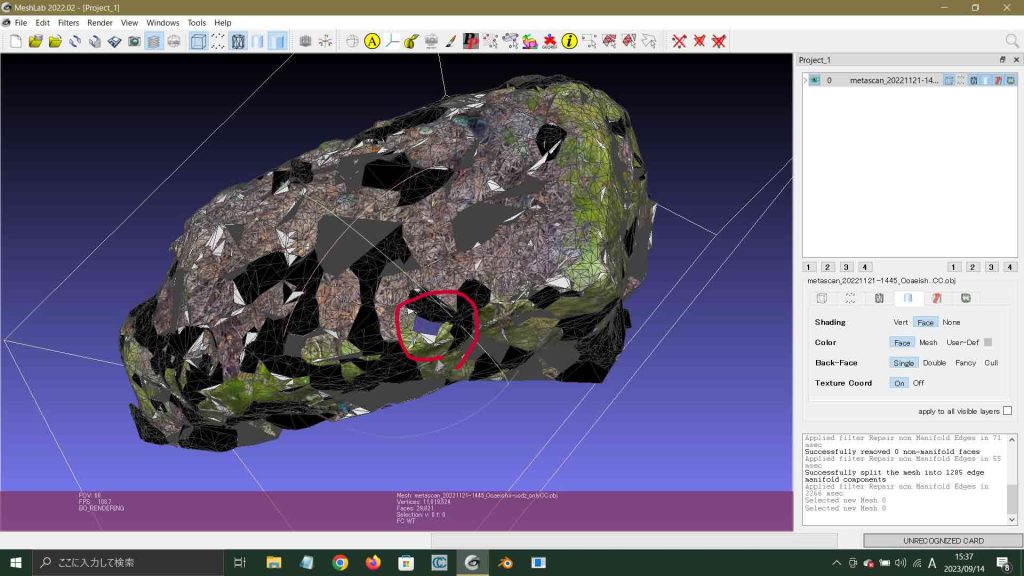
引き続き,Close Holesを実行しようとすると,Filter Failure not 2-manifold egesエラー。それで, Filters > Cleaning and Repairing > Repair non Manifold Edges, Remove Faces を実行後に,もう一つの選択肢Split Verticesも実行した結果が図19で,図20のように,いまだ懸案の穴は残っている。 size=1,000も実行した。Closed 789 holes and 44 new facesという結果。さらに,図21のように,10,000実行。Closed 32 holes and 1 new faces。とはいえ,図21のように,未だパネルそばの穴は塞がっていない。
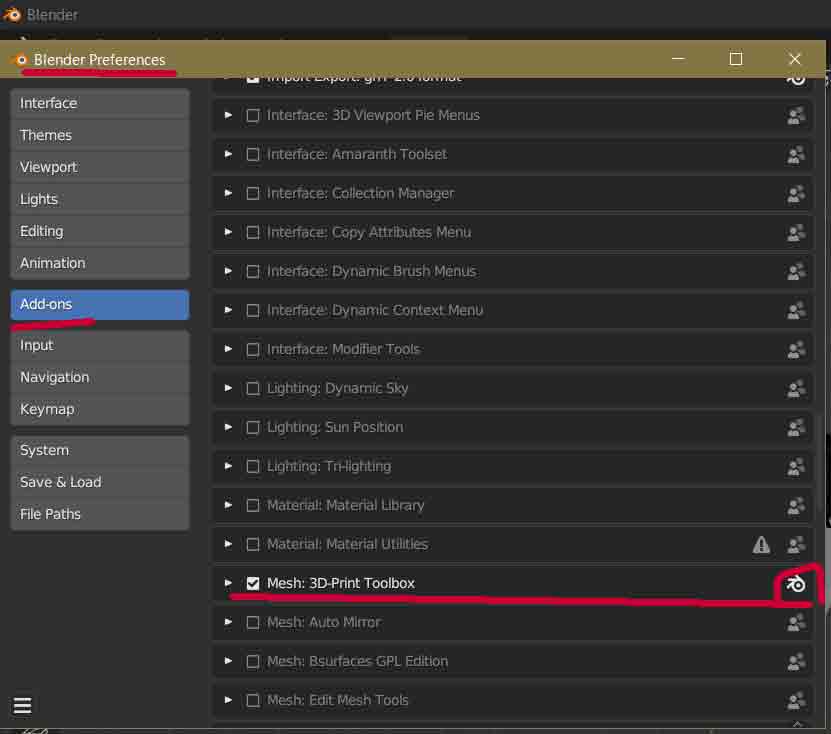
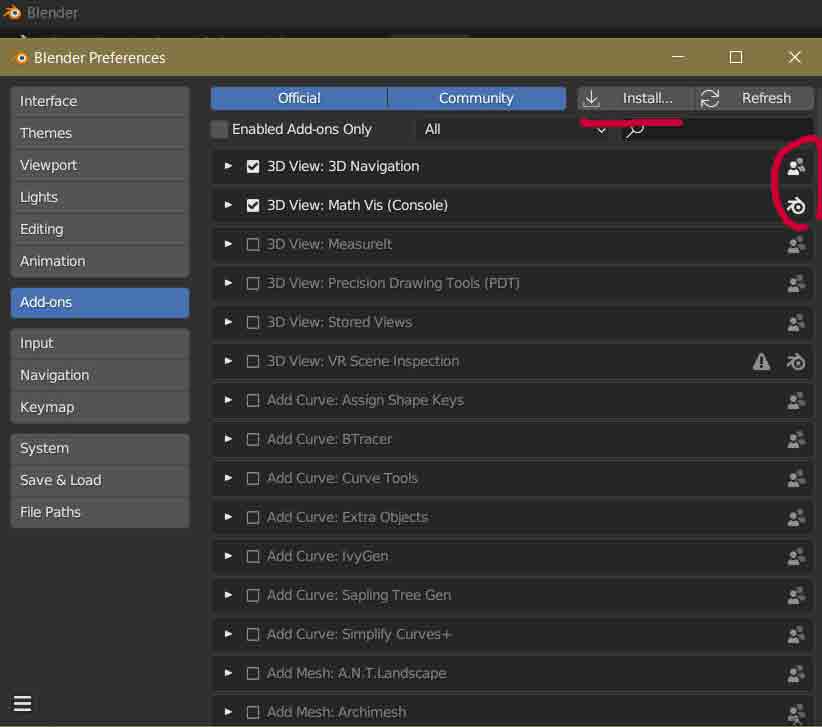
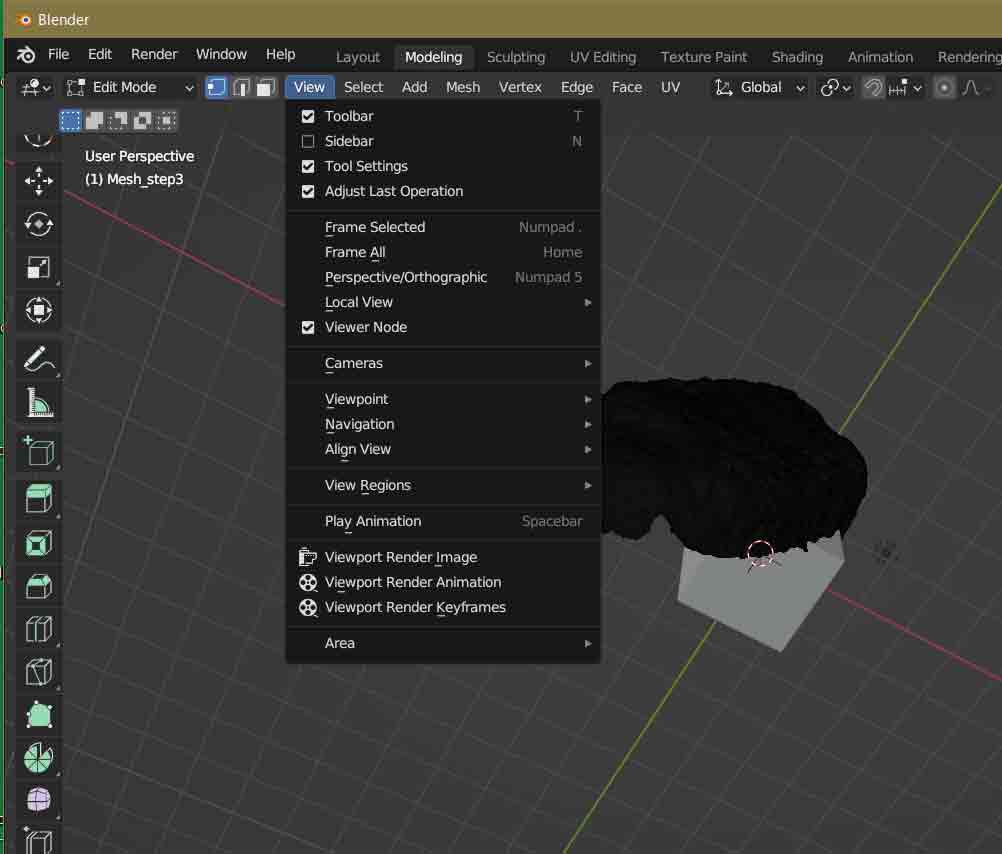
Blender PreferencesのAdd-onsのリストの中に,Mesh: 3D-Print Toolboxがあり,Blenderアイコンが出ている(図41)ので,インストール済みということ。□に✓を入れること。なお,インストールされていないのは人影が見えるので,□に✓を入れて,リスト最上段の「↓インストール」ボタンを押せば良い。 add-onがあるpathは次のようだ。C:\Program Files\Blender Foundation\Blender 3.6\3.6\Script\addons。 Mesh: 3D-Print Toolboxの使用法は, How To Use The 3D Print Toolbox Add On? 【注意点アリ!】Blenderで3Dプリンター用のデータを作る方法 にある。要するに,3Dプリンター用のファイルを作るためのadd-onのようだ。Mesh: 3D-Print Toolboxを画面に表示するには,図43のViewメニューのSidebarの□に✓を入れること。
LiDARスキャンオブジェクトの底を塞ぐ closing the bottom hole of a LiDAR scanned object
はじめに
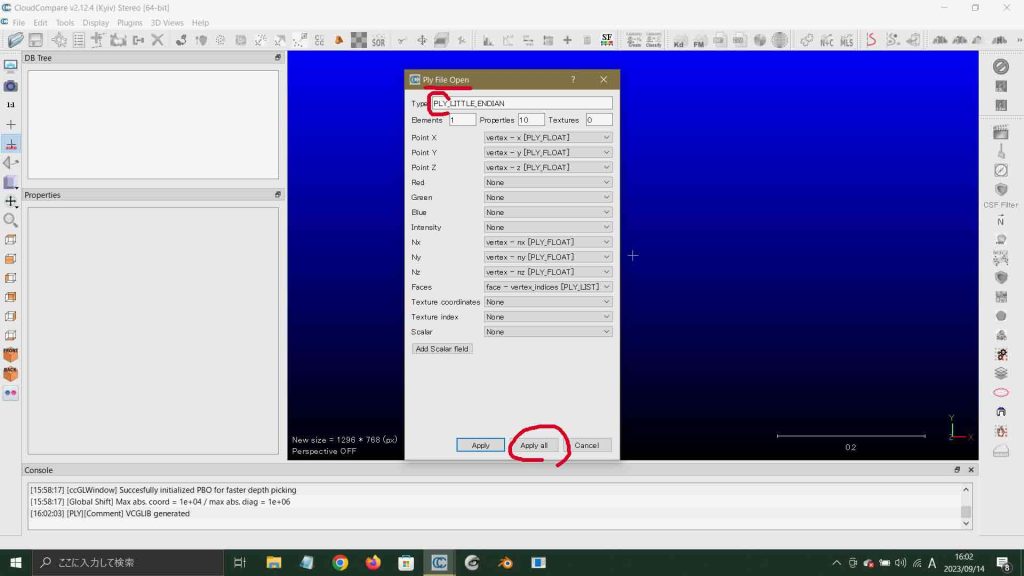
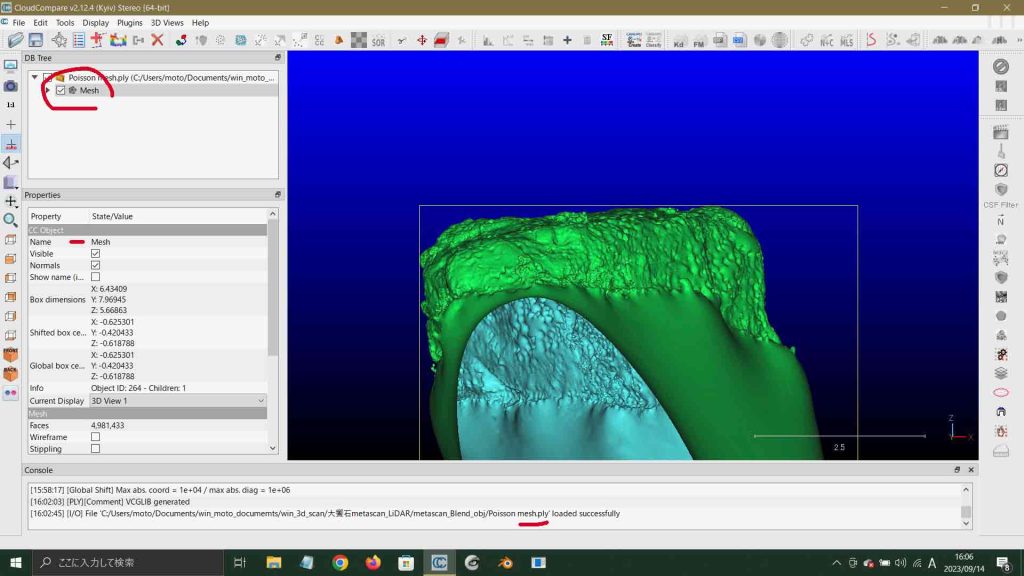
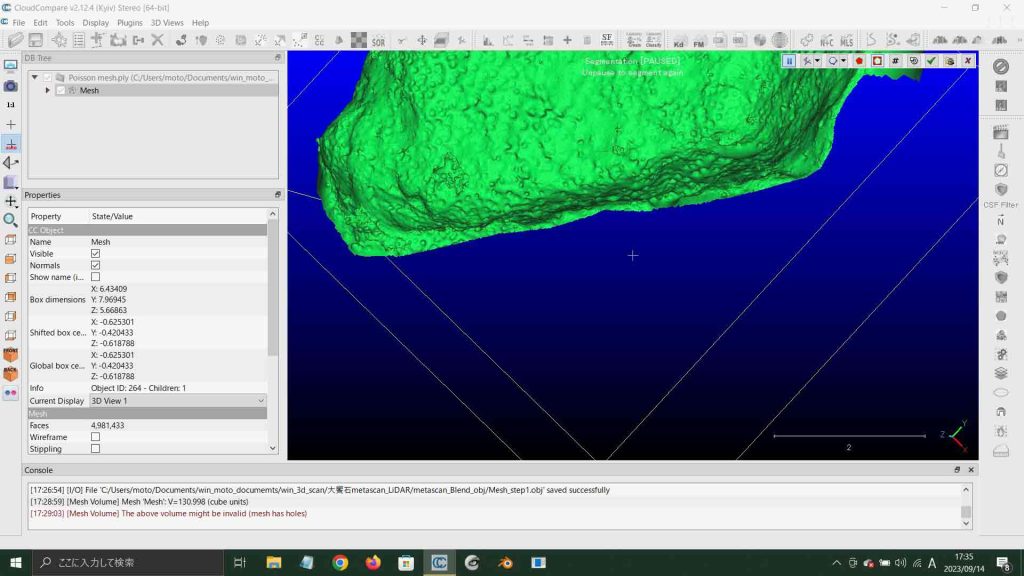
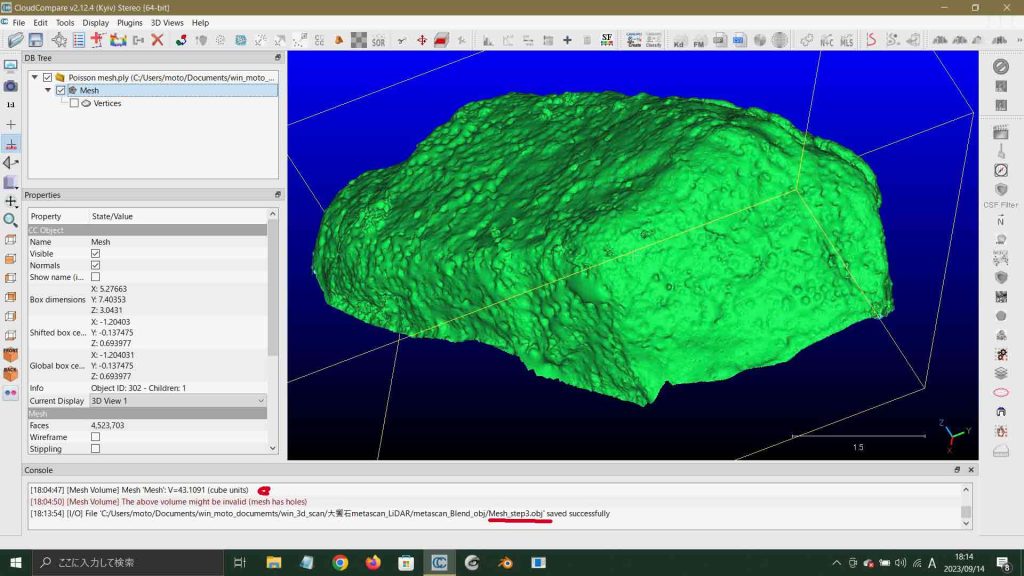
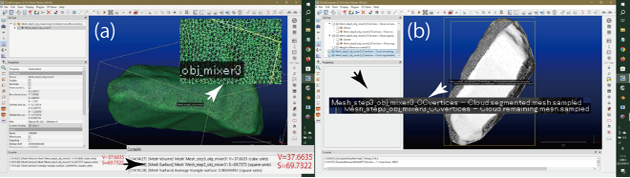
iPhone 12 ProのLiDARで3DスキャンしてPLY, OBJ, FBXファイルで出力して, メッシュファイルを使って体積を求めるべく,CloudCompareで開いて,Edit > Mesh > Measure Volumeを実行すると,計算値が出るが,必ず,”The above volume might be invalid (mesh has holes)”のメッセージが現れる。
これをぼくは作成した3Dスキャン像に隙間や穴ができているためだと考えて,実際埋める作業をしてきた。実際埋まるのであるが,相変わらずこのinvalidメッセージが出る。MeshLabでの作業を学んでいて,昨晩,やっと気付いたのである。オブジェクトの下が抜けているのである。オブジェクトが載る床や地面に「接する」底はスキャンできない。これまでの3Dスキャン像は全部,底抜けである。この底抜けのために,”The above volume might be invalid (mesh has holes)”のメッセージが現れていたのである。
This tool is accessible via the ‘Edit > Mesh > Delaunay 2.5D (XY plane)’ menu.
Description
Computes a Delaunay 2D1/2 triangulation on a point cloud.
The point cloud is simply projected in 2D on the (XY) plane. Then the corresponding 2D points are triangulated and the mesh structure is applied to the 3D points.
By default the 2D Delaunay triangulation is done on the cloud convex hull. Therefore CloudCompare will ask the user to specify a maximum length for the triangle edges. This allows to remove the biggest triangles (generally on the boundary) that are not necessarily meaningful. If this value is left to zero, then all the triangles output by the Delaunay triangulation will be kept.
This works very well with rather flat clouds and properly oriented (i.e. with the Z dimension as the vertical one). If the point cloud is not properly oriented but is still rather flat in a direction, you should consider using the other version of this method Delaunay 2D (best LS plane).
Note: for 3D triangulation, refer to the qPoissonRecon plugin.
ここに記述されている内容であれば,Delaunay 2.5D (XY plane) を実行することに問題はない。”specify a maximum length for the triangle edges” が理解できないので,デフォルトで実行した。これ自体,問題はないはずではある。
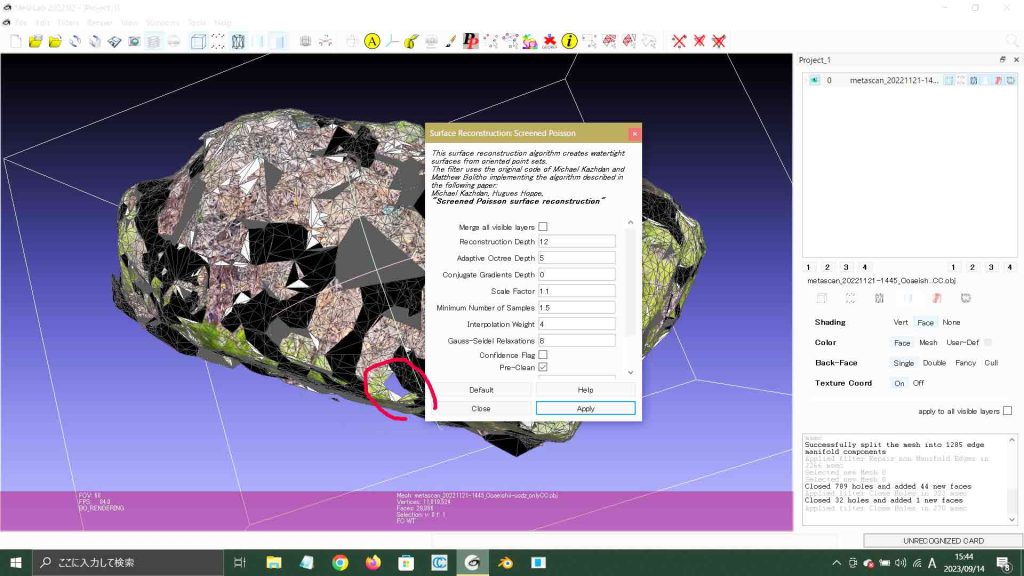
Merge all visible layers:デフォルトでは✓なしで,ママ。 Reconstruction Depth: デフォルト 8のママ。 Minimum Number of Samples: できるだけスムーズにするには高い値の方がいいようだ。デフォルトは1.5であるが,不確かだが10としよう。体積を求めるにはよりスムーズにした方がいいと思うからである。 Interpolation Weight: この値をゼロにすると,original (unscreened) Poisson Reconstructionになってしまう。このパネルを実行する意味が無くなると言って良いと思う。デフォルトは4で,4のママ。 Confidence Flag: デフォルトは✓なし。この場合,すべてのnormals法線はこの操作の前のunit-length(単位長)に揃えられる。デフォルトのママ。 Pre-Clean: デフォルトは✓なし。この場合,vertices (vertex) 関係の整理が実行されない。実行した方がいいと思うので,✓。 Number Thread: このreconstruction algorism 再建アルゴリズムの最大実行回数の意味であるがどういう役目を果たすのか,わからない。デフォルト 8のママ。
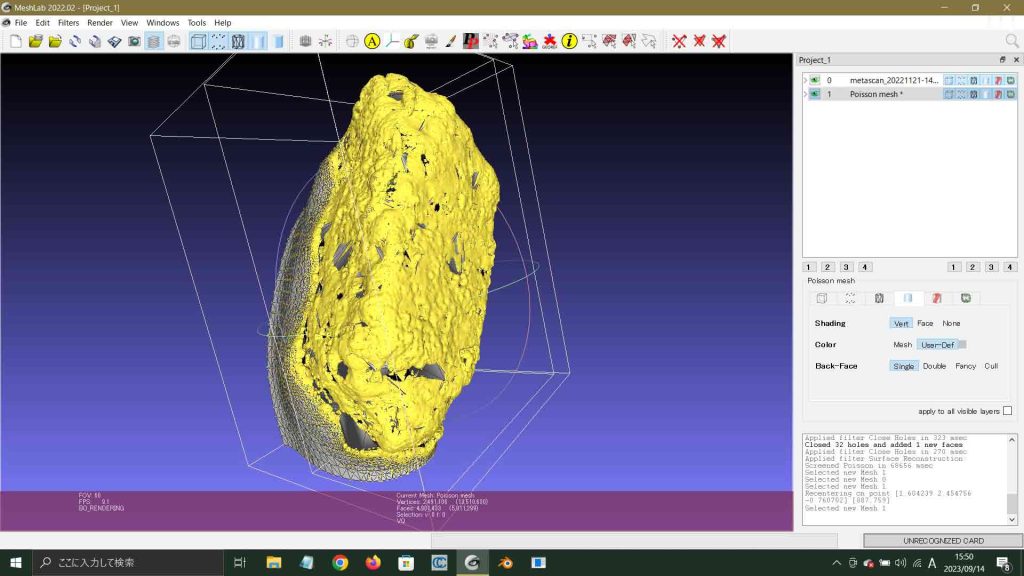
図3 Poisson meshの結果
図3のように,実行した結果はスカートを穿いたようになった。底は抜けたままだ。残念っ。新しいレイヤーができただけなので,右クリックで “delete current mesh” を実行すれば削除できそうなので,一応,キープ。全くデフォルトで実行したのだが,その結果の違いがわからなかった。二つとも削除した。底抜けを埋めるのは全く無理。
5 Filters / Remeshing, Simplification and Reconstruction/ Close Holes
図4 Current mesh does not have any faces
さて,現状は,前日の出口無しに戻ってしまった。先ほどMeshLabに取り込んだPLYファイルを操作する。Filters / Remeshing, Simplification and Reconstruction/ Close Holes を実行すると,PreConditions’ Failureとして,Current mesh does not have any faces. とのメッセージだ。
新たなファイルだから当然だなあ。
この点群PLYファイルに,Filters / Normals, Curvatures and Orientation / Compute normals for point sets, で点群の法線を生成する。Neighbour numをデフォルトの10で。Helpを見ると,Smooth Iteration欄がある。これを実行するかどうかで,像がスムーズになるかどうがわかるかも。
図5 Filters / Normals, Curvatures and Orientation / Compute normals for point sets
穴埋めには,次の三つのステップ Cleaning掃除, Fixing修理, Remeshing再メッシュ化がある。このツールとして最も簡便で多用されているのは, Remeshing, simplification and reconstruction->Close Holes パラメータには次の4点がある。(MeshLab でメッシュの穴埋めを行なう) Max size to be closed: ふさぐ穴の境界を構成するエッジの最大数。このエッジ数より小さい穴が処理対象。 Close holes with selected faces: 処理対象を選択されている面に限定するかどうか。 Select the newly created faces: 新たに追加された面を選択状態にするかどうか。処理前の選択面の選択は解除される。 Prevent creation of selfIntersecting faces: なるべく既存面と交差しないように面を追加するかどうか。
Open the point cloud file in Meshlab.
Clean the point cloud by removing any outliers and irrelevant data.It also reudces the number of points to be processed.
Compute Vertex Normals. Go to Filters->Normals,Curvatures and Orientation->Compute Normals for point sets.We have used default meshlab parameters for computing the normals.
Apply Poisson Reconstruction. Go to Filters->Remeshing,Simplification and Reconstruction->Surface Reconstruction:Poisson. To obtain good results, you may have to experiment with giving different octree depth value.Normal direction may need to be flipped for orienting them outwards.(Filters->Normals,Curvatures and Orientation->Flip Faces)
To add color, Go to Filters->Sampling->Attribute Transfer.Select color transfer check box and source and destination files appropriately for mapping.
Filters > Remeshing, Simplification and Reconstruction > Close Hole これを実行すると,manifoldエラーが出るので,前もって, Filters > Cleaning and Repairing > Repair non Manifold Edges (デフォルトのRemove Facesのまま)(図37),Applyしたが,実行結果はゼロだった。つまり,不要だ。これはポアッソン再建実行後のためであろう。 そして,Filters > Remeshing, Simplification and Reconstruction > Close Holeで,サイズを100に設定して(図38),Apply。実行結果はゼロ。これも,ポアッソン再建実行後のためであろう。サイズを10,000 に設定して(図39), Apply。
図37 Filters > Cleaning and Repairing > Repair non Manifold Edges (デフォルトのRemove Facesのまま)
図38 Filters > Remeshing, Simplification and Reconstruction > Close Hole
図39 size=10,000で
その結果,図40に合わせて,consoleでは,Closed 1 holes and added 117 new face,というメッセージ。柱状石碑メッシュの底の半分ほどが塞がっている。図41 に見えるように,sizeを 20,000 にして,Prevent creation of selfintersecting facesの✓は外してみた。図42のように底抜けが解消されている。
図40 consoleでは,Closed 1 holes and added 117 new face
図41 sizeを20000にして, Prevent creation of selfintersecting facesの✓は外してみた
まずは,図52のように,Filters > Remeshing, Simplification and Reconstruction > Close Holeで,Max size to be closed: 10,000,他は全✓。結果は,Closed 0 holes and added 0 new faces。1,000,000も実行,これも駄目。原因はPreventの✓を外さなかったためかも知れないが。
図52 Close holes Max size to be closed: 10,000 他は全✓。
ポアッソンに期待。図53のパネル設定。
図53 Poisson Reconstruction Depth 12 Adaptive Octree 5 Minimum Number of Samples 10 Pre-Clean ✓。
22:36, July 26, 2023: 外部6TBハードディスクをUSBa-C to USB Adapterを介してMacBookAIRに接続した。外部ハードディスクJAN2023_6TBアイコンが見えて,「Time MachineでMacをバックアップ。バックアップを作成するためにディスクを使用しますか?」というメッセージが継続的に表示さあれているので,このメッセージの左上の✖️を選んで,表示を見えなくした。
———————————————— Office 2016 for Mac のサポートの終了 – Microsoft サポート Office 2016 for Mac のサポートは、2020 年 10 月 13 日に終了しました。 Office 2016 アプリは引き続き機能しますが、安全を確保するために Microsoft 365 にアップグレードすることをお勧めします。適用対象:Office 2016 for Mac
Office 2016 for Mac のライセンス: Microsoft 365または Office 2019 for Mac にアップグレードする場合、既存の Office 2016 for Mac ライセンスを削除する必要がありますが、Office アプリを削除する必要はありません。
どうも読み込むと,macOS Ventura on MacBookAIR,で,Office 2016は,使用可能らしい。サポートしないし,2016のリストアも拒否する,ということだ。
今朝,macOS Ventura on MacBookAIR内のMicrosoft WordやPowerPointファイルを開こうとしたら,完全?に開いた。驚きだったが,全く編集できない。「読み込み」専用とある。だから,とにかく,macOS Ventura on MacBookAIR内のMicrosoft WordやPowerPointなどのアプリは削除してはいけない,ということだ。
2023/04/20 — Does OpenOffice work on Apple Silicon? App has not yet been reported to be native to Apple Silicon. May also be known as OpenOffice, soffice, …
Appleストアが安心で最も安いなあ。 Microsoft Office Home and Business 2021(Mac 2台)37,800円(税込) 概要: Microsoft Office Home and Business 2021は、ファミリーや小規模ビジネス向けの製品です。自宅や仕事場にあるMac 2台またはWindows搭載パソコン2台に、永続版のOfficeアプリやメール機能をインストールして使うことができます。永続版のOfficeアプリには、Word、Excel、PowerPoint、Outlookが含まれます。 システム条件: オペレーティングシステム : Office for Macは、macOSの3つの最新バージョンでサポートされています。macOSの新しいメジャーバージョンがリリースされると、最も古いバージョンでのサポートは終了し、最新バージョンと、その2つ前までのバージョンでサポートされるようになります。
メールアプリに赤い数字の5が表示されているが,全受信には未読がみつからない。図17の左ペーンには,On My Mac,という見出しがある。未読の5の数字がここにあった。図17は処理後のものなので表示されていない。On My Macを開いたものが図18である。多数の[修復されたメッセージ]フォルダがあって,それぞれにかなりの数のメールが収納されている。送信だけのもの,受信だけのもの,という区分があって,送信だけのメールは一気に選んで,最上段の[すべての送信済み]にドラッグアンドドロップした。受信だけのものは,[全受信]にドラッグアンドドロップした。それぞれの受信メールアドレスに対応して自動で分配されるであろうと考えた。
繰り返される突然の電源オフとMacBookAIR15″購入 repeated Sudden shut-downs using my vintaged mac and an inevitable buy of a MacBookAIR15″M2
はじめに
さびしい。繰り返される突如の電源オフ。macbook pro 15″, early 2014。現OSはSierra (mac OS 10.12.6)。一つ上のHigh Sierraにすると沢山のアプリが使えなくなる。Adobe Illustrator, Photoshopなどだけでなく,関連プラグインも。microsoft関連もそうだ。Microsoft WordやMicrosoft ExcelなどはWindowsマシーンの方では使えるが,どうもWindowsマシーンのキーボード操作がmacに慣れたぼくには厳しい。
削除または変更されたコンポーネント: macOS Catalinaは64ビットアプリケーションしか動作しない。そのため、Carbon APIおよびQuickTime 7が必要な画像・音声・動画フォーマットを使用するすべてのソフトウェアを含む32ビットアプリケーションは動作しなくなった。Appleは、32ビットでしか動作しないアプリケーションをMac App Storeから削除した。 macOS Catalinaでは、2003年のMac OS X v10.3(Panther)に導入されたBashの代わりに、zshがログインシェルおよびインタラクティブシェルのデフォルトとなった。BashはmacOS Catalinaでも利用可能であり、csh/tcshやkshなども引き続き利用できる。DashboardはmacOS Catalinaでは削除された。Perl、Python 2.7、Rubyに対するビルトインサポートはレガシー・ソフトウェアとの互換性のためにmacOSに残される。しかし、将来のバージョンのmacOSでは、こうしたスクリプト言語のランタイムではデフォルトでは含まれなくなり、追加パッケージの手動インストールが必要となる。
タイムマシーンで 外付けTBのハードディスクに,[macbook pro 15″, early 2014, Sierra (mac OS 10.12.6)] のバックアップをしてきたが,AIRのベンチュラのタイムマシーンで復旧はできない可能性が高いという。まあ,拒否されなかった場合でも,役立たずのファイルがただコピーされる可能性が高いという。悪さをするかも知れない?
現在,[macbook pro 15″, early 2014, Sierra (mac OS 10.12.6)] 上で,Parallels Desktoをインストールし,Windows 10とWindows XPを使っている。この方法で,macOS 13 Venturaで32ビットアプリを使えば良い。Windowsについてもちょっと使い難いところがあって,macの他のOSでも同様だろう。まあ,仕方がない。この方向だなあ。Parallels Desktopはアップデートできる。
以上,アップルストアでアカデミックで購入するしか無い。 3TB,6TBのハードディスクと同時接続の場合,USB-A to -C変換アダプターが二つ必要だ。
以上
以上,Jul. 16, 2023記。
6 MacBookAIR 15″(M2)購入
一晩考えて,上記のMacBookAIRを購入して,Parallels Desktopをアップデートして,ここにSierraをインストールして,この中のタイムマシーンを使って,現有の[macbook pro 15″, early 2014, Sierra (mac OS 10.12.6)] のバックアップがある6TBの外部ハードディスクから,リストアすれば,いいだろうと思った。
7 Parallels Desktop ver. 18 (latest)
Parallels Desktopで,macbook pro 15″, early 2014で現在使用している Sierra (mac OS 10.12.6) が使えるのか,気になった。結論を言うと,全く問題が無いということである。以下,関連情報をコピペしておく。 ———————————————— Intel-based guest macOS on an M2 host macOS – possible? Discussion in ‘macOS Guest OS Discussion’ started by DA_, Friday at 12:01 PM.
Tags: guest os host intel m2 chip I was wondering if it is possible to install Intel-based guest macOS on an Apple silicon (M2 chip) host OS using Parallels?
MatthewR20 Most valuable person Messages:43 Virtual machines created on Intel-based Mac computers have x86_64 CPU architecture that is fundamentally different from the Arm architecture. Therefore, a virtual machine created on an Intel-based Mac cannot be used on a Mac with Apple silicon, and vise-versa.
About Apple silicon Apple M Series chip is a successor of iPad’s A14Z chip and the first designed specifically for the Mac. It is built on Arm architecture and includes a system on a chip (SoC) that combines numerous powerful technologies into a single silicon, featuring a unified memory architecture for dramatically improved performance and efficiency.
Virtual machines created on Intel-based Mac computers have x86_64 CPU architecture that is fundamentally different from the Arm architecture.
Software applications are heavily dependent on a computer’s CPU architecture: an application that is compiled (created) for one architecture, cannot be easily run on another architecture.
Therefore, a virtual machine created on an Intel-based Mac cannot be used on a Mac with Apple silicon, and vise-versa. If you are switching from a Mac with an Intel processor to a Mac with Apple silicon or the other way around, please refer to KB 125344 for more details.
For macOS x86 VM Unfortunately, it’s not possible to copy the data from a macOS x86 virtual machine on Mac with M-Series chip. However, you can open your macOS x86 virtual machine on an Intel-based Mac to get access to the data stored inside the VM.
About Parallels Desktop for Mac with Apple silicon To run virtual machines on a Mac with Apple silicon, Parallels engineers created a new virtualization engine that uses the Apple silicon chip hardware-assisted virtualization and allows to run Arm-based virtual machines. All of the best Parallels Desktop features were re-engineered for the Apple silicon, including:
Choose to have Windows invisible while still using its applications in Coherence Mode, side-by-side with Mac apps. Shared Profile Tool that enables you to share your Mac desktop, pictures, documents, and other folders with Windows, allowing you to easily access them from Windows applications. Touch Bar controls for Windows applications – truly seamless experience running a Windows app on a Mac. Your Mac keyboard layouts are added automatically to Windows for greater productivity. And hundreds of other Parallels Desktop features await to be discovered. Note: See the list of supported operating systems in Parallels Desktop on Mac with Apple M Series chip.
Parallels Desktop for Mac Technical Documentation & Resources Version 18 (latest)
Use macOS as a Guest OS You can install a copy of macOS in a virtual machine and use it as a guest operating system. This can be useful, for example, if you want to test software in a fresh version of macOS without having to log in and out of your main account. Note: in the App Store Edition, this feature is only available on Intel Mac machines, and not available on Apple Silicon Macs. For more information on the App Store Edition, follow this link https://kb.parallels.com/123796. By default, an installation of macOS is stored in a recovery partition on your Mac You can easily install macOS into a virtual machine from that partition without having to purchase or download another copy of macOS. To install macOS in a virtual machine: 1 Open Parallels Desktop and choose File > New. 2 Select Install macOS Using the Recovery Partition, click Continue, and follow the onscreen instructions. When using OS X Lion or later as a guest OS, you can use it in Coherence mode (p. 41), so that guest OS application windows appear on the host OS desktop alongside host OS applications. You can also copy and paste text and drag and drop files between host and guest macOS, just as you can when using Windows as a guest OS. You can set whether function keys and other system shortcuts trigger actions in the host or guest version of macOS (p. 71).
Use Keyboard Shortcuts Both macOS and Windows provide extensive keyboard shortcuts. For example, in macOS you can hold down the Command key and press Q (Command-Q) to quit the current application. To enter a keyboard shortcut, simply press a key combination on your keyboard. You can also enter keyboard shortcuts by doing one of the following:
Click the Parallels Desktop icon in the menu bar, then choose Devices > Keyboard and choose a key combination.
Choose Devices > Keyboard and choose a key combination. These methods are most useful for using keyboard shortcuts that include keys not included on a Mac keyboard, such as Alt + PrintScreen. Note: To use the F1-F12 keys on a MacBook, press and hold the Fn key and then press an F key. Customize Keyboard Shortcuts By default, Parallels Desktop maps common macOS keyboard shortcut key combinations to the equivalent Windows key combinations. That way if you’re used to, for example, pressing Command-C to copy text in macOS, you don’t have to switch to the Windows equivalent, ControlC. You can also use and customize keyboard shortcuts for switching between Coherence, Full Screen, and Window view modes, and for showing and hiding Parallels Desktop.
以上,Jul. 17, 2023記。Taro, Shuko, and Yohchan having come to our house in these three days.
AppleCare+ for 15インチMacBook Air(M2) 30,800円 お客様のApple製ハードウェアは自動登録されました。
図2 USB-C – USBアダプタ 2,780円
USB-C – USB アダプタの製品番号はMJ1M2AM/A。7月19日に本体より早く到着予定。右図の上端がCで下端がAだ。電源の通電も併用されている。安い他社製品でも使用可能だ。ぼくは外付けハードディスクとのUSB接続に使用するつもりだ。外付けハードディスクは別途通電されているので,このケーブルは必ずしも必要なものではない。
ハードウェア:
8コアCPU、10コアGPU、16コアNeural Engine搭載Apple M2チップ16GBユニファイドメモリ1TB SSDストレージTrue Tone搭載15.3インチLiquid Retinaディスプレイ³1080p FaceTime HDカメラMagSafe 3充電ポートThunderbolt / USB 4ポート x 2デュアルUSB-Cポート搭載35Wコンパクト電源アダプタTouch ID搭載バックライトMagic Keyboard – 英語(US)アクセサリキット
「OSを検出できません」と出る。Windowsを優先して探すようである。「続行」ボタンをクリックすると,「オペレーティングシステムを選択してください:」というメッセージ。スクロールして,「macOS」を指定する。名前は「macOS」,保存先は,「/Users/kobamotoharu/Parallels/」となっている。「8.59GBのディスク領域が使用されます」となる。その後,”Cannot retrieve the hardware model data.”となって,OKボタンを押してもだめで,Parallels Toolboxをインストールして下さいというメッセージが出た。これはParallels Desktop購入の際に無料で購入可能というメッセージがあった。ファインダーで強制終了したが,macOS 12が表示されている。
Yesterday, July 26, 2023, I had bought your standard version of Parallels Dektop v. 18. I have been trying to install macOS 10.12 Sierra into your Parallels Desktop on the latest macbook air 15″ M2. At any rate, a message ”Cannot retrieve the hardware model data.” has been grabbing me up. If you can solve this problem, I want to keep this Parallels Desktop. Not, please give a refund.
Hello, Thank you for contacting Parallels Support.
Unfortunately, if you’re using the M-Series processor, the only virtual machine OS that can be installed are:
> Windows 11 Pro and Enterprise editions (recommended) > Ubuntu Linux 23.04, 22.04, 21.10, 21.04, 20.10, 20.04 > Fedora Workstation 38, 37, 36, 35, 34, 33-1.2 > Debian GNU/Linux 11, 10 > Kali Linux 2023.1, 2022.2, 2022.1, 2021.3 > Red Hat Enterprise Linux (RHEL) 9 > macOS Monterey 12 (in-app download) > macOS Ventura 13 (in-app download)
Please access this article to have the full list for intel and M: https://kb.parallels.com/124223 In case you require additional help or assistance, please reply to this e-mail and we will be glad to assist you. We look forward to your reply at your convenience.
[Parallels #] FWD: Installing macOS 10.12 Sierra into a standard “Parallels Desktop” on the latest macbook air 15″ M2.
2023/07/30 (日) 17:01
Dear Mr. Akhilesh Cheetamun, Customer Support Engineer,
Thank you for youra two kind mails.
I have been tried to use the Parallels Desktop, but I am sorry not to be able to use MacOS X 10.12 Sierra. More over Microsoft Windows XP and 10 installed into the former Parallels Desktop have been messaged to be incompative.
Before downloading the Parallels Desktop v. 18, I have read the following information, and I have misunderstood it. Please cancel my order, and show me how to delete v. 18.
Thank you for your tedious work.
July 30, 2023
————————————————
Parallels Desktop for MacTechnical Documentation & ResourcesVersion 18 (latest)Use macOS as a Guest OSYou can install a copy of macOS in a virtual machine and use it as a guest operating system. Thiscan be useful, for example, if you want to test software in a fresh version of macOS without havingto log in and out of your main account.Note: in the App Store Edition, this feature is only available on Intel Mac machines, and not available onApple Silicon Macs. For more information on the App Store Edition, follow this linkhttps://kb.parallels.com/123796.By default, an installation of macOS is stored in a recovery partition on your Mac You can easilyinstall macOS into a virtual machine from that partition without having to purchase or downloadanother copy of macOS.To install macOS in a virtual machine:1 Open Parallels Desktop and choose File > New.2 Select Install macOS Using the Recovery Partition, click Continue, and follow the onscreeninstructions.When using OS X Lion or later as a guest OS, you can use it in Coherence mode (p. 41), so thatguest OS application windows appear on the host OS desktop alongside host OS applications.You can also copy and paste text and drag and drop files between host and guest macOS, just asyou can when using Windows as a guest OS.You can set whether function keys and other system shortcuts trigger actions in the host or guestversion of macOS (p. 71).
————————————————
下記July 27に対する返事が上のメール。
Dear Valued Customer, Thank you for being a Parallels customer. Please let us know how we did by choosing one of the options below. Your answers will help us serve you better in the future. Everything was great, thanks! You could have done better.