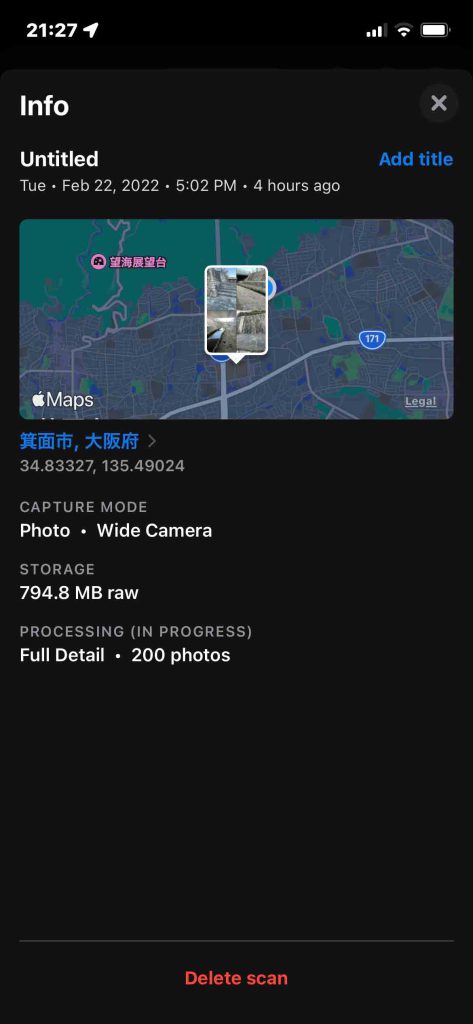
今後,座標変換をする際に,複数のcloudを繋ぐことは面倒なので(Metascan Proは使用制限が無い),(前もって手順を考えて)一気に全域をスキャンすることになるだろう。ラベルの座標値は,次に紹介した方法で求めることができる。iPhone 12 Pro撮影の3Dスキャン画像の座標を捉える の,4.1 Point picking,4.2 Point list picking,である。
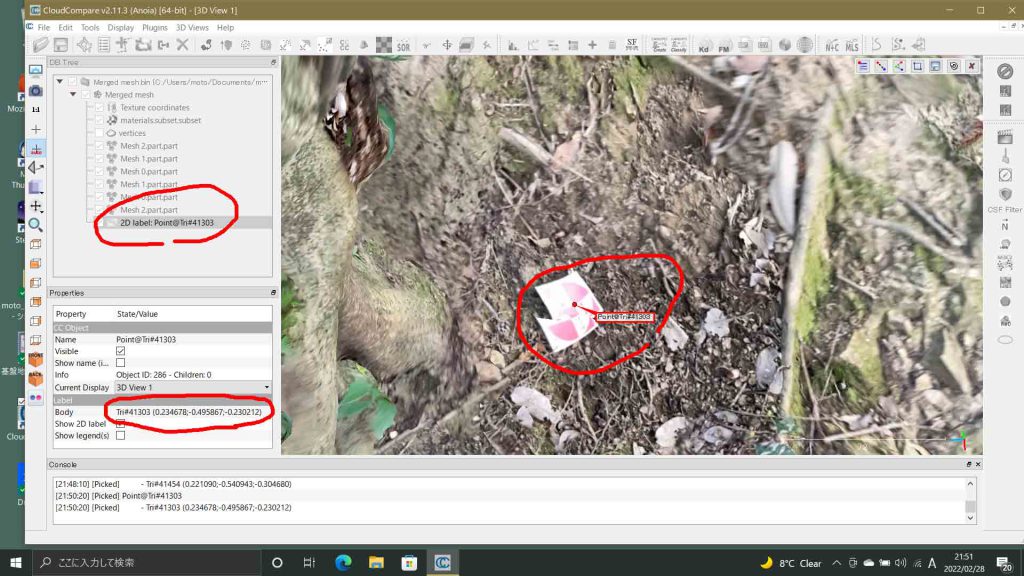
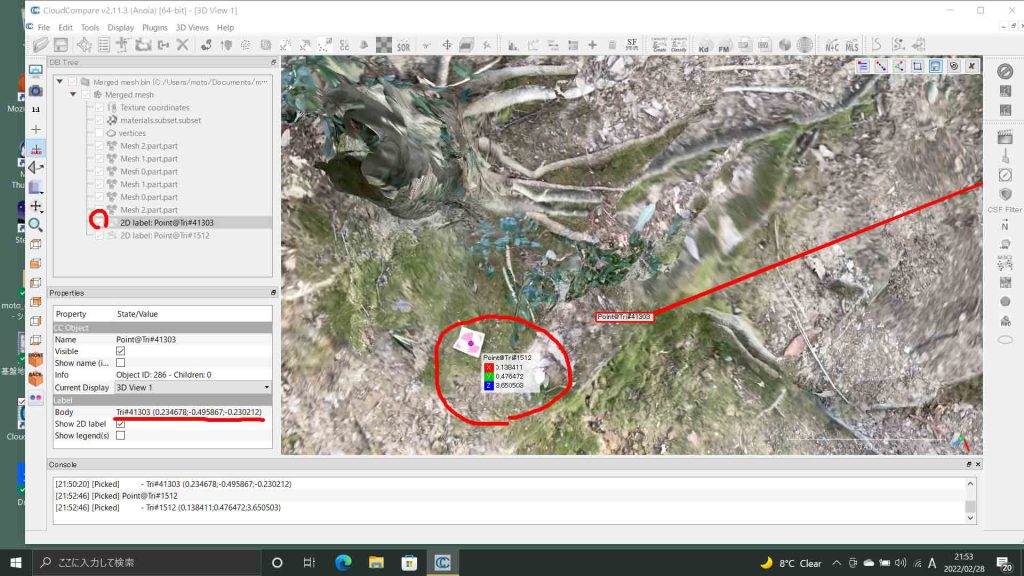
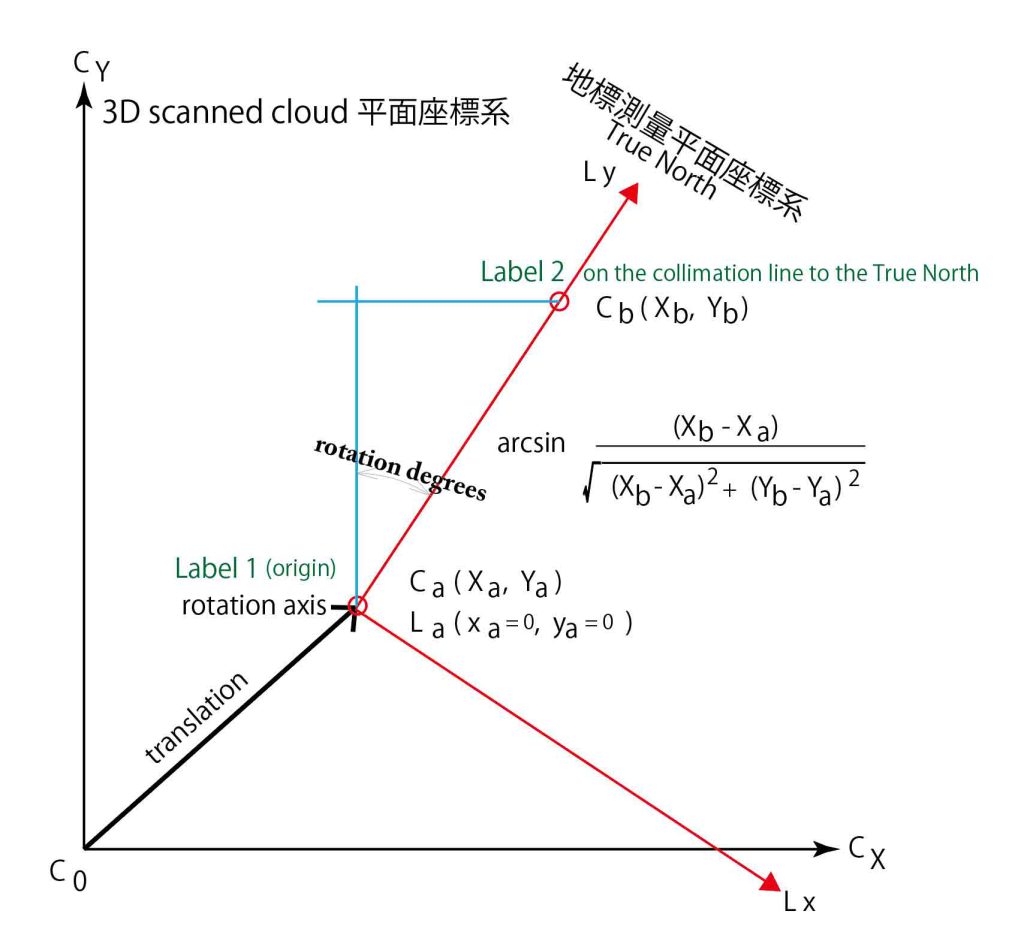
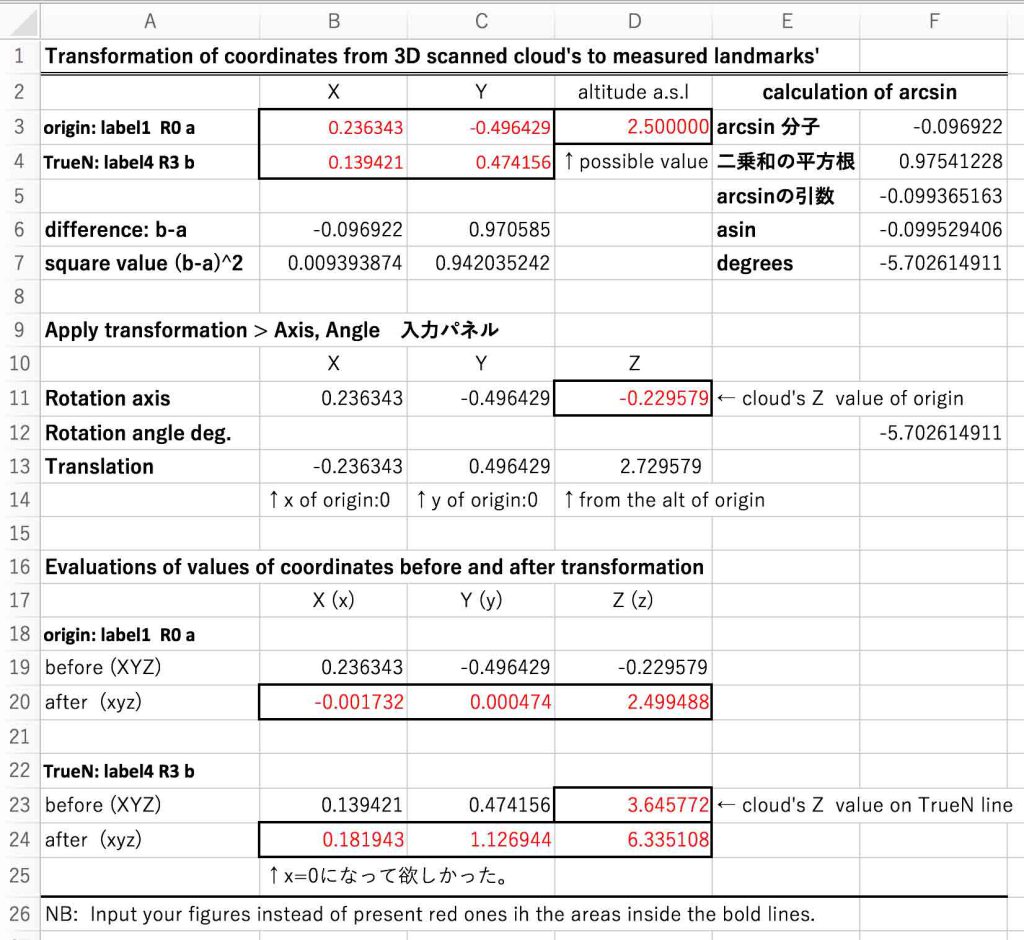
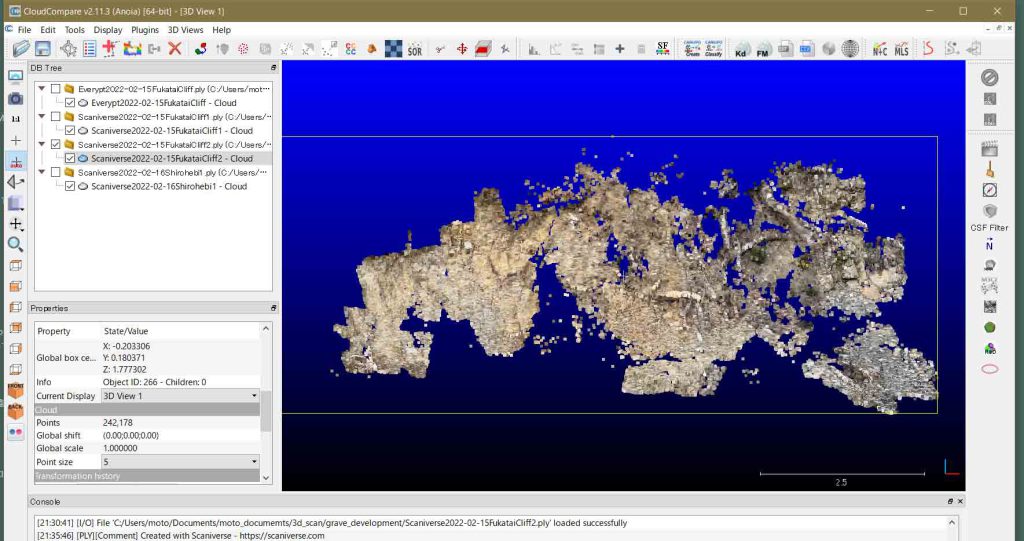
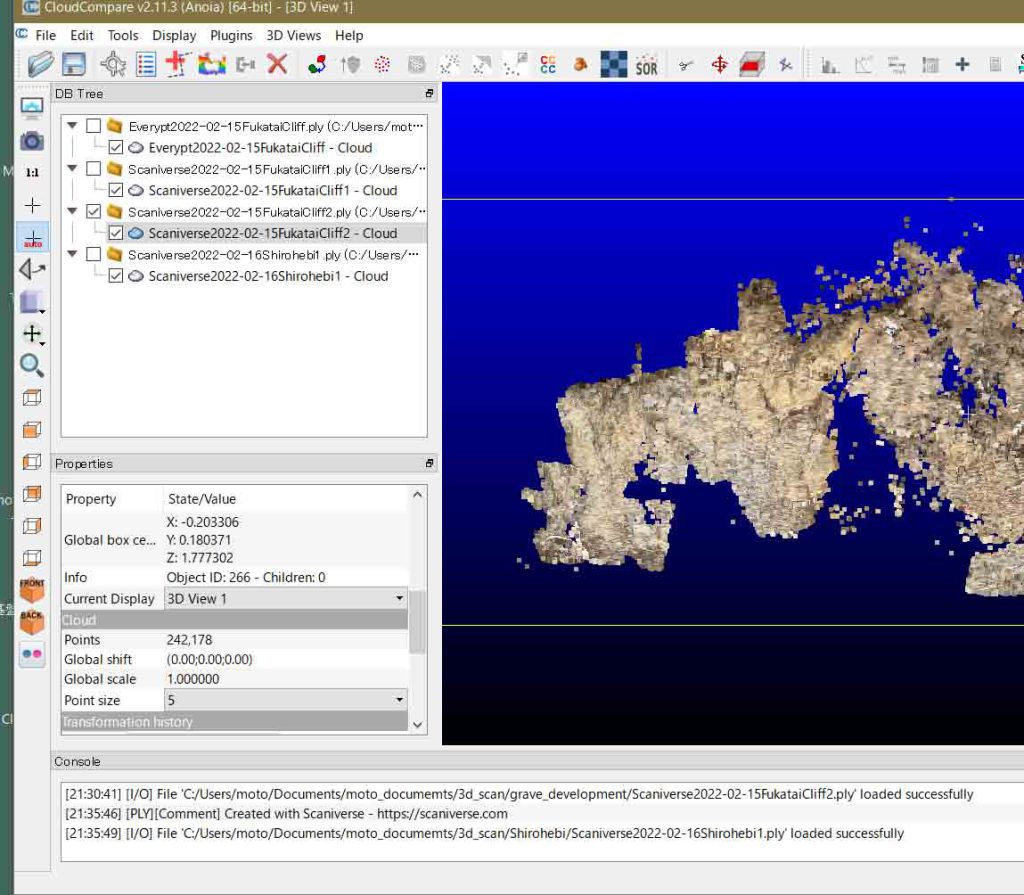
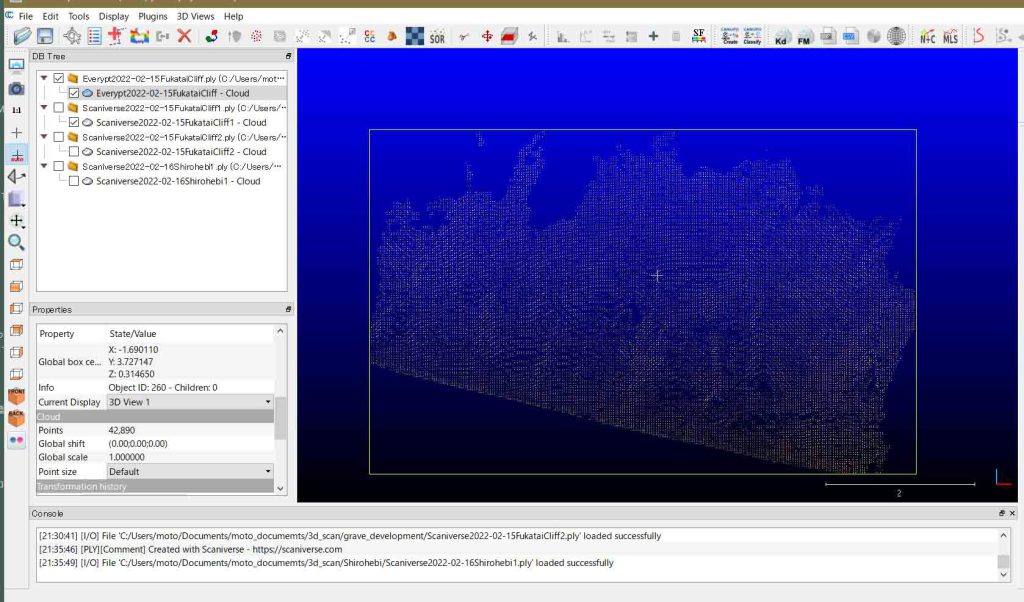
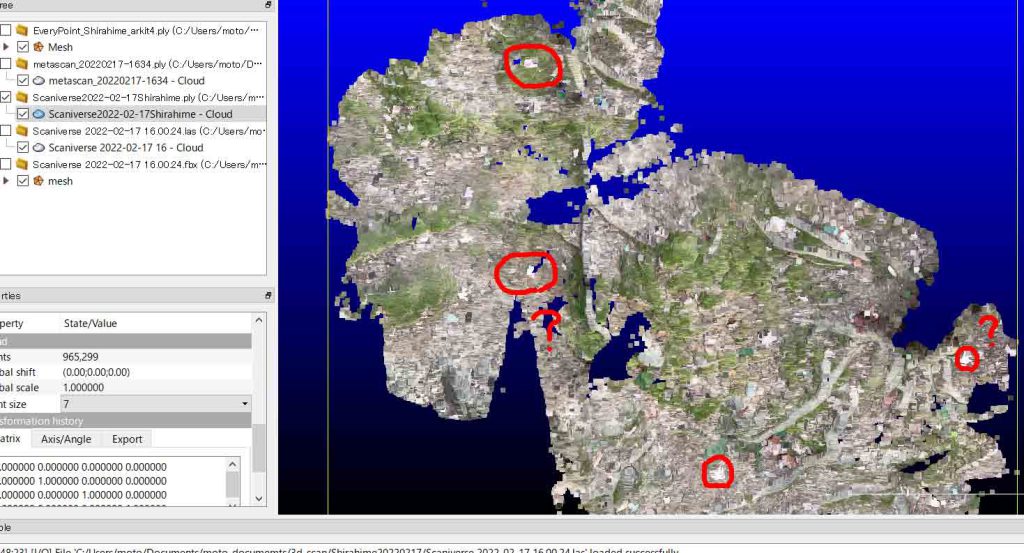
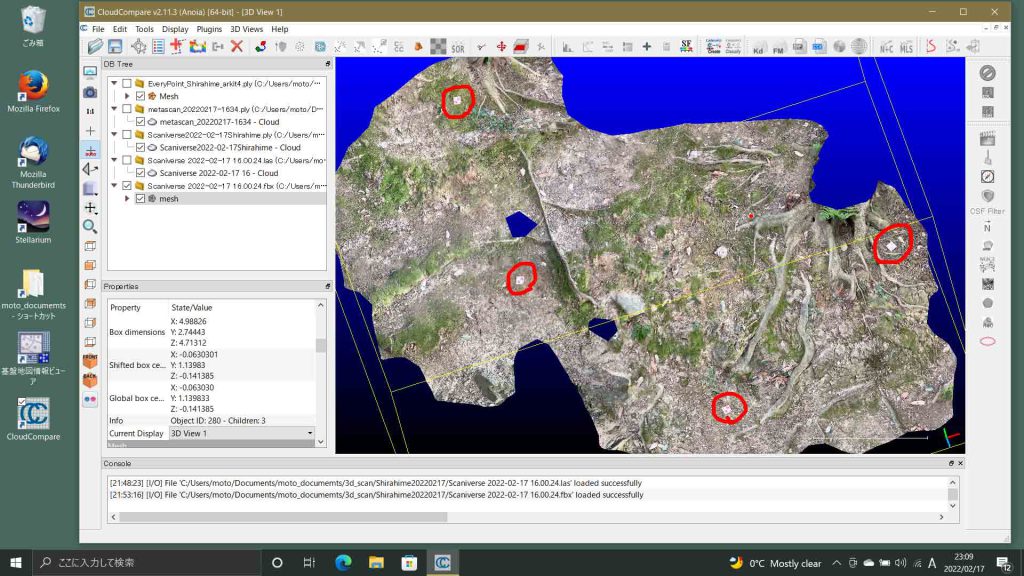
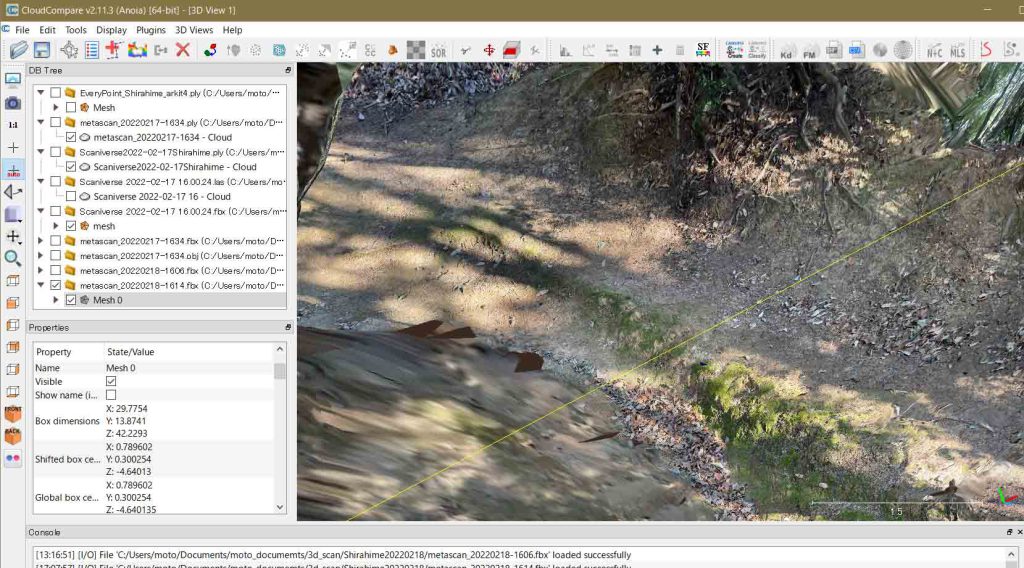
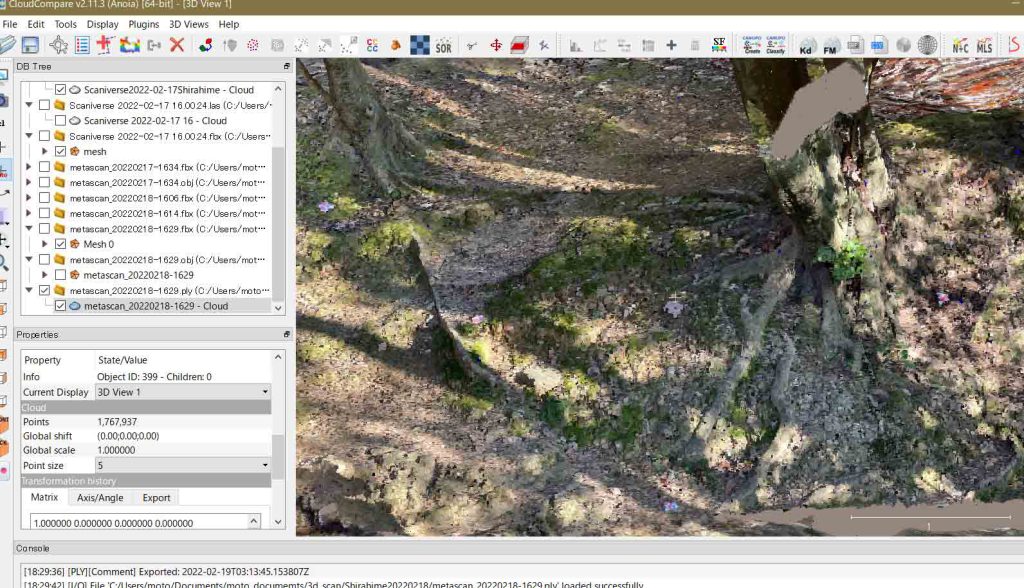
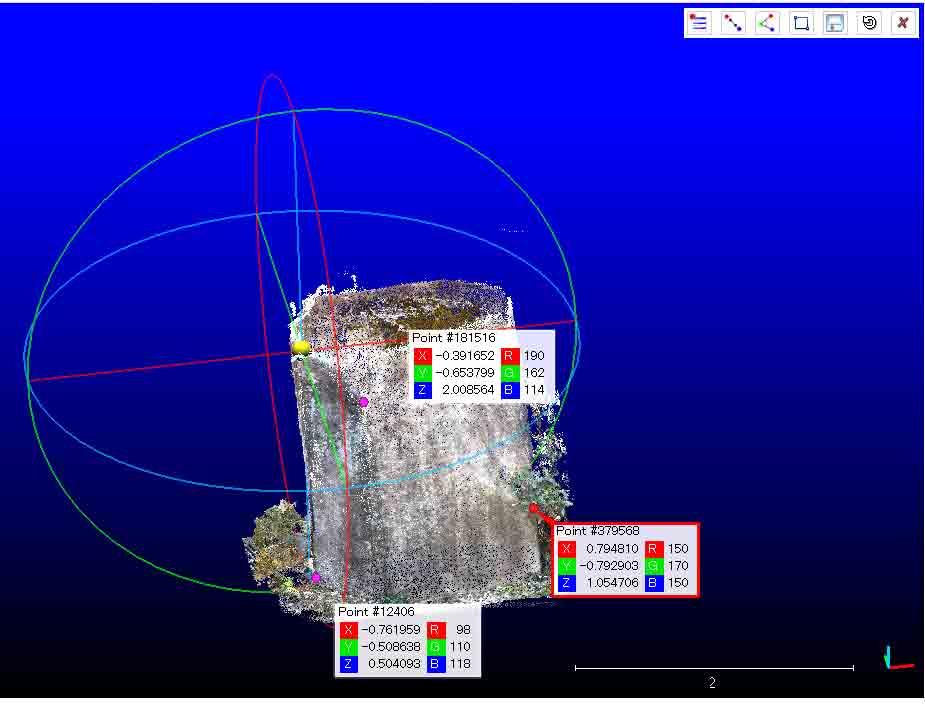
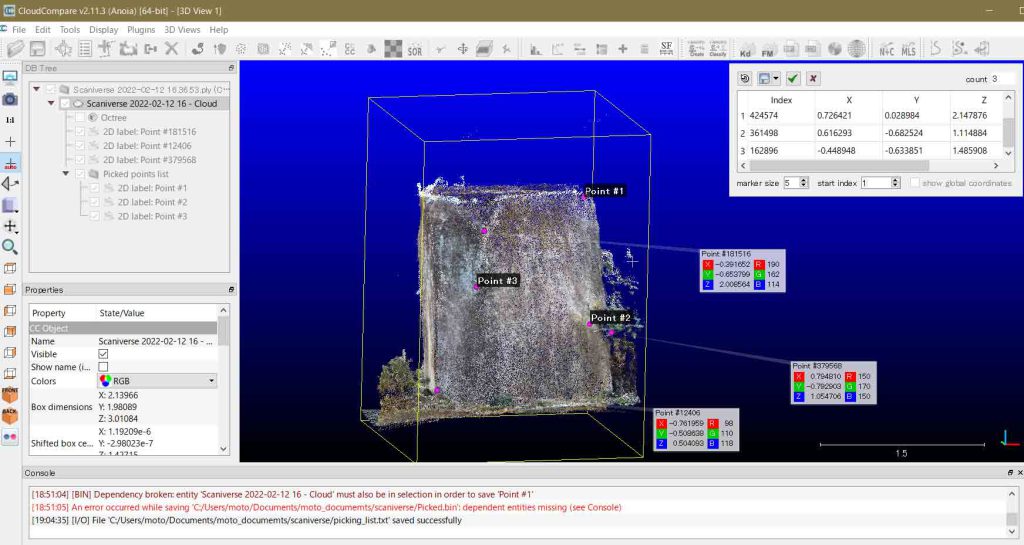
4.1 Point pickingを実施して,ラベル1と4の座標値を確認した。図3に見えるように,ラベル1ではラベルがダブって見られる。座標値から確認したのであるが,アラインメントの際のレファランスになった方は,この図の上方のものである。図4のラベル4では幸い1枚だけが示されている。なお,図3と図4の左手のペーンの赤で囲った情報から,座標を知ることができる。
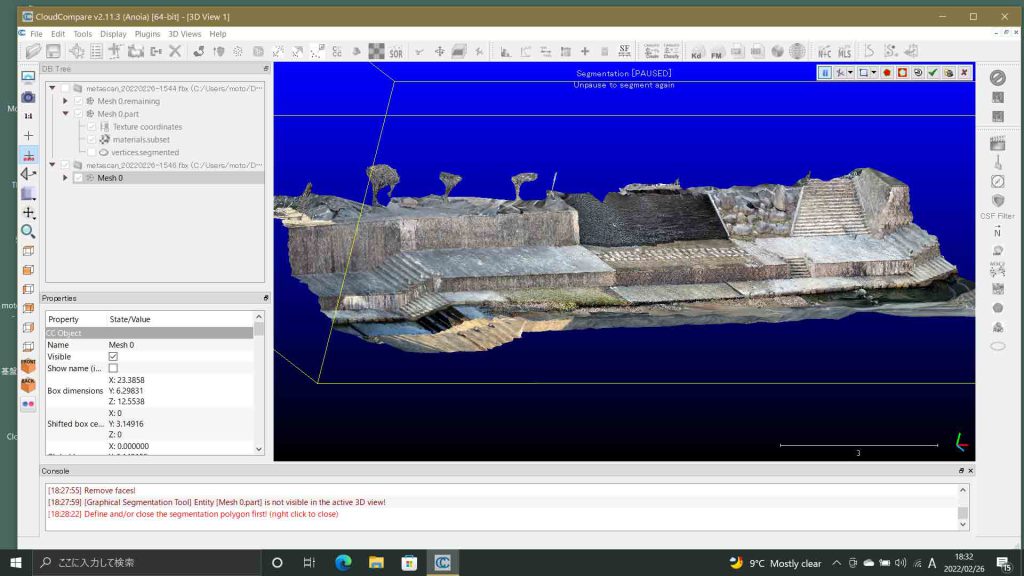
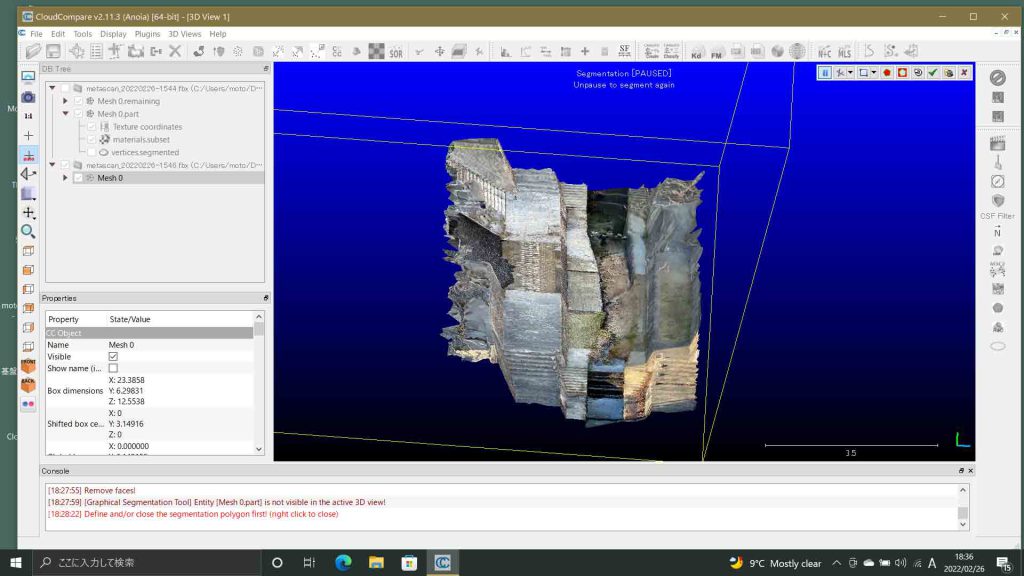
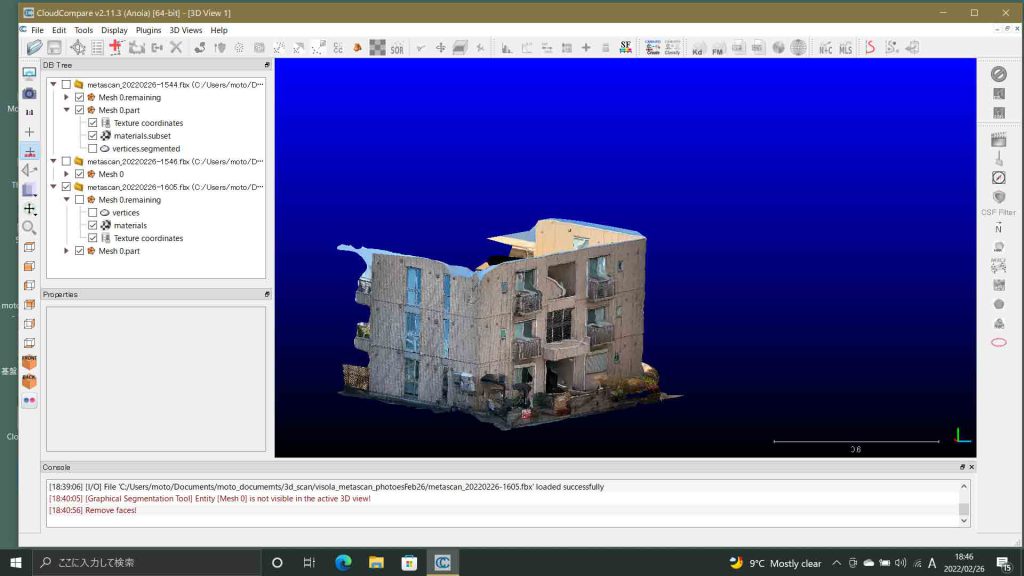
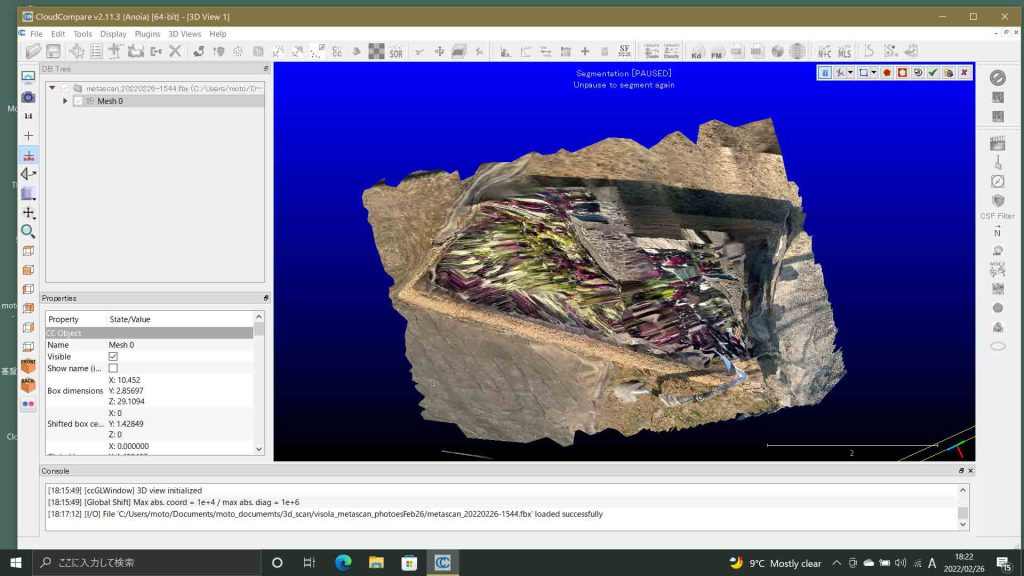
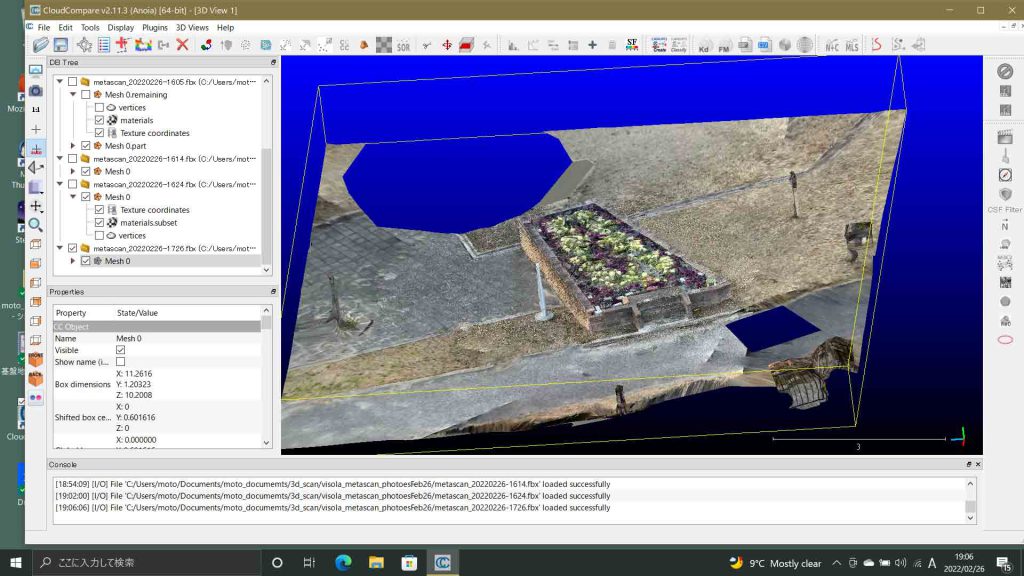
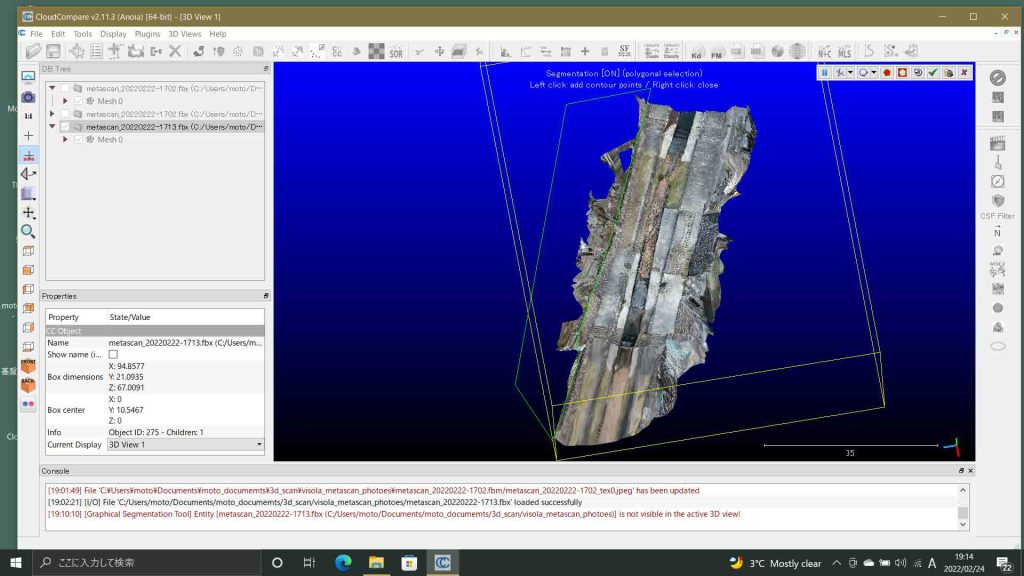
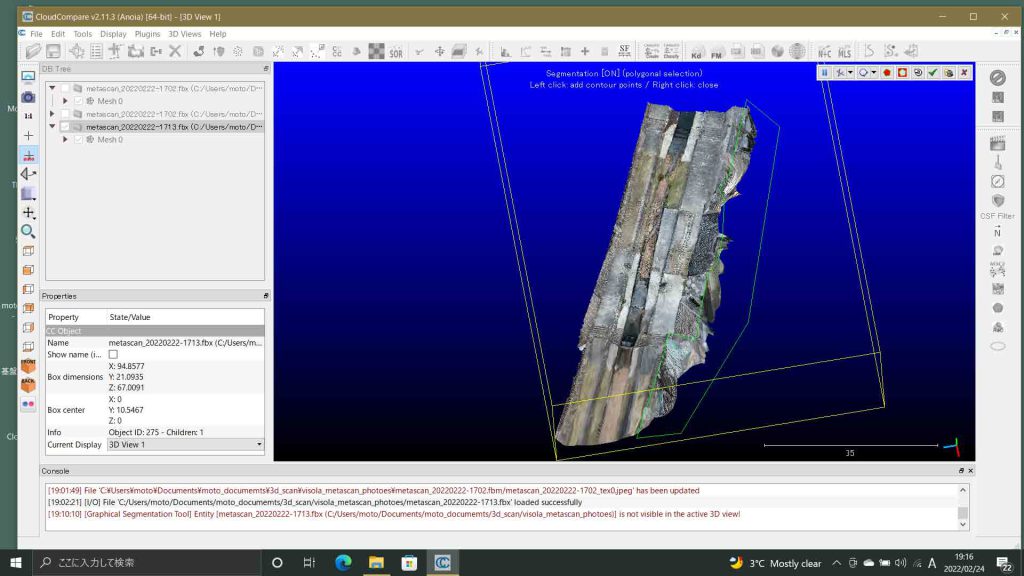
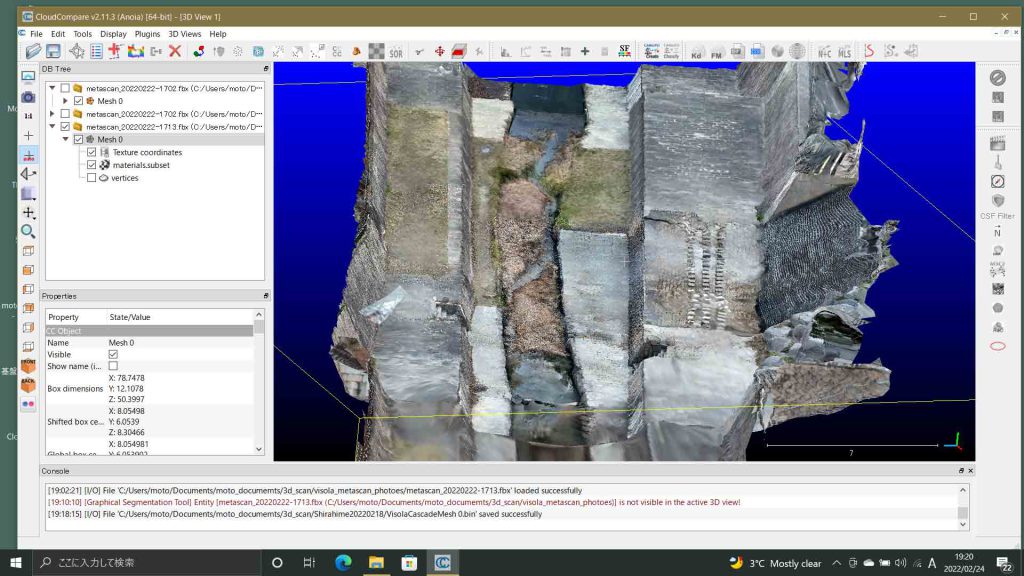
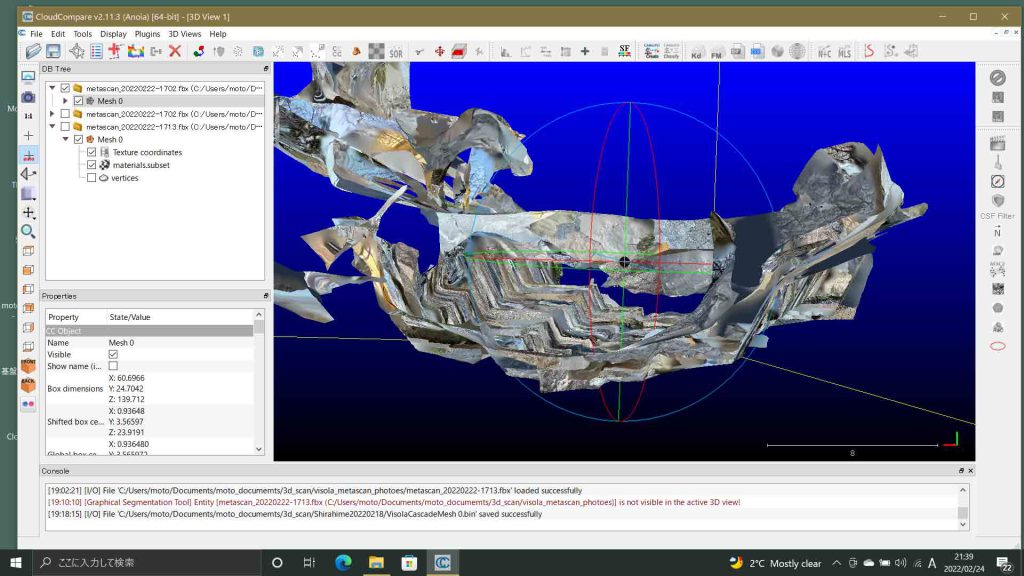
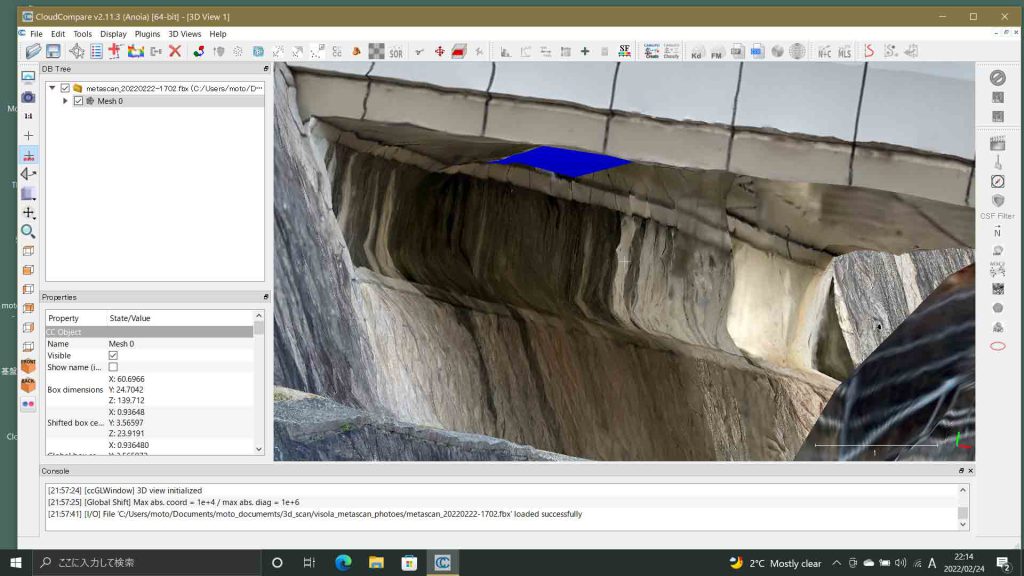
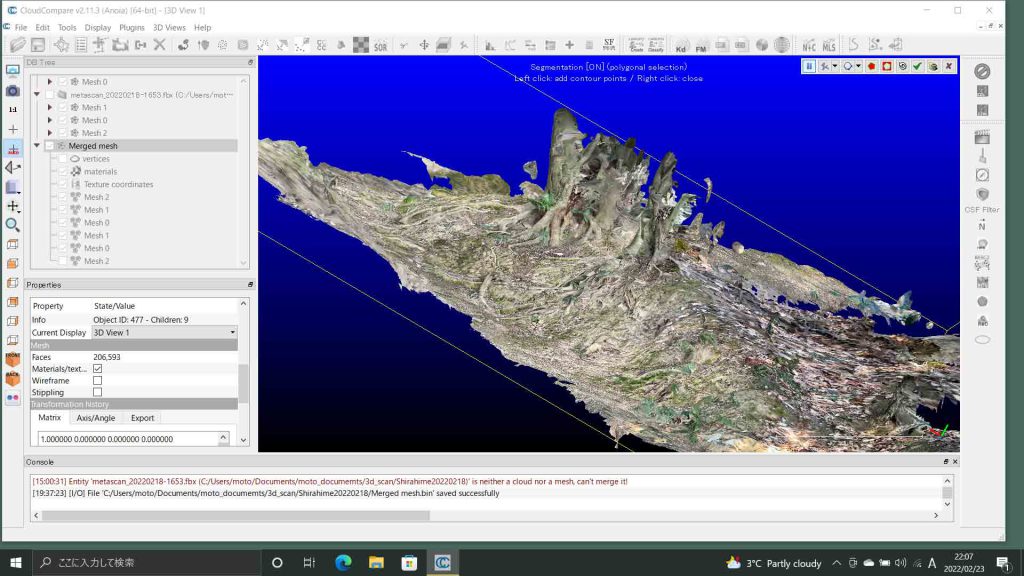
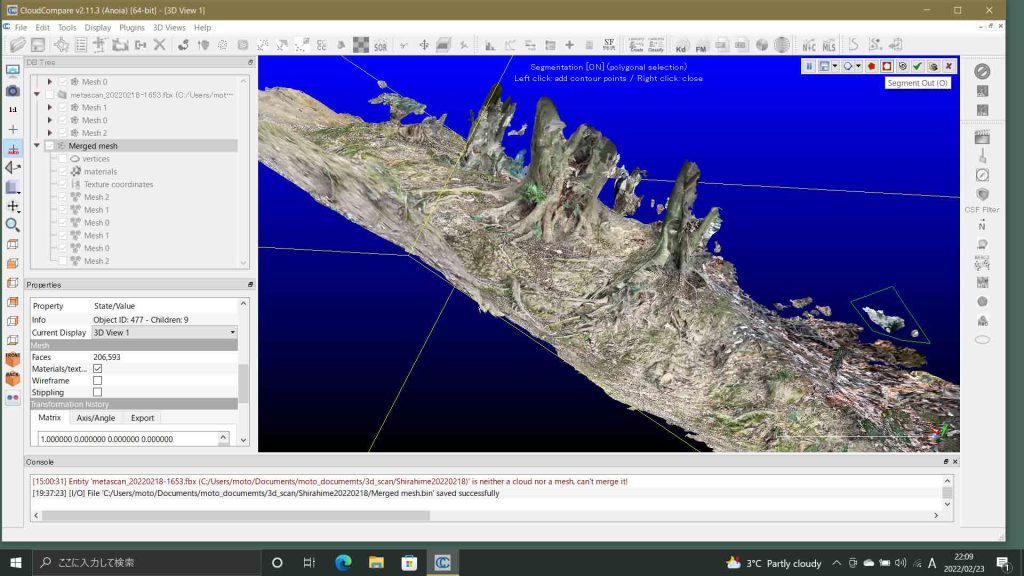
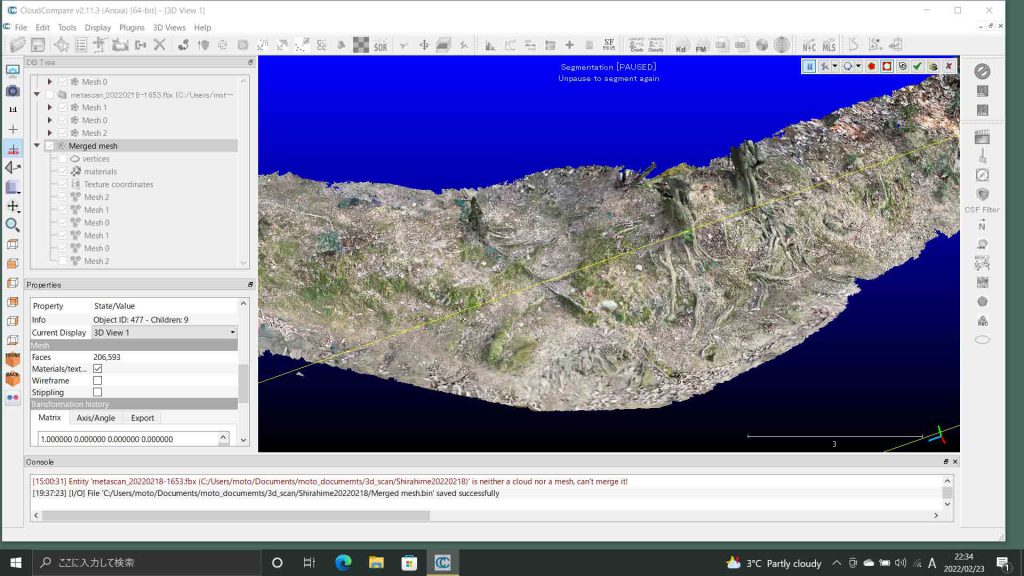
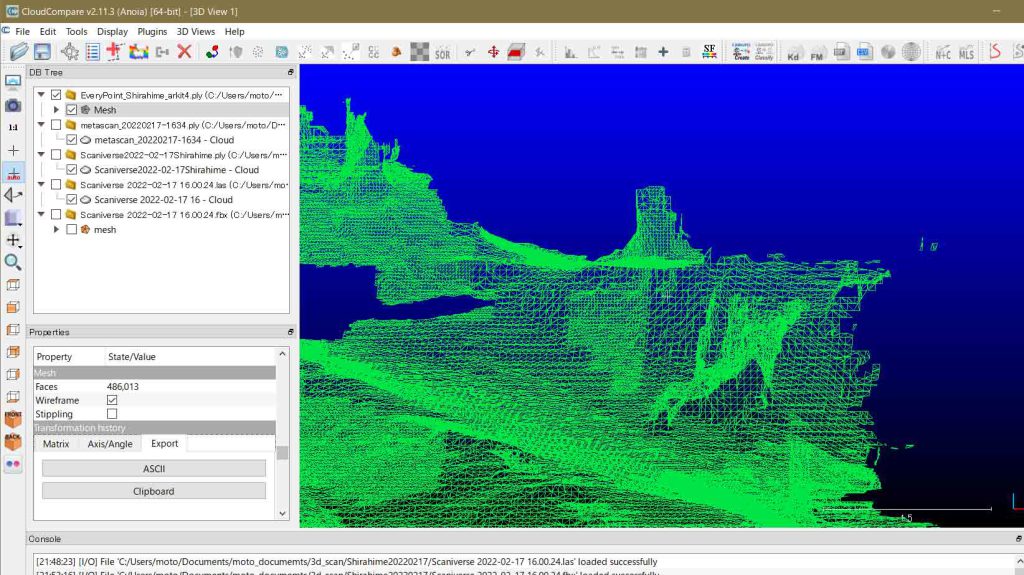
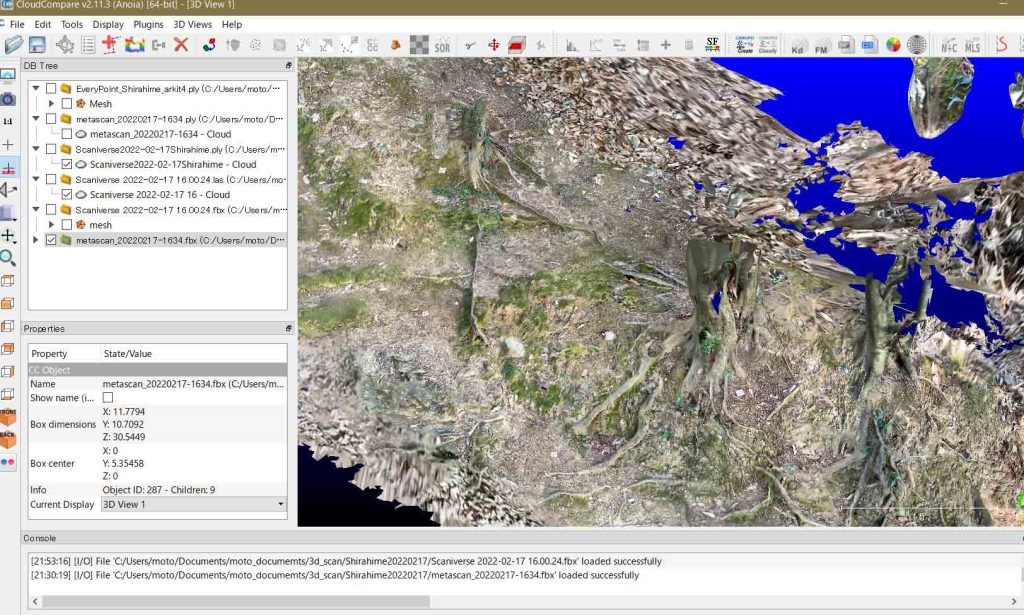
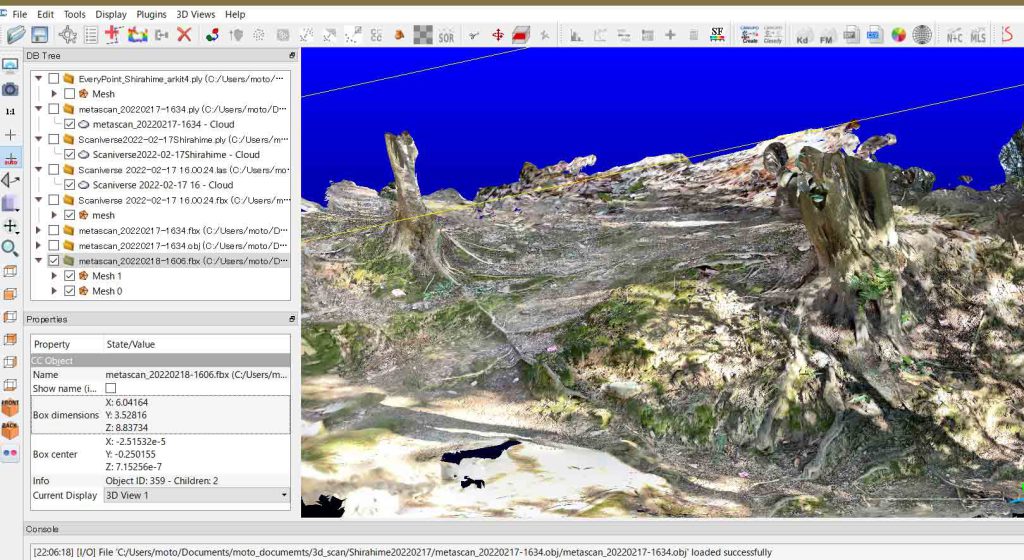
segmentのページ CloudCompareで不要なポイント群または面群の削除 では,☑️cofirmの意味がわからなかった。マニュアルでは,”validate the current segmentation and create two clouds: one with the selected points and one with the others”となっている。図9の左ペーンのDB Treeのmetascan 20220226-1605のMesh構造を見ると,Mesh 0.partにチェックを入れていて,この編集画面の集合住宅だけが表示されている。Mesh 0.remainingにはチェックを入れていない。これを入れると削除したcloudが現れる。ぼくがMesh 0.partをMesh 0.remainingと同階層に置いた結果である。confirmを実行すると,元々はMesh 0.remainingの一つ下の階層に作られるのである。上記英語の説明では理解できない。
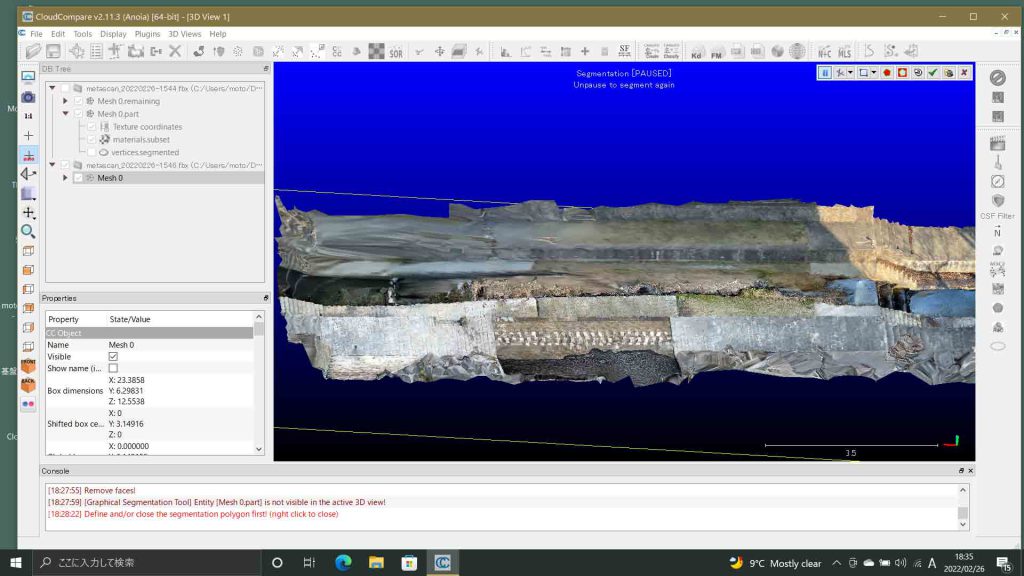
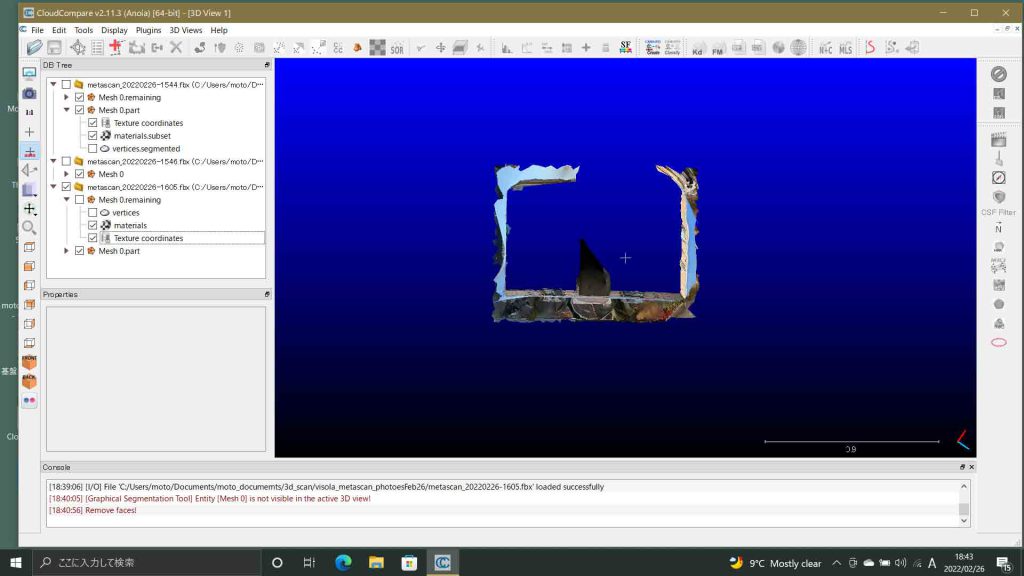
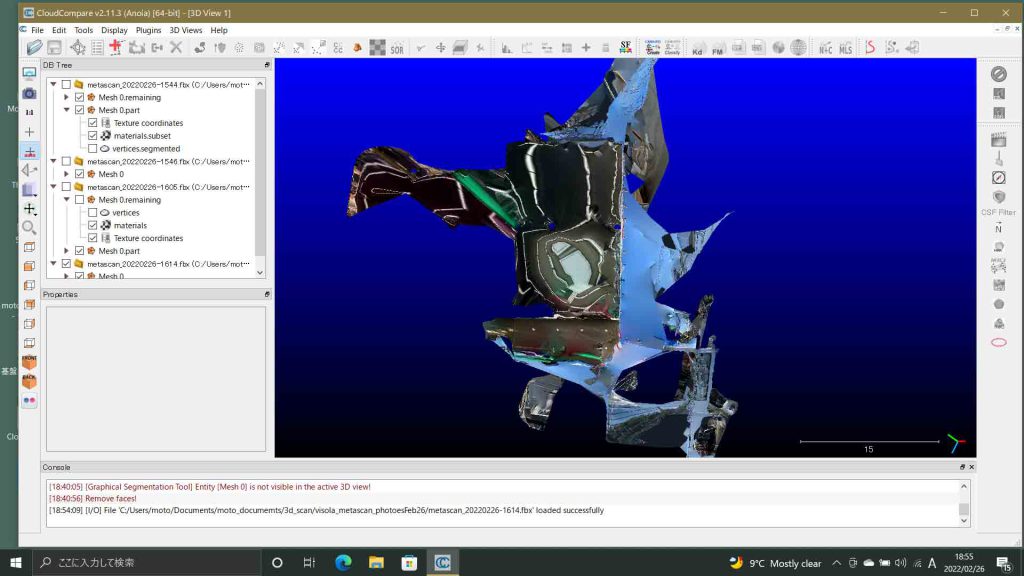
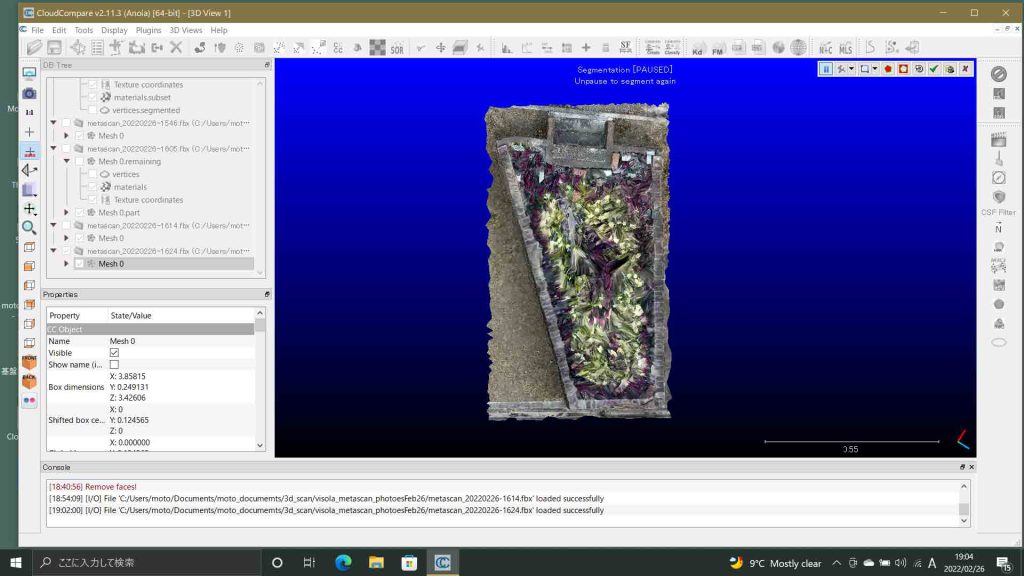
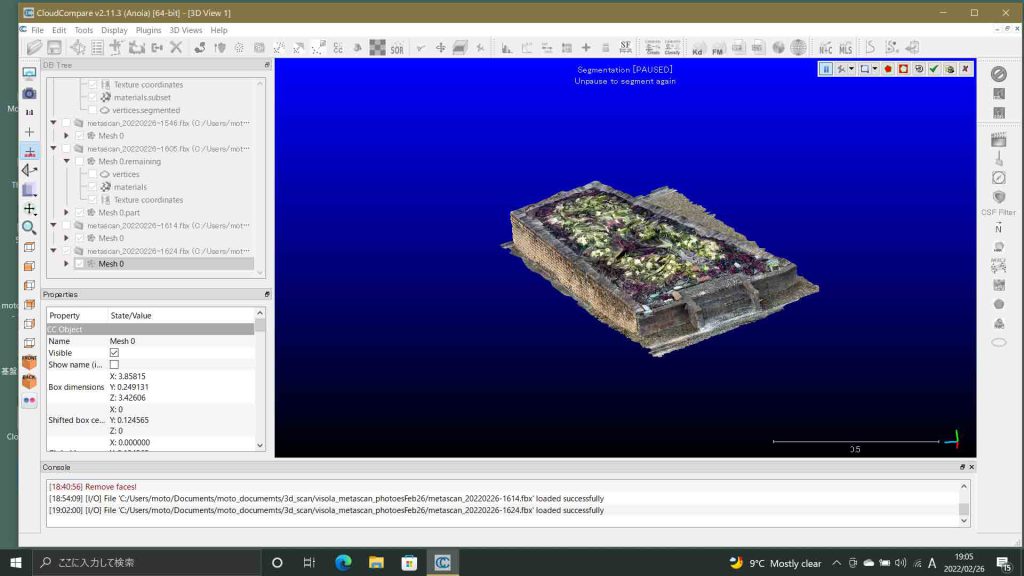
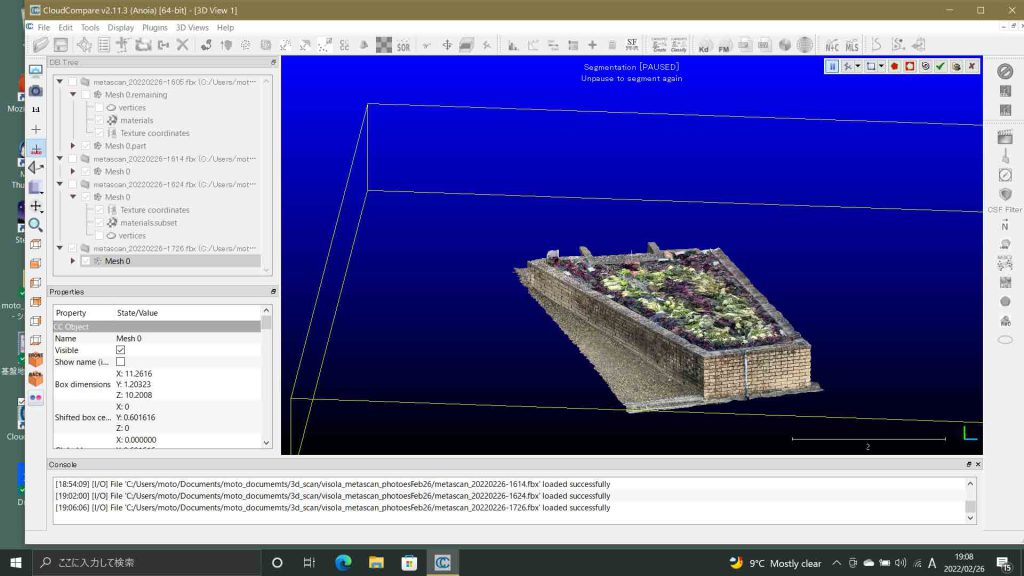
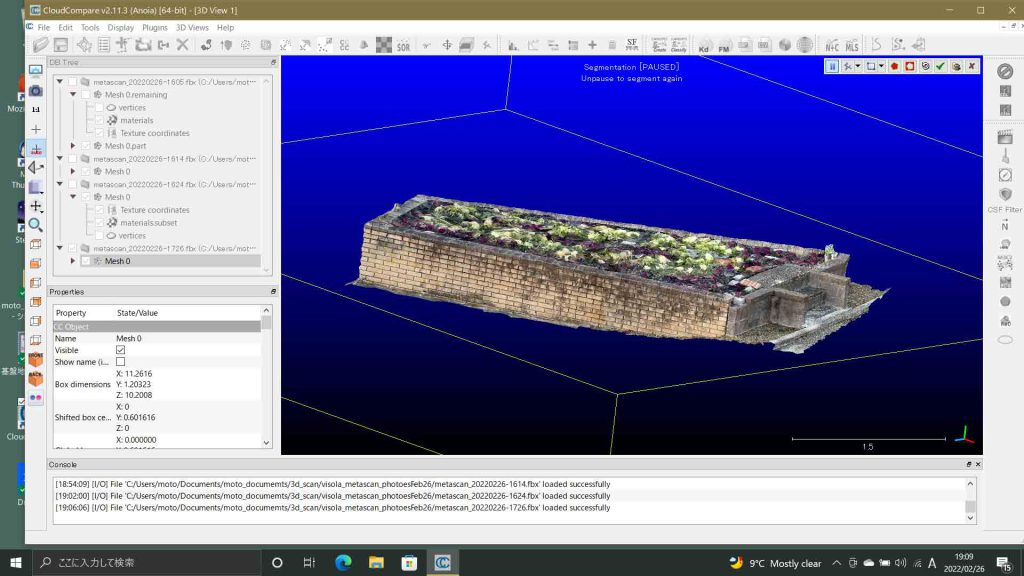
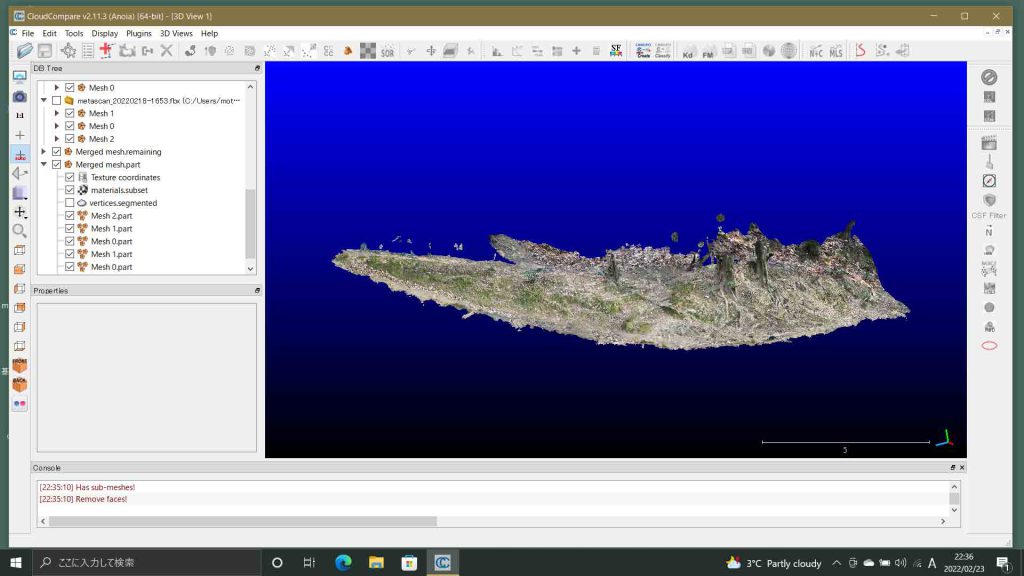
図2の☑️ボタンの機能は把握していなかった。これをクリックするとそれまで削除してきたゴミが復活したように見え,再度,ゴミ削除をしなければならなかった。上記リンクのマニュアルでは,”validate the current segmentation and create two clouds: one with the selected points and one with the others”とあるが,新たなcloudが見つからない。 しかしながら,次のページで,この☑️ボタンの機能を理解できた。Metascan写真画像測量モードの利用-2 での,「3 ヴィソラ東端の商店と集合住宅」の図9とその直後のテキストを参照。
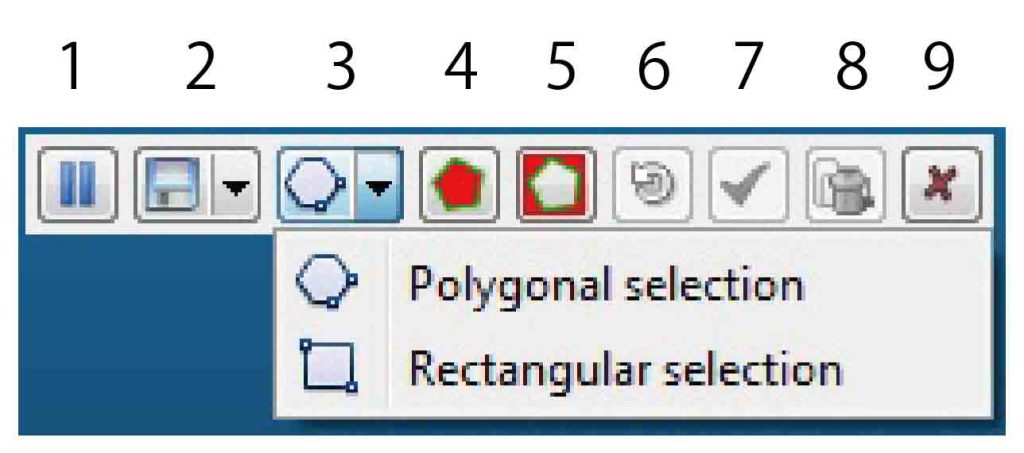
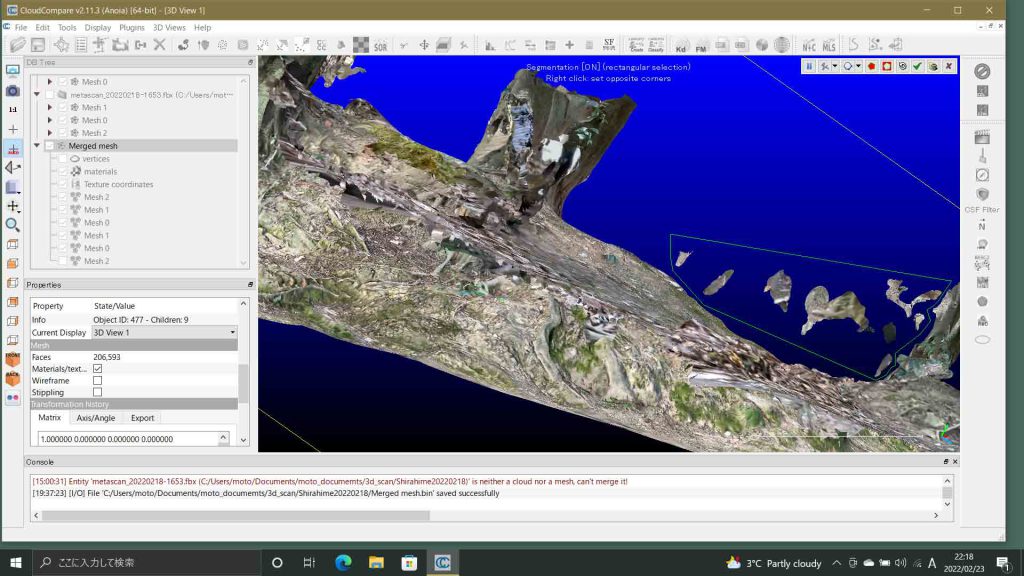
さて,GrassGISしか知らないぼくにとっては驚くべき技術が次に示されている。cloudのポリゴン(矩形選択ツールは対応しない,as a (flat) 3D polyline)が他のcloud向けにエキスポートできることである。それゆえ,インポートもできる。図2の2のフロッピーディスクのアイコンが見えるボタンである。このボタンの右手の↓をクリックしていると,現在選んでいるポリゴンや直方体をエキスポートする選択アイコンが現れるのである。エキスポートしたいcloudやmeshのある領域をポリゴン作成する直前,つまり右クリックする前に,図2の2の右手の↓を選んでフロッピーディスクにすると,エキスポートの体制が出来上がる。フィギュアなどのcloudを丸ごとエキスポートもできるわけだ。ぼくには今の所,関心が無いのでこの実験はここでは行わない。
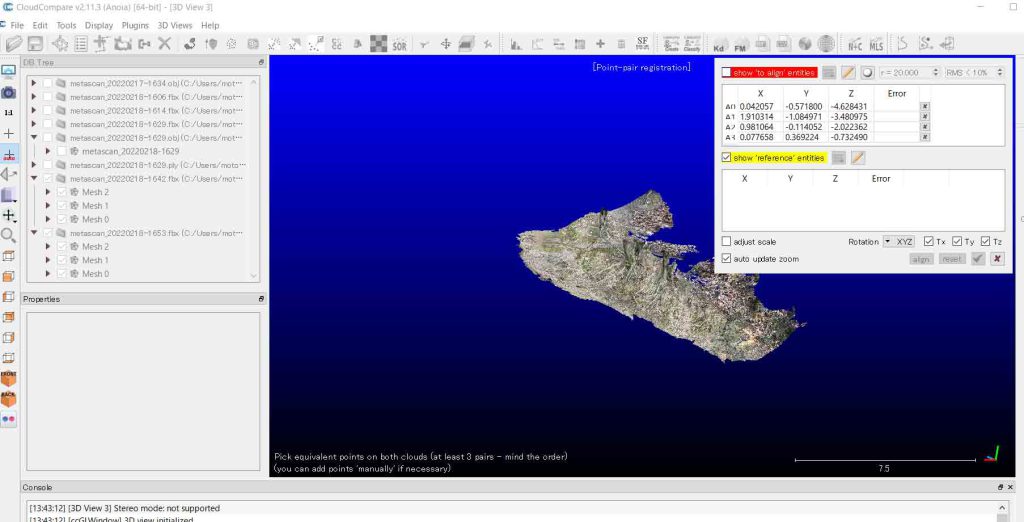
CloudCompareのマニュアルはよく整備されていて,CloudCompare Wiki (このサイト内検索は最低,Googleで検索した方が良い)がある。このalign コマンドを使う。もちろん,ぼくには初めての実行である。macの横にmouseマシーンでCloudCompareを実行しながら,このページを書いている。このalignページのノートに,バージョン2.6から,メッシュに対応したようだから,ありがたい。現在のバージョン2.11につながる技術であったようだ。
2 alignment 実行
実行手順に沿って記述してゆく。
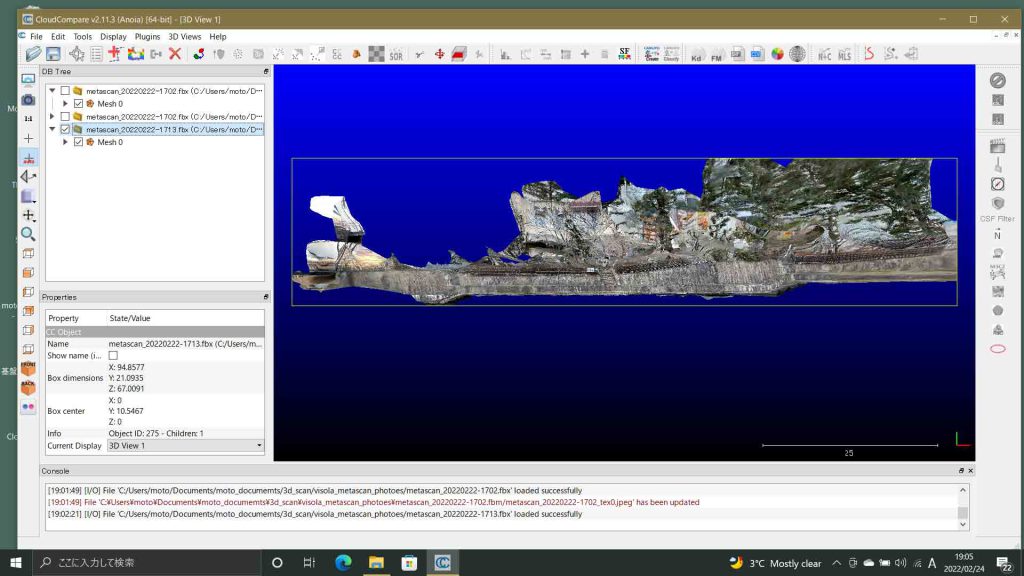
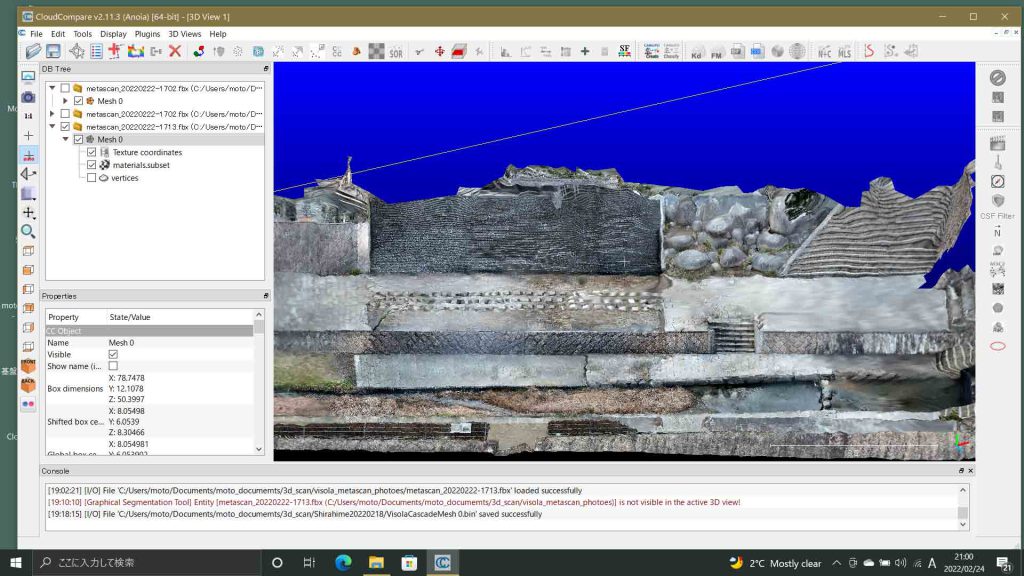
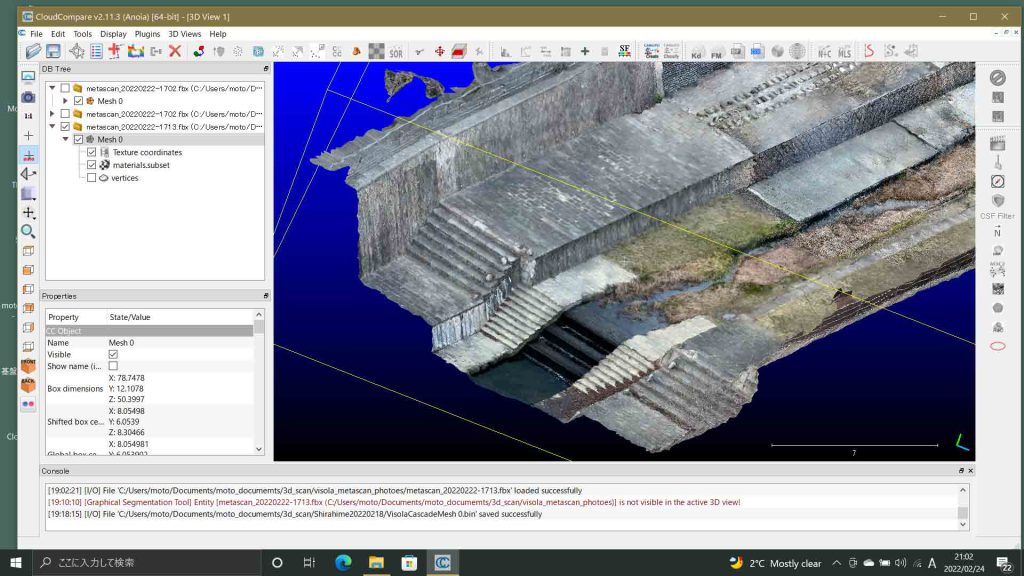
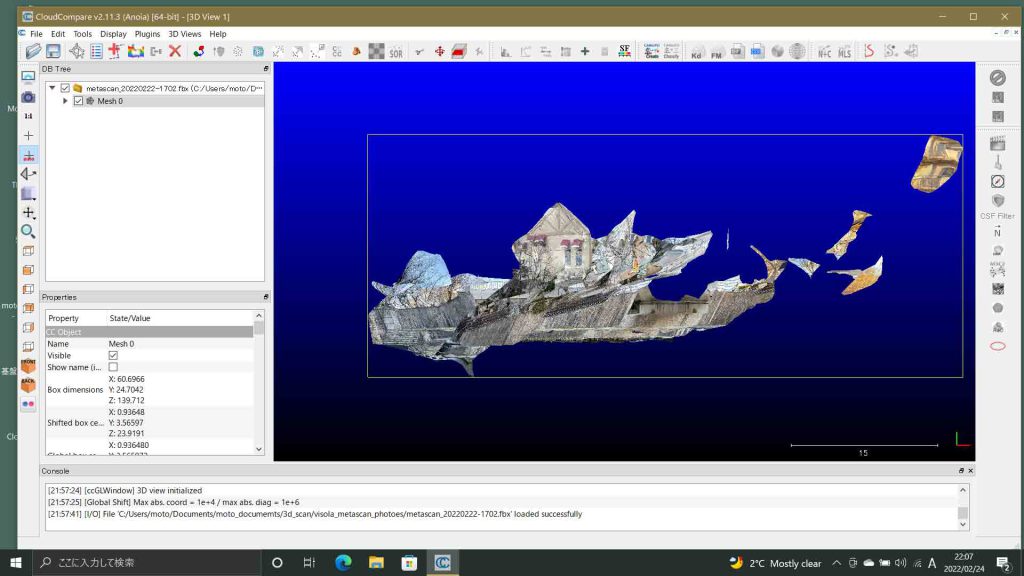
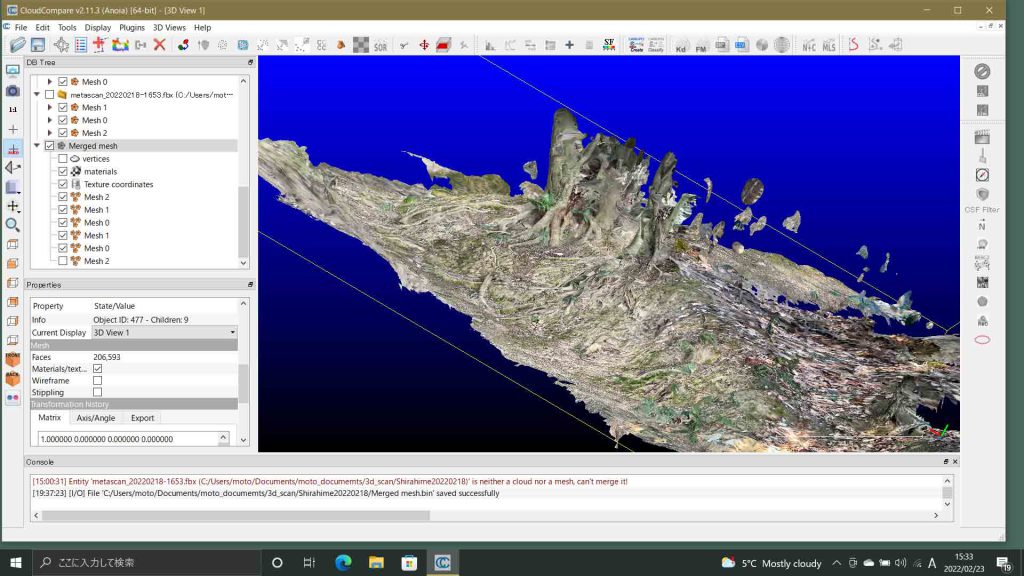
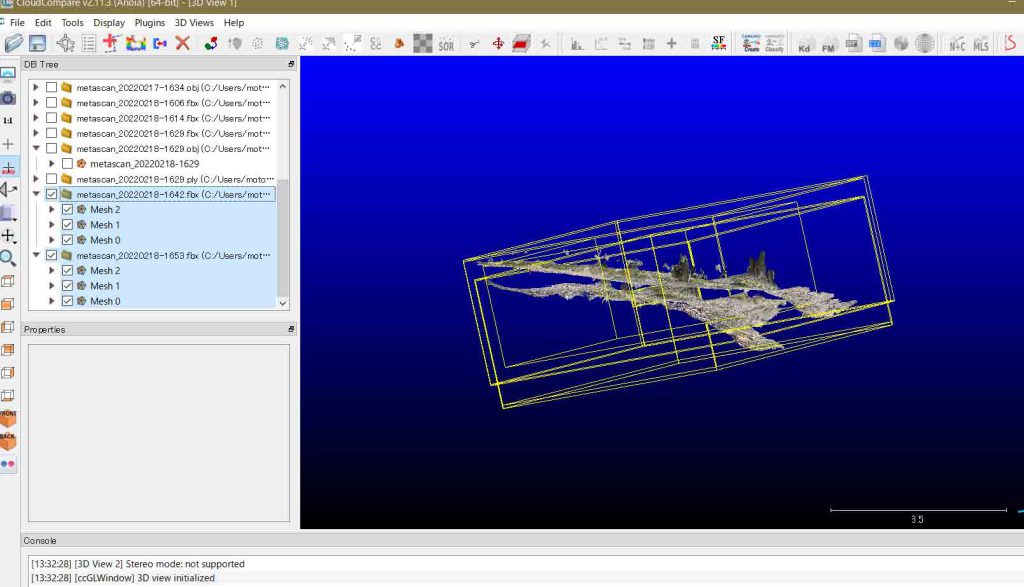
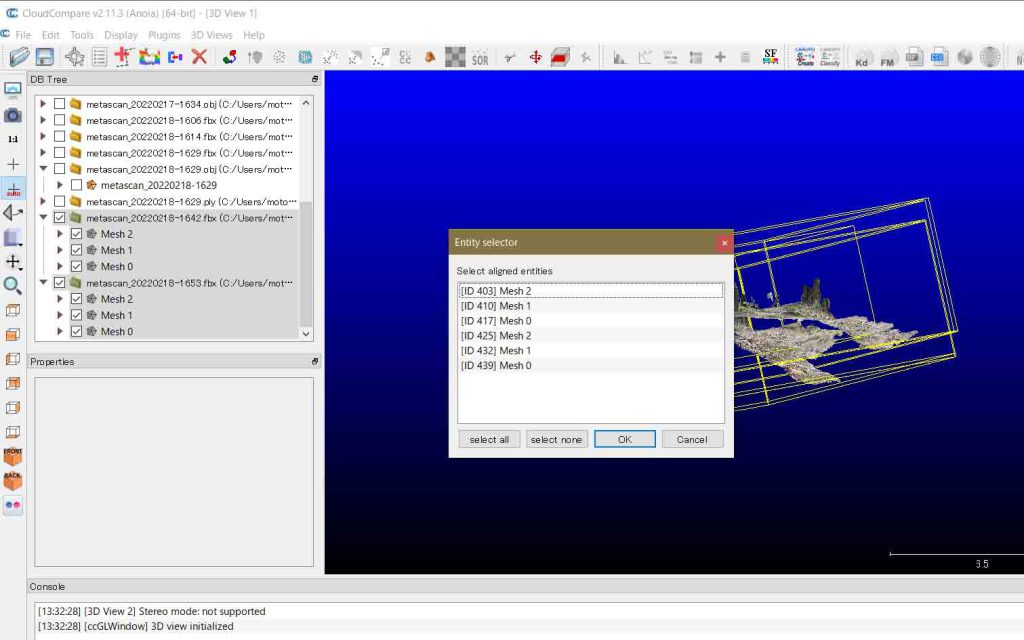
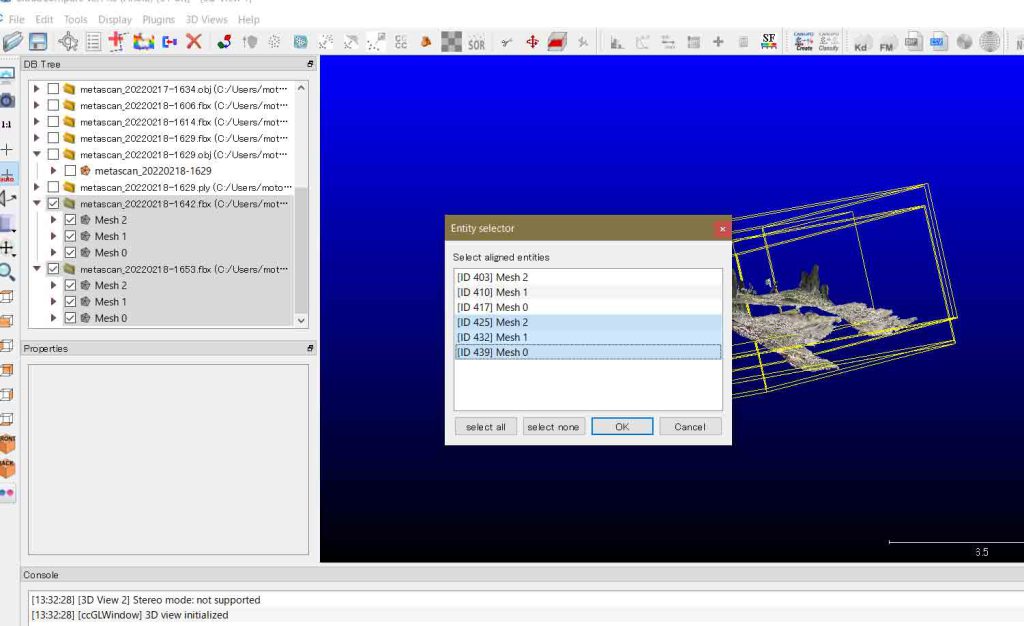
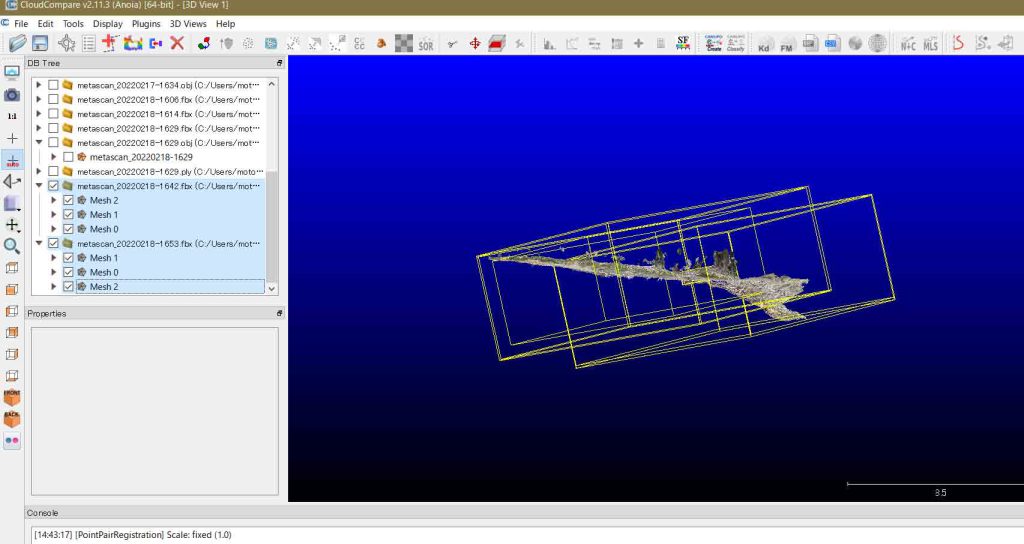
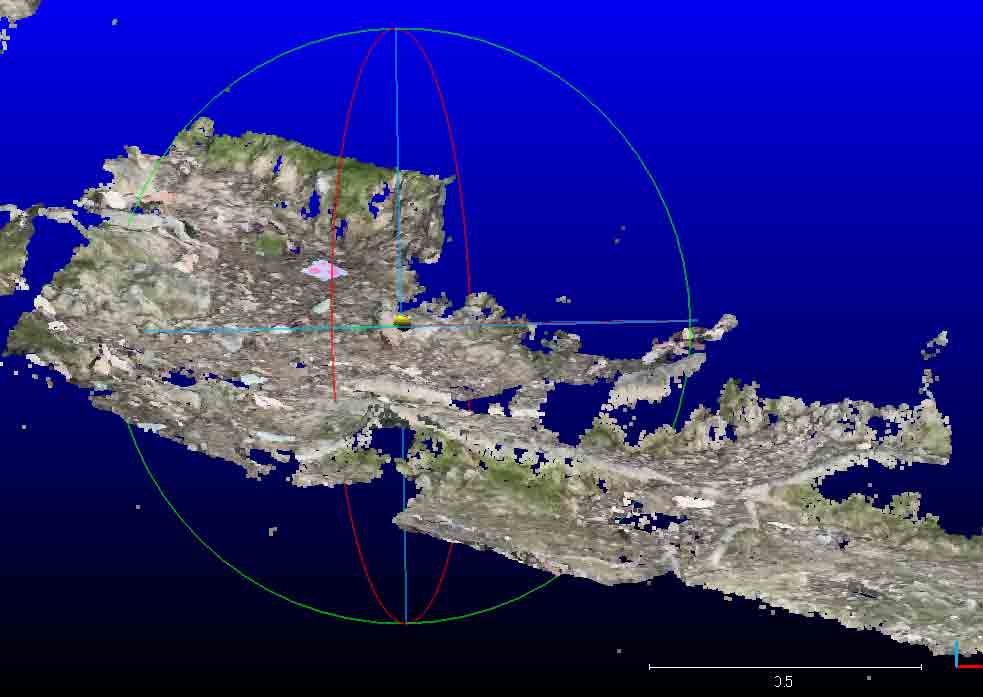
1 Role assignment,そして,alignment Reference(基準クラウド,つまりこのクラウドは動かさない)とaligned cloud(位置合わせしたいクラウド。レファランスの座標系に動したいクラウド)を決める。ここでは,調査地域で始めに実施した低い方の1642ファイルをレファランスとし,高い方の1653ファイルを位置合わせクラウドとする。図1でいうと,下方のクラウドに上方のクラウドを合わせることにする。
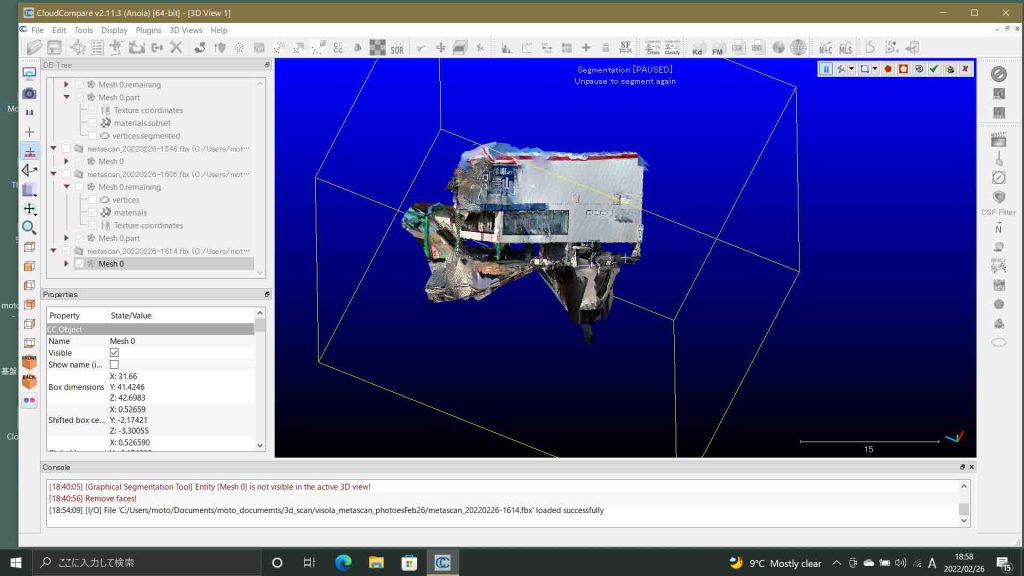
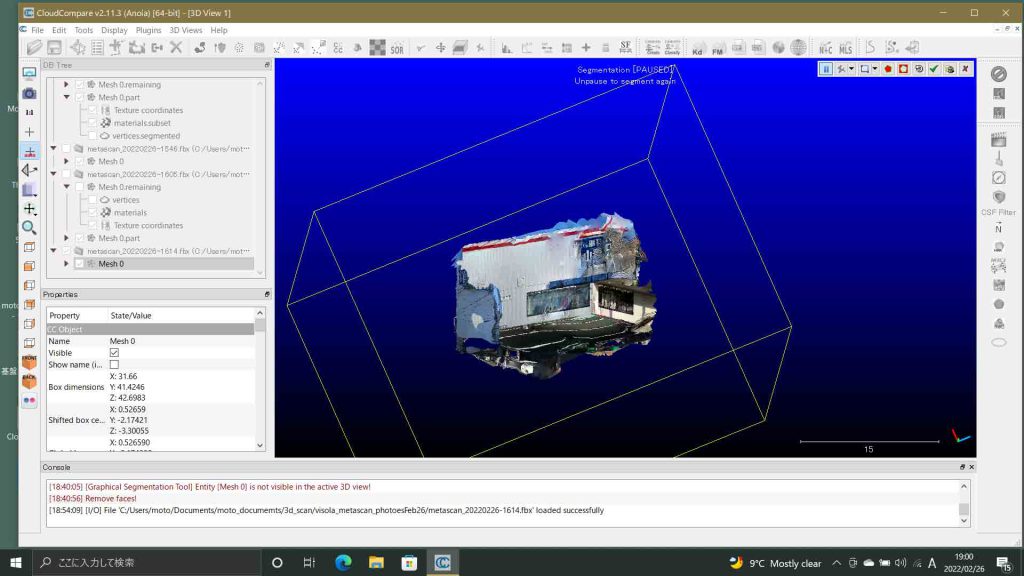
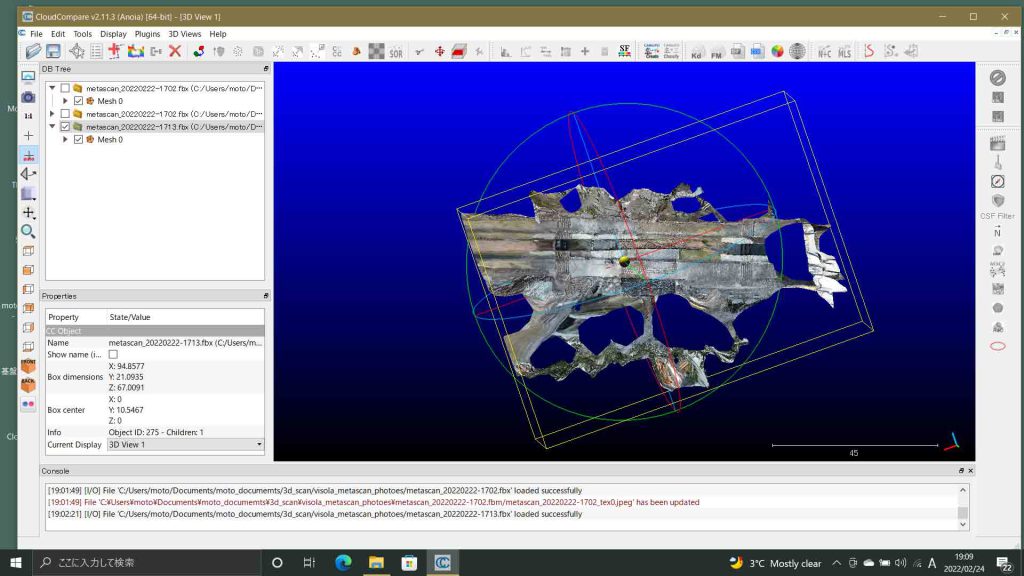
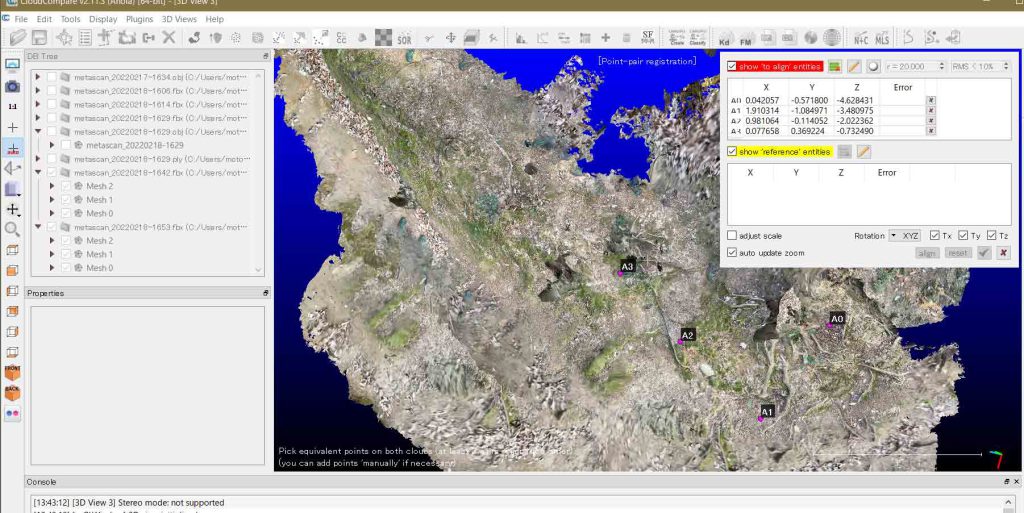
レファランスの方(平野側)のcloudは,アライメントする方(山側)のcloudに隠されている。そこで,この右上の表の最上部の赤く塗られた Show ‘to align’ entriesの左の☑️を外せば,アライメントする方(山側)のcloudが見えなくなって,レファランスの方(平野側)のcloudだけが見えるようになる。図6のように,レファランスcloudの全貌が自動で表示される。
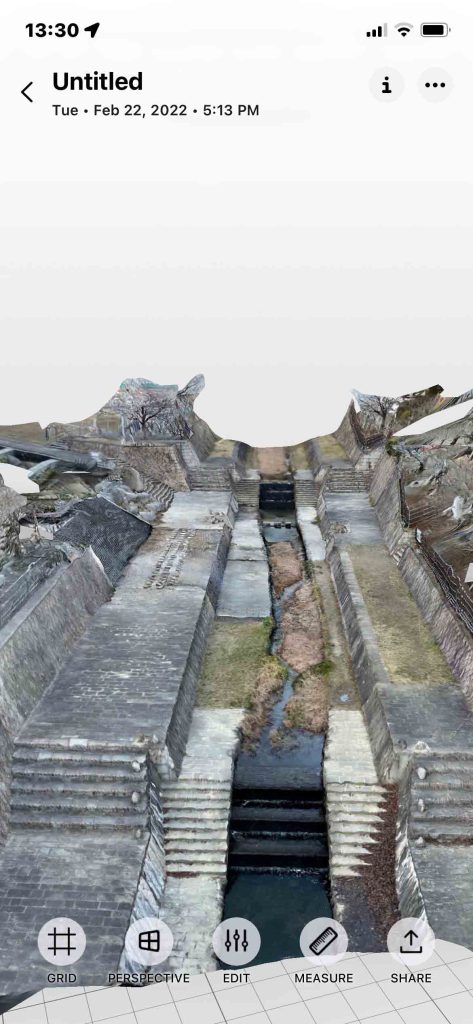
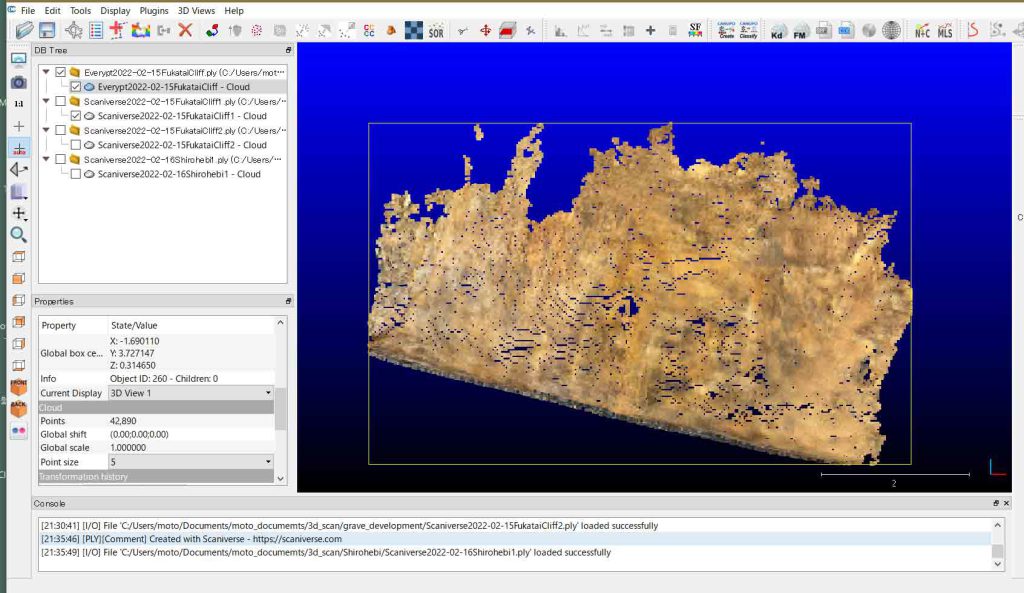
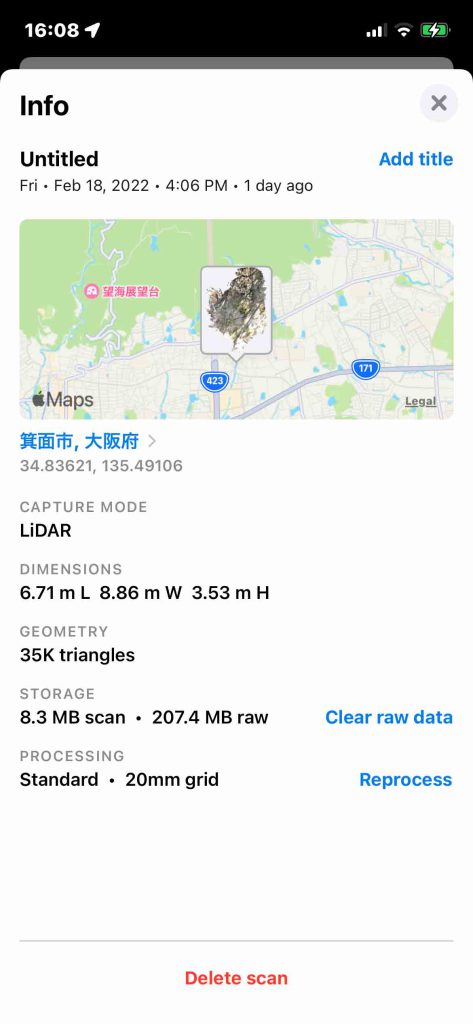
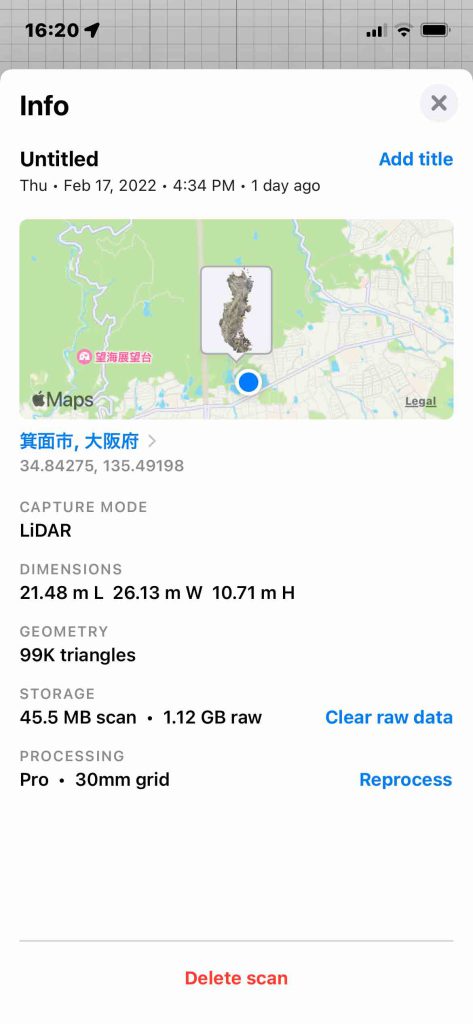
以上,スキャニバースは,丁寧に重ねてスキャンして高精細出力すれば,狭い範囲(この例では5 x 3 sq m)であれば,そして,FBX出力すれば,使用に耐えうると考えて良い。スキャンしてすでに感知記録された部分とされていない部分は,スキャン作業中,大変見易いので,使い易いソフトと感じられる。エブリポイントのように突然終了することも無かったと思われる。
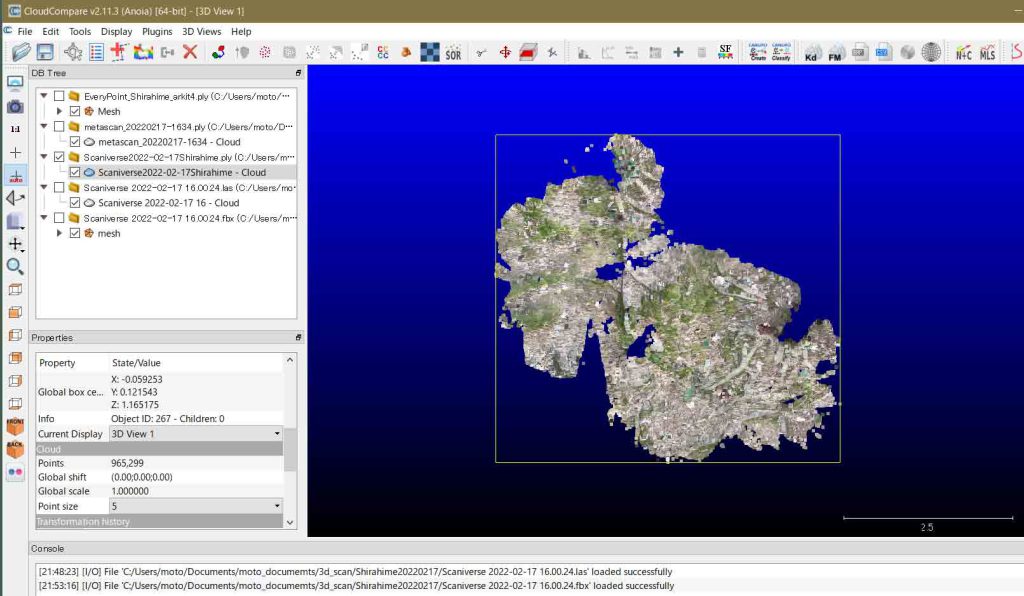
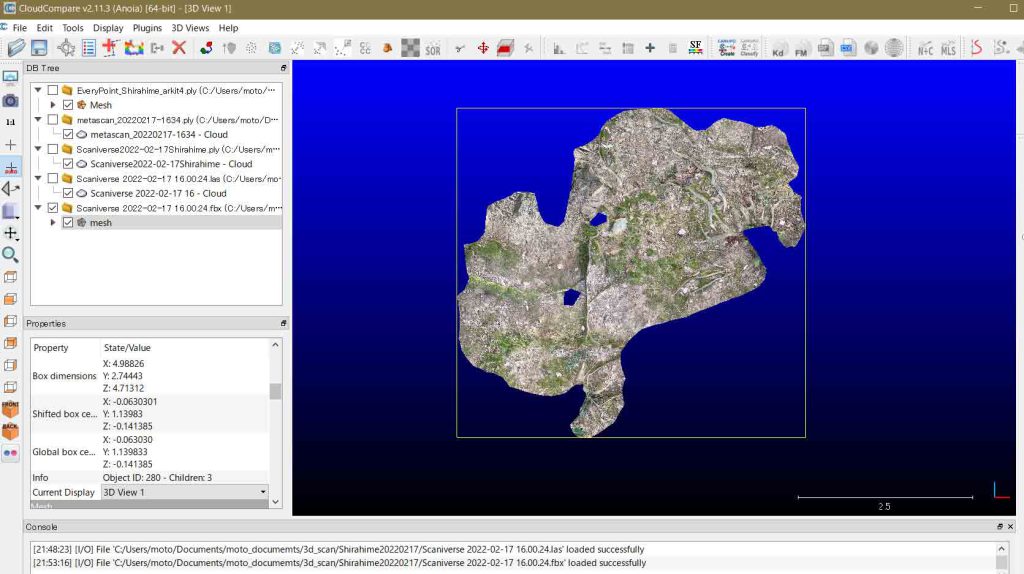
図22や図23と比べてほとんど遜色が無い。ラベルもハッキリ見える。CloudCompareで拡大して確認したが,高精細モードで出力したものと違いを感じないのである。それで,次のメタスキャンのサイト Terms of Use を調べてみた。FAQを次にそのまま掲載する。特に僕が参考になると思ったものを強調している。
We’re happy to answer your questions. Send us an email, ask a question in our community Discord server, or use the app’s Contact Support feature.
Frequently Asked Questions
What devices does Metascan run on? Metascan supports any iPhone or iPad from 2015 or later that runs iOS 14. LiDAR Mode requires a device with LiDAR Scanner, such as an iPhone 12 Pro or iPad Pro 2020.
Does my data stay on my device? LiDAR Mode processes completely on-device, while Photo Mode uploads your photos to our photogrammetry server for processing. The photos are deleted from the server as soon as your model is processed.Sharing a scan using Upload Scan uploads it to our web server. You can delete it at any time using Delete from Cloud in the app.
What does the Metascan Pro subscription give me? Available as either a monthly or annual in-app subscription, Metascan Pro unlocks the following features:Export to all supported file formats.Highest resolution LiDAR scans.Process 150 photo scans every 30 days.Metascan Pro has a one week free trial period.
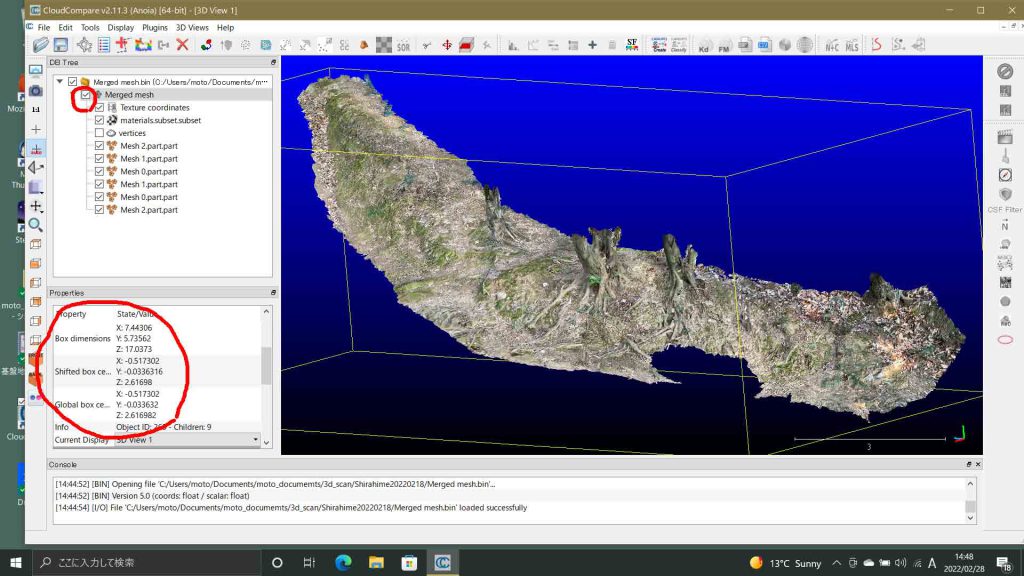
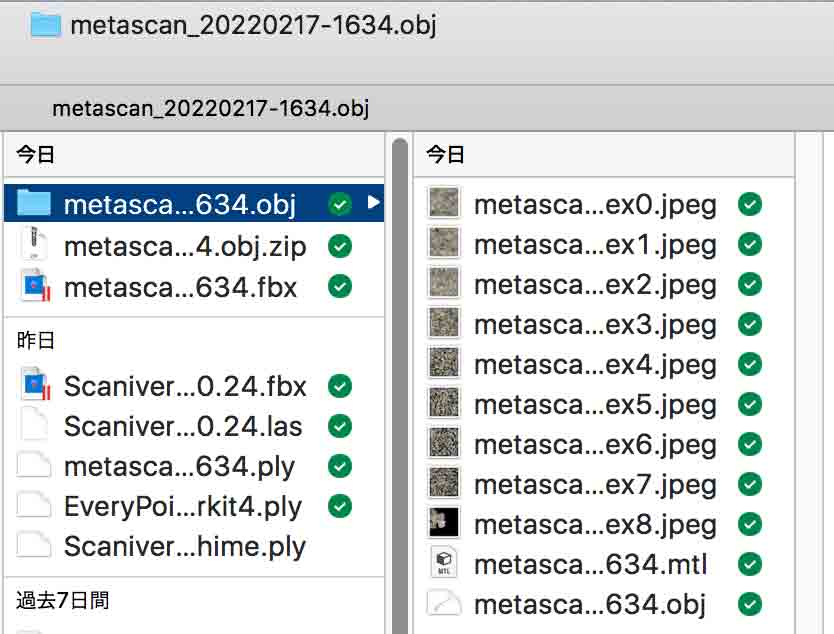
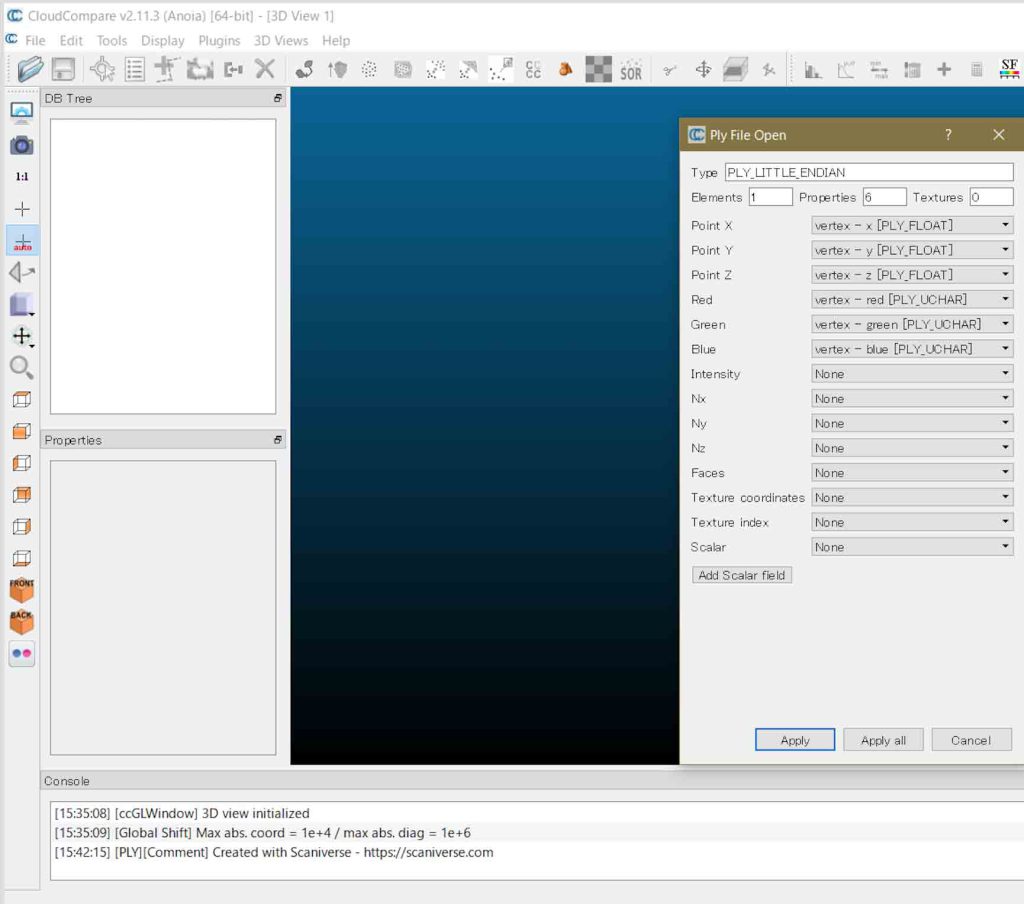
What file formats does Metascan Pro export to? Metascan currently supports: USDZ is an open standard, supported natively on iOS and macOS. FBX is a closed format, created by Autodesk and widely supported by 3D software applications and game engines. OBJ is a simple text-based format which is supported by almost all 3D software. Metascan stores the OBJ file and its JPEG textures in a ZIP file when exported. テキスト編集にはこのファイル形式がいいような? glTF is an open standard format for sharing 3D data on the web. Metascan uses the .glb format to embed all data in a single file. PLY is a simple format used for sharing point cloud data. Metascan stores the 3D position and color data in binary. LAZ is a widely used format for sharing point cloud data that is georeferenced so can be imported into a GIS system such as QGIS for analysis. 未だわからないけど,iPhone 12 ProのGPS機能を使って何らかの座標認識が行われるのかも知れない。その座標系は国土地理院のものではない。global boxって変なサイトもある。
When exporting multiple scans, files are stored in a single ZIP file. Contact us if you’d like to see additional formats supported.
What units are exported models measured in?
All coordinates are expressed in units of meters. How are model textures exported? Texture maps are stored in one or more square RGB images at maximum 4096×4096 pixel resolution and compressed with JPEG to 92% quality level using 4:2:0 Chroma subsampling.
How do I take better LiDAR scans? Taking good scans requires practice. Here are some tips: Scan bright, well-lit areas and try to avoid capturing small objects. Make sure your camera lenses are clean. Wipe them with a cloth before starting. Check that the tracked feature points (colored dots) appear stable before you start scanning. Aim to keep between 0.5 to 3.0 meters between you and the surface you're scanning. Avoid moving too quickly – it causes camera motion blur. Avoid transparent, shiny or reflective surfaces such as windows, metal or mirrors. Avoid any moving objects, people or animals.
How do I take better photo scans? Photo Mode uses photogrammetry which relies on matching image features between photos to estimate distance. Here are some tips to improve your scans: Non-transparent, unreflective objects with varied surface textures scan best. Capture all sides of your object in a series of orbits. Adjacent shots should have 70% overlap or more for alignment. Minimize motion blur by holding your device steady while taking a photo. Make sure you have even, good lighting and a stable environment for scanning. If scanning outdoors, cloudy days work best. 引用終了————————————————
CloudCompare 3D point cloud and mesh processing software Open Source Project http://www.danielgm.net/cc/ このサイトの始めにニュースレターの定期購読の登録ウィンドウがある。登録して半時間ほど経つがまだリアクションがない。24時間経って返事が無かったら問い合わせよとあるけど面倒だな。 ヘッドメニューからDownloadをクリックして,Latest stable release 2.11.3 Anoiaのうち,CloudCompare 2.11.3 Windows 64bitsのアイコンにmouseを載せると,Installer versionとArchive versionの二択になっており,Installer versionをダブルクリックする。144MB。ファイルを開く,をダブルクリック。変更を加えることを承諾が2回だったか。Setupウィンドウが出る。C:\Program Files\CloudCompare,にインストールされ,再起動画面が出て,強制的に再起動を選ぶ。
2 CloudCompareのメニュー構造
CloudCompare Wiki : ここにいわば,凡てが説明されているのであるが,プログラム開発者によるものなので,利用者はただ利用したいだけという視点が欠落しているとも感じられる。
PointCloudデータ編集可能ソフトCloudCompare概要: point cloudの専門家の簡潔な説明がある。CloudCompareでは,「ファイルを開く」が import のことで,「保存」が export のこと,という説明(?)は目からウロコであった。CloudCompareを使っていて驚くのは複数のファイルをimportしてファイル間の算術ができることである。compareというよりcloud間のcalculationができるということである。
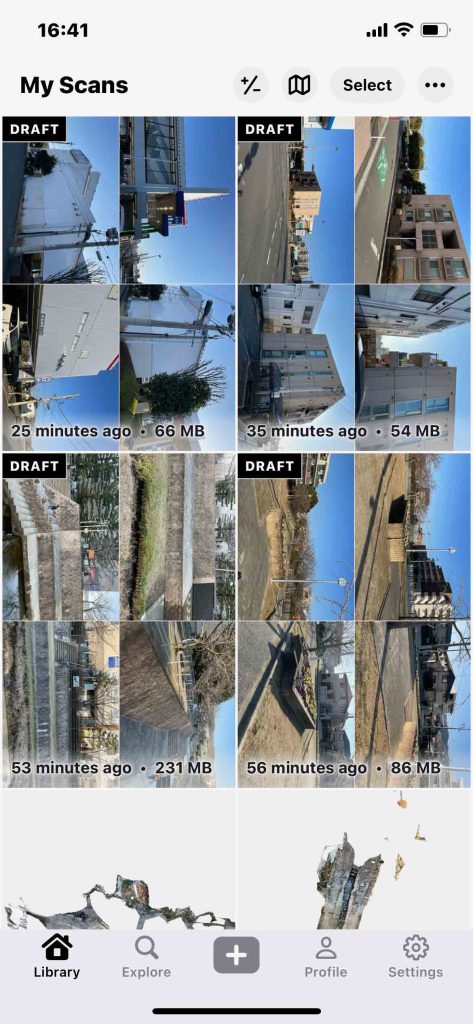
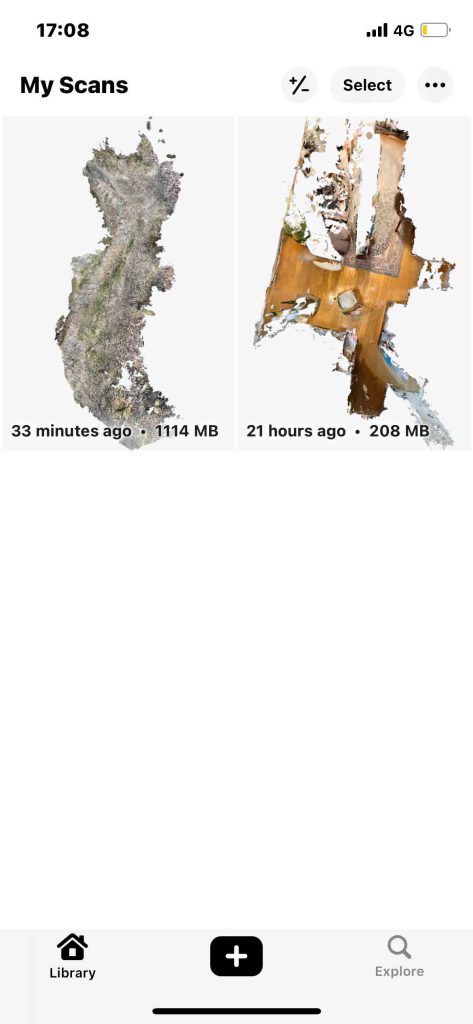
d 不要なデータを削除: iPhoneで3Dスキャンした場合の最終3DモデルデータはLiDARスキャンで平均15MB、最大50MB程度(最高品質で処理した場合)、フォトグラメトリだと平均nnMB、最大nnMB(最高品質処理)となります。RAWデータは結構重くてLiDARスキャンだと50~300MB、フォトグラメトリモードだと50~400MB程度となります。RAWデータを使用するのは3Dモデルを構築する段階のみなので、モデル構築に問題がない場合はRAWデータのみを削除することが可能です。そのため削除前は200MBあったデータ容量も15MB程度まで減ります。
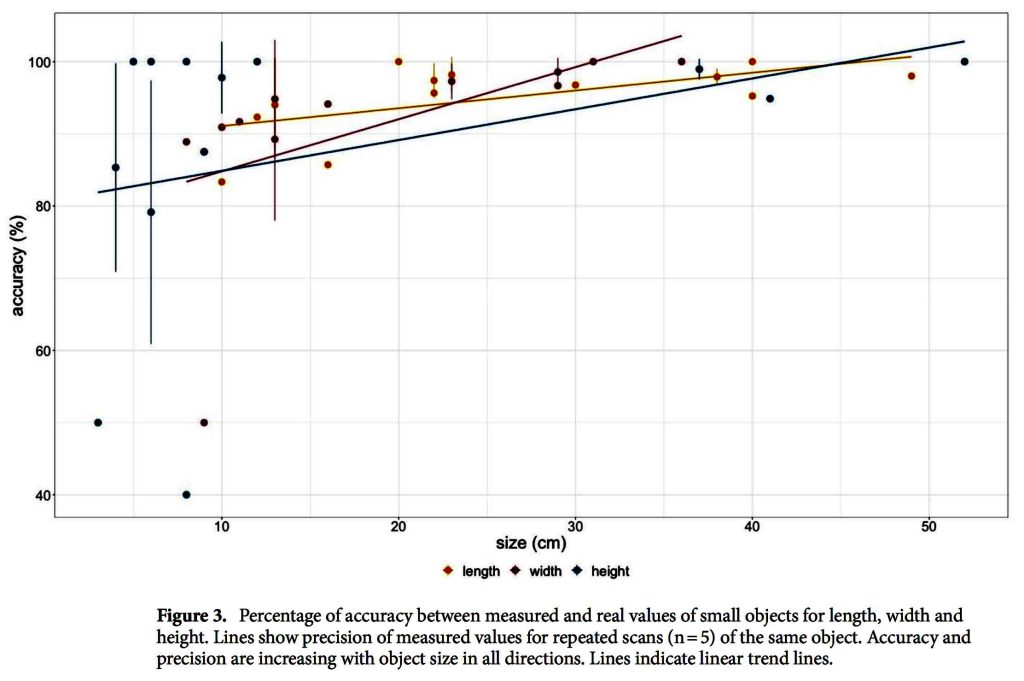
Traditionally, topographic surveying in earth sciences requires high fnancial investments, elaborate logistics, complicated training of staf and extensive data processing. Recently, of-the-shelf drones with optical sensors already reduced the costs for obtaining a high-resolution dataset of an Earth surface considerably. Nevertheless, costs and complexity associated with topographic surveying are still high. In 2020, Apple Inc. released the iPad Pro 2020 and the iPhone 12 Pro with novel build-in LiDAR sensors. Here we investigate the basic technical capabilities of the LiDAR sensors and we test the application at a coastal clif in Denmark. The results are compared to state-of-the-art Structure from Motion Multi-View Stereo (SfM MVS) point clouds. The LiDAR sensors create accurate highresolution models of small objects with a side length> 10 cm with an absolute accuracy of ± 1 cm. 3D models with the dimensions of up to 130 × 15 × 10 m of a coastal clif with an absolute accuracy of ± 10 cm are compiled. Overall, the versatility in handling outweighs the range limitations, making the Apple LiDAR devices cost-efective alternatives to established techniques in remote sensing with possible felds of application for a wide range of geo-scientifc areas and teaching.
長さ10cm以上であれば ±1cmの精度で測量できるということで,ぼくが今想定している研究対象の微地形については,厳しい感じがある。フィールの広がりとしては,海岸線沿いに距離130mで斜面幅は15m,高さは10mぐらい(Scanning of the entire coastal clif and the beach at Roneklint (length: 130 m,width: 15 m, height: 10 m)のものであれば, ± 1 cmの精度とあり,微地形そのものではなくて,広がりの視点で言えば,測量に問題がないということになる。
and recordings of the clifs were obtained with the ‘EveryPoint’ app by URC Ventures Inc. version 2.5 in the ARKit LiDAR Mesh mode. In that scanning mode, a mesh of the close surroundings (< 5 m) is generated based on the iPhone’s LiDAR sensor. At the same time, the app is taking a video with the iPhone’s camera. Data recoding is performed by walking along the beach close to the water line pointing the phone side wards of the moving direction towards the object of interest. Close surroundings like the beach are captured by the LiDAR sensor, whereas objects further away like the clif, are only recorded in the video. Both video and LiDAR mesh were uploaded to EveryPoint’s servers where their own photogrammetry algorithm is creating a point cloud out of stills cropped from the video and the LiDAR mesh. Te user can download the point cloud that combines images and LiDAR data as well as the source images when processing is done.
EveryPointのサーバー利用の費用については書かれていない。これはこのページの後ろで示したいと思う。なお,次のような記述があるので,世界測地系との対応についても,用意されているようである。 In between the scanning dates, GNSS tagging was added to the app’s functionalities.
例1 A impressive scan of a stump scanned by one of our iPhone app beta testers @cretakano. The resultant point cloud is so dense that it looks like a solid surface. What could you do with dense point clouds of objects that you scanned with the iPhone in your pocket?
例2 Over the summer one of our team members had a chance to hike Yosemite and capture this beautiful section of boulders and rock faces at Nevada Falls. Imagine using an iPhone for scanning rock formations for geological studies.
EveryPoint Help ユーチューブリンクがあるが最悪。センスゼロ。次の文だけでいい。大変参考になった。ゴチと日本語訳は筆者。
Scanning Tips Avoid rotations in place – It’s easy to stand still and look around, but this doesn’t give good 3D results. Instead, keep your feet moving, and when you need to turn in a new direction, make sure that it’s an arc (back up and then arc if needed).
Avoid motion blur(被写体が動いたために生じるブレ) in the video – In indoor or dimly (薄暗い明かりが灯っている)lit environmentsit can be easy to have motion blur in the video (as the camera’s shutter is open for longer periods of time). Move a little slower and avoid shaking or moving the phone too quickly.
Try to keep diverse scene elements(多様なシーン要素) in view – The 3D reconstruction works best when there are a variety of unique, high-contrast objects in the scene. Avoid continually filling the camera’s field-of-view with entirely white walls, looking straight at the sky, etc.
Maintain strong connectivity between near and far views – When scanning a scene, we usually get the most complete results when you keep your distance from what you’re scanning and try to make sure that there are lots of unique things in view. To add detail to a reconstruction, you then can get closer at various parts, but you need to make sure that there is some unique object/texture in view in order for the image tracking to latch onto(しがみつく). By combining near and far views, you can try to get the best of both worlds: the far views of the whole scene help tie everything together and provide a nice skeleton of connectivity for the reconstruction, and the near views can add detail (as long as those near views are easily distinguished and share similar content with the far views).
Limited LiDAR range – The LiDAR sensor in the iPad Pro (or iPhone 12 Pro) only has a 5 meter range. So, while standing back to capture the whole scene can be really helpful, in order to test out the LiDAR you will likely want to get within 5 meters to see how it performs (you can check the live depth view in the corner of the app to see what is currently visible by the LiDAR sensor).
Variety of viewing angles – When scanning an object or scene, it’s best to view it from a variety of overlapping angles and distances. You want to maintain strong connectivity between those different views, but having a large variety is important in order to generate complete and accurate results. This is especially important for flat objects, as only scanning a flat surface from a single, constant distance will result in issues with the reconstruction.
ネットサーフィンをしたが,結局,EveryPoint Video + LiDAR Fusion,については,見つからなかった。また,改めて,EveryPoint,に関する情報も希薄であった。まあ,この種の情報に対する関心とビジネスが厳しいものであると感じた次第で,ある程度,クラウドなどの費用は負担したいと思うようになった。
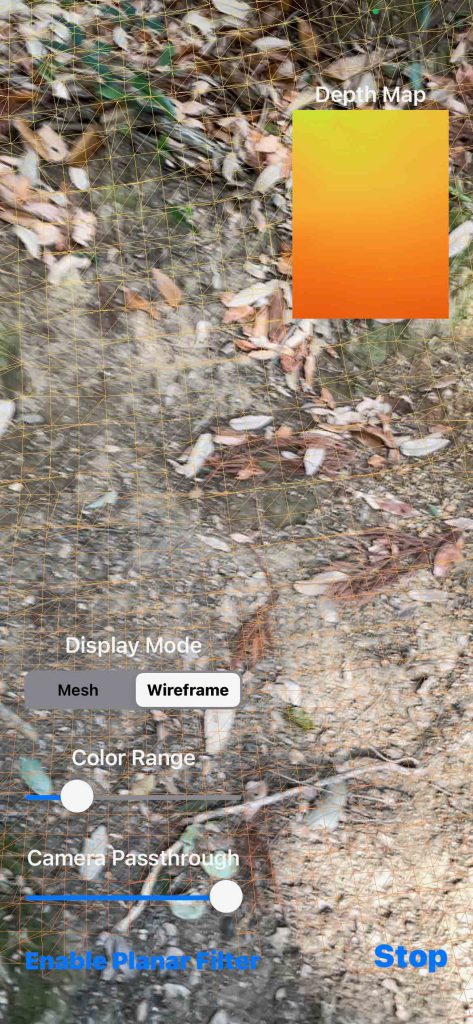
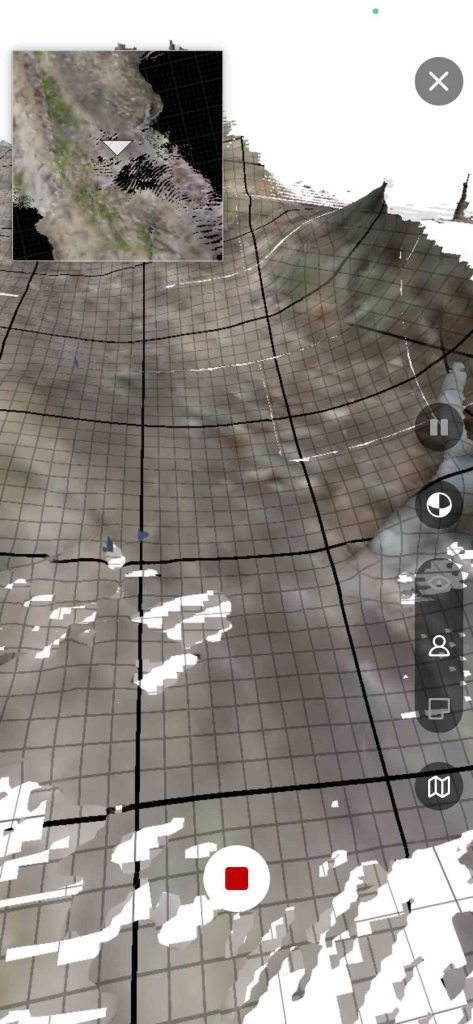
a iPhone 12 Pro上のスキャニバースアプリのロゴをタップすると,すぐに 赤地の “Create Scan”が最下部に現れるので,それをタップすると,ムービーを撮る際の赤ボタンが現れる。これをタップするとスキャンが始まる。終了するのは,ムービー同様,赤ボタンを再度押せばよい。 b エブリポイントよりは高速で,スキャン済みの領域は,通常のムービーを撮っている時のように画像が現れる。スキャンが終わっていない場所は斜めの赤白縞模様になっている。iPhone 12 Proを止めずにゆっくりとiPhone 12 Proを移動してゆくのがいいようだ。エブリポイントよりかなり高速だ。撮影した場所でまだ記録されていない場合,そこまで戻っても問題が無いようだ。 c 終了すると,自動で処理する際の3択が出てくるが,今回の場合,昼閒の無照明の室内であるが自動で認知していたので,そのままその指示に従った。今日,Feb. 12では,屋外での撮影で,高精度の方を敢えて選んだ。多少,保存に時間がかかったか。
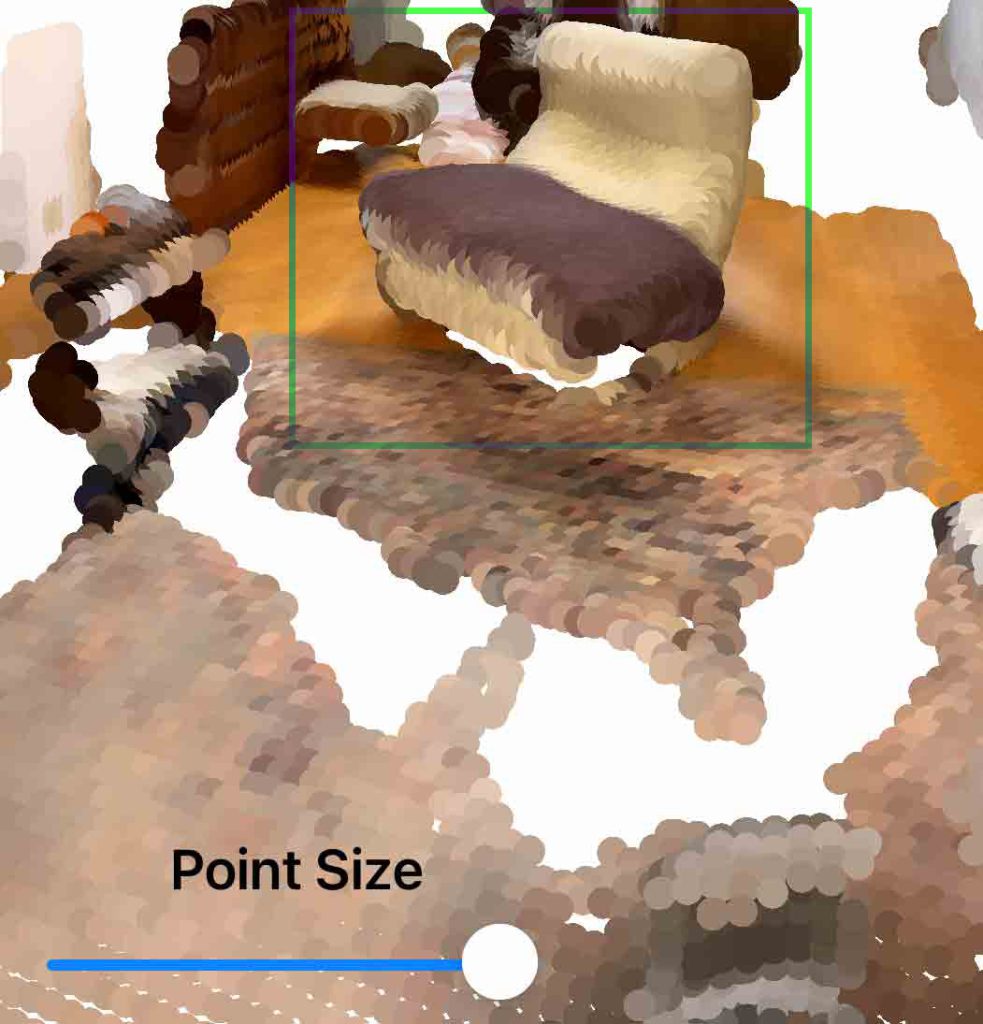
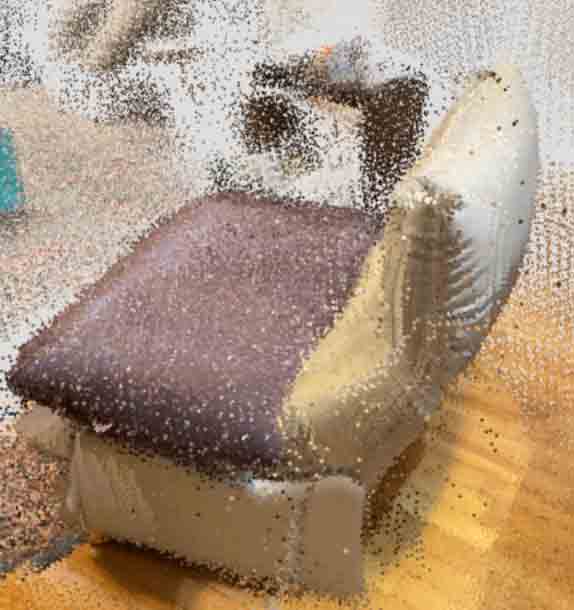
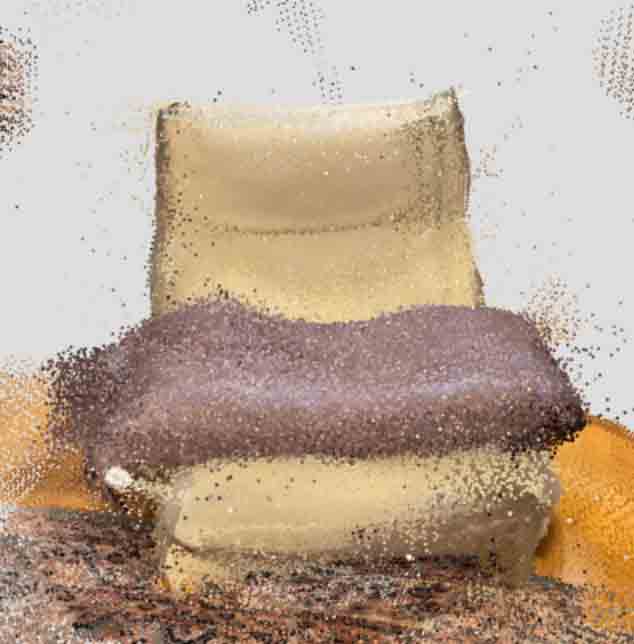
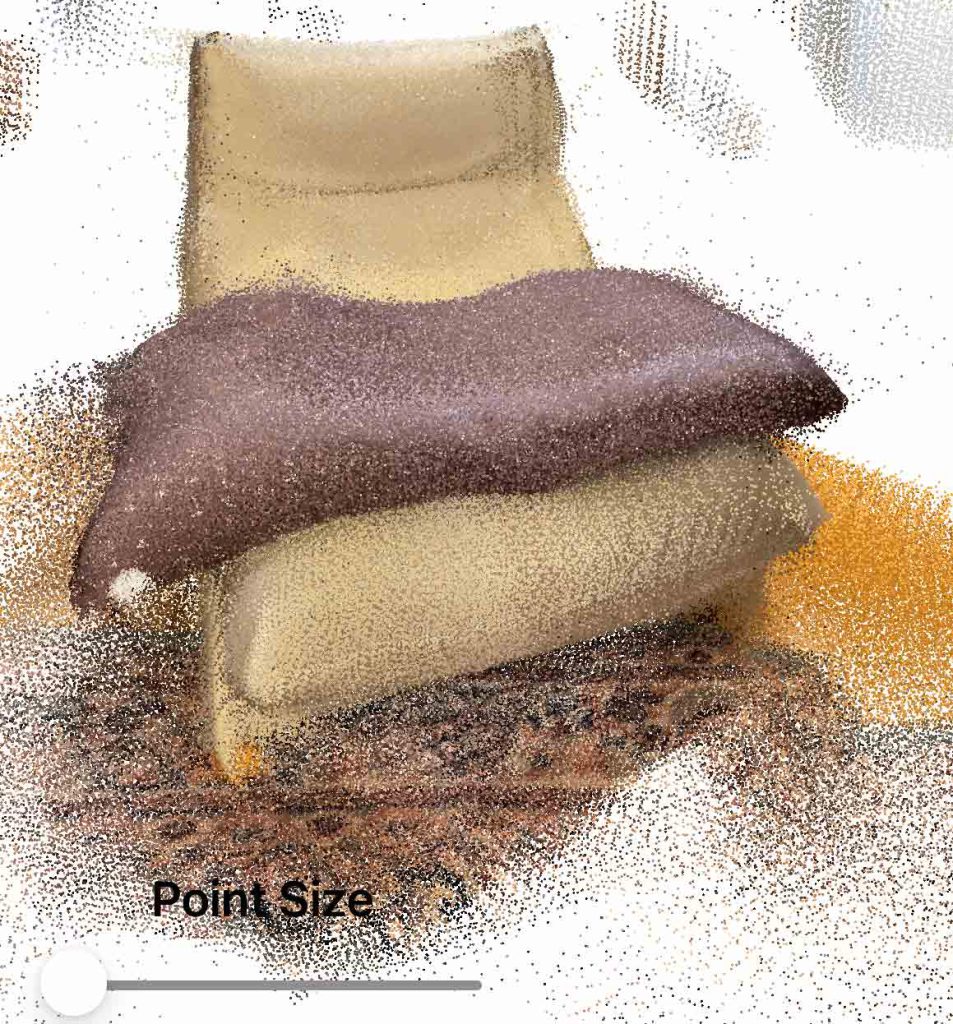
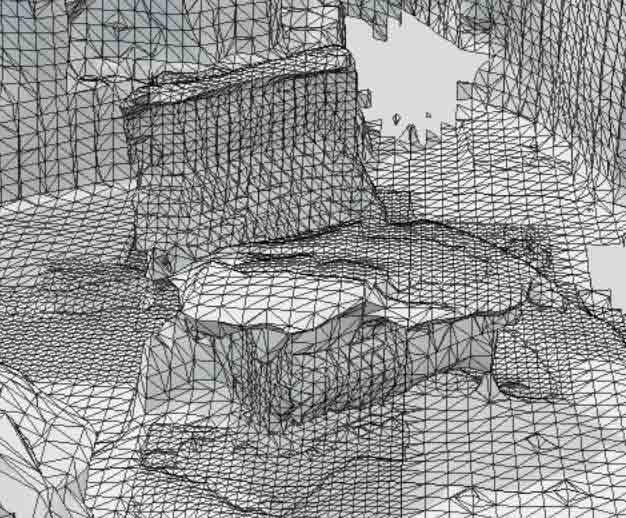
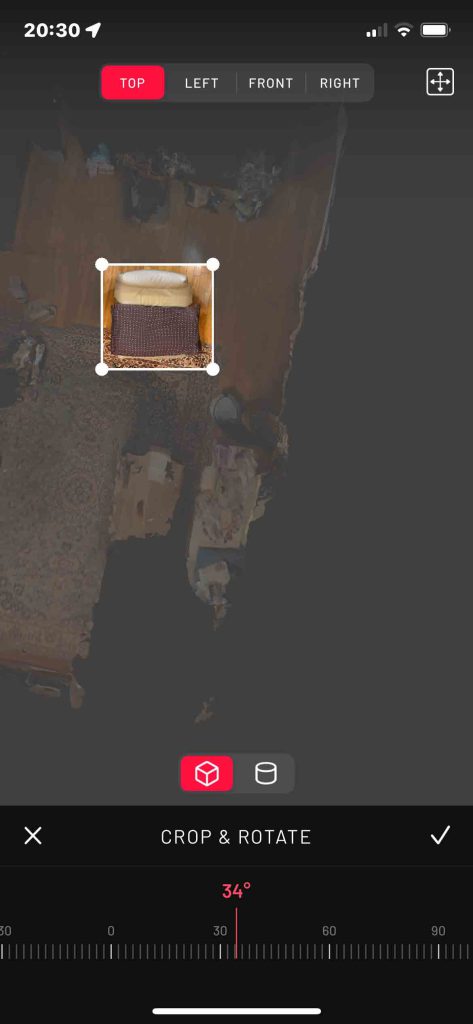
図17 シングルソファの範囲を上から
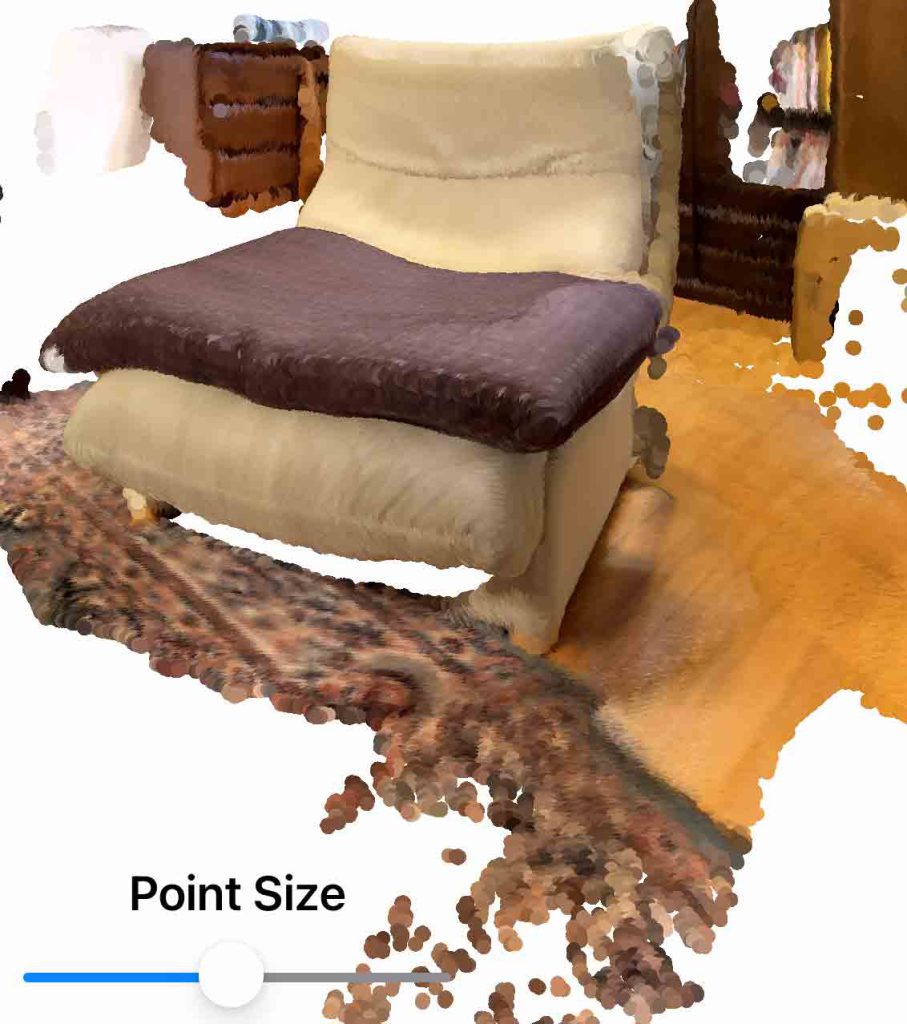
図18 ソファ域が拡大
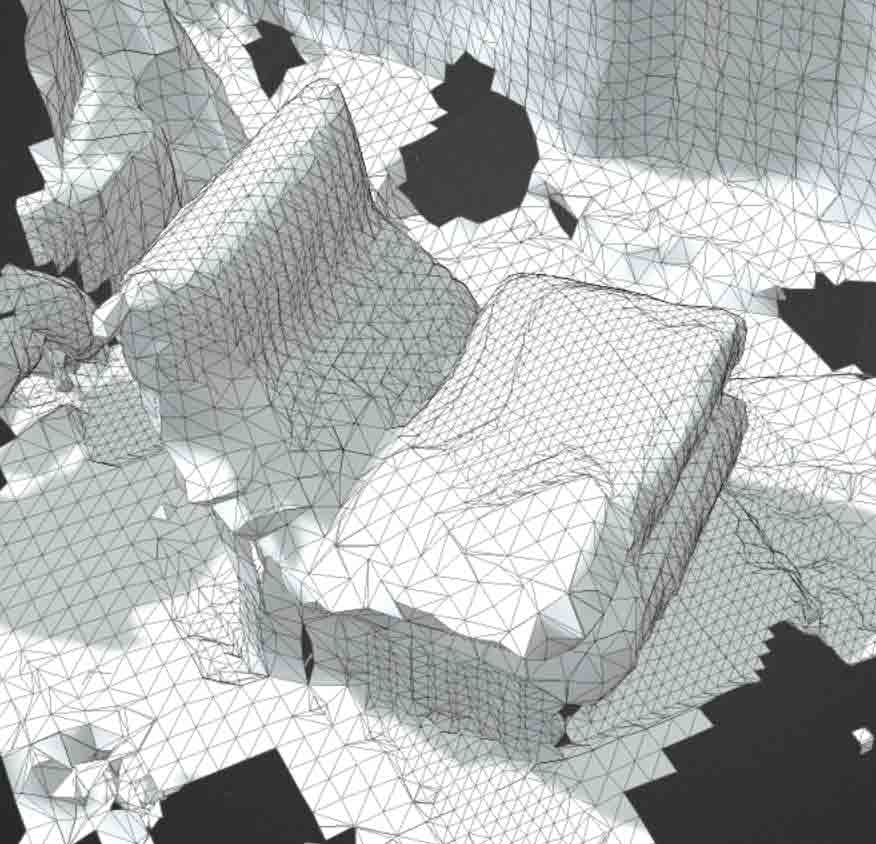
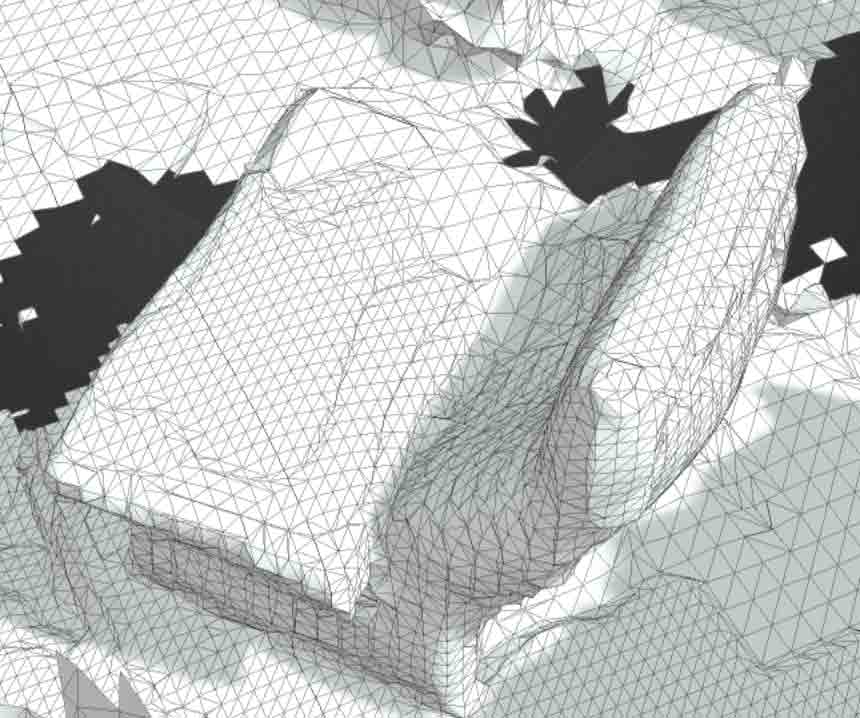
d 図17に示した画面の一つ前の画面の際に,最下部のメニューで,Editを選ぶと,自動で画像が鉛直になって真上からの視野となり,トリミングの枠も現れる。図17のように,下部にCROP & ROTATEのスケールが現れ,それをスライドすると画像が求める位置を取ってくれる。トリミングの枠をこのソファに図17のように近づけて,右下の✓記号をタップすると,図18のように枠内が拡大表示される e Editアイコンを選んで実行すると,文字”Save”が現れるので,それをタップする。
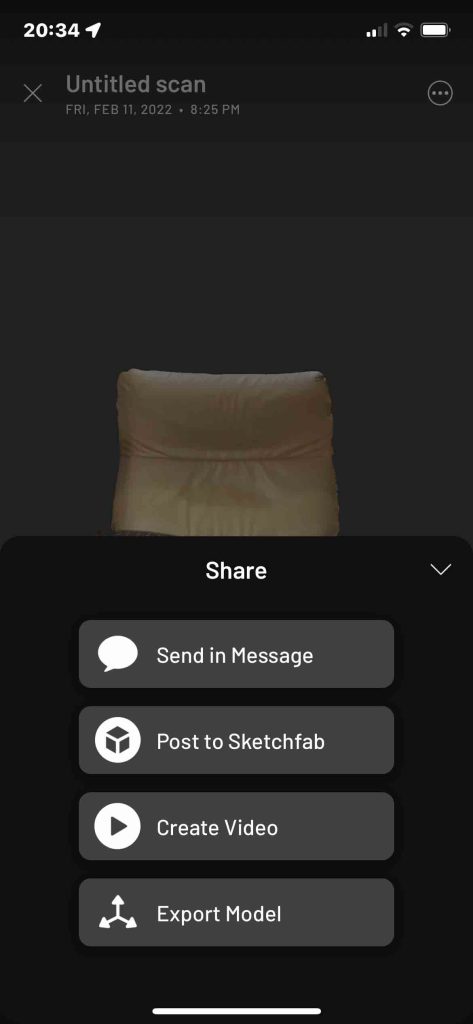
図19 shareの選択肢
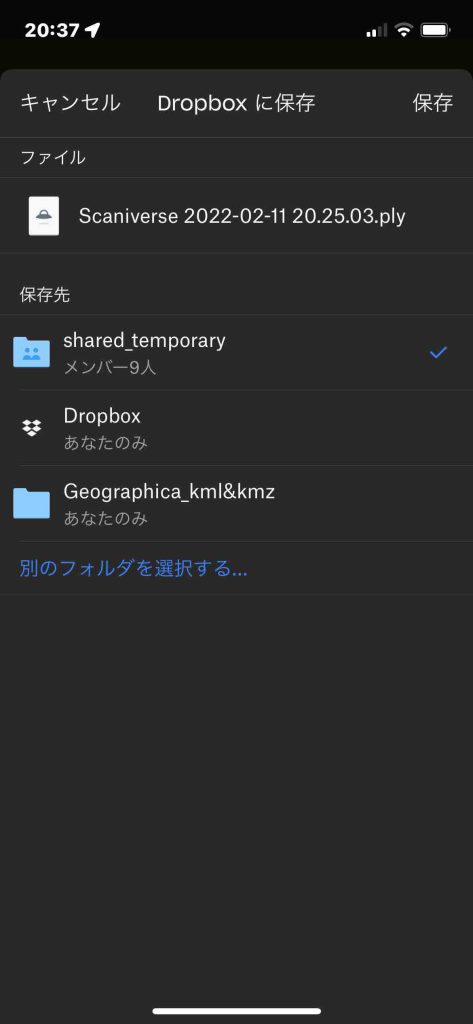
図20 Export ModelでのDropbox
f 最下部のアイコンの右端の”SHARE”を選ぶと,図19が現れる。 g ここでは,最下部のExport Modelを選ぶと,幾つかの選択肢がアイコンで現れ,Dropboxを選ぶ。その次だったかに,スキャンで得た情報の出力ファイル形式の選択があり, h 図20では.plyとなっている。この図では,木庭のmacなどで共有するshared_temporaryフォルダを選んだことがわかる。